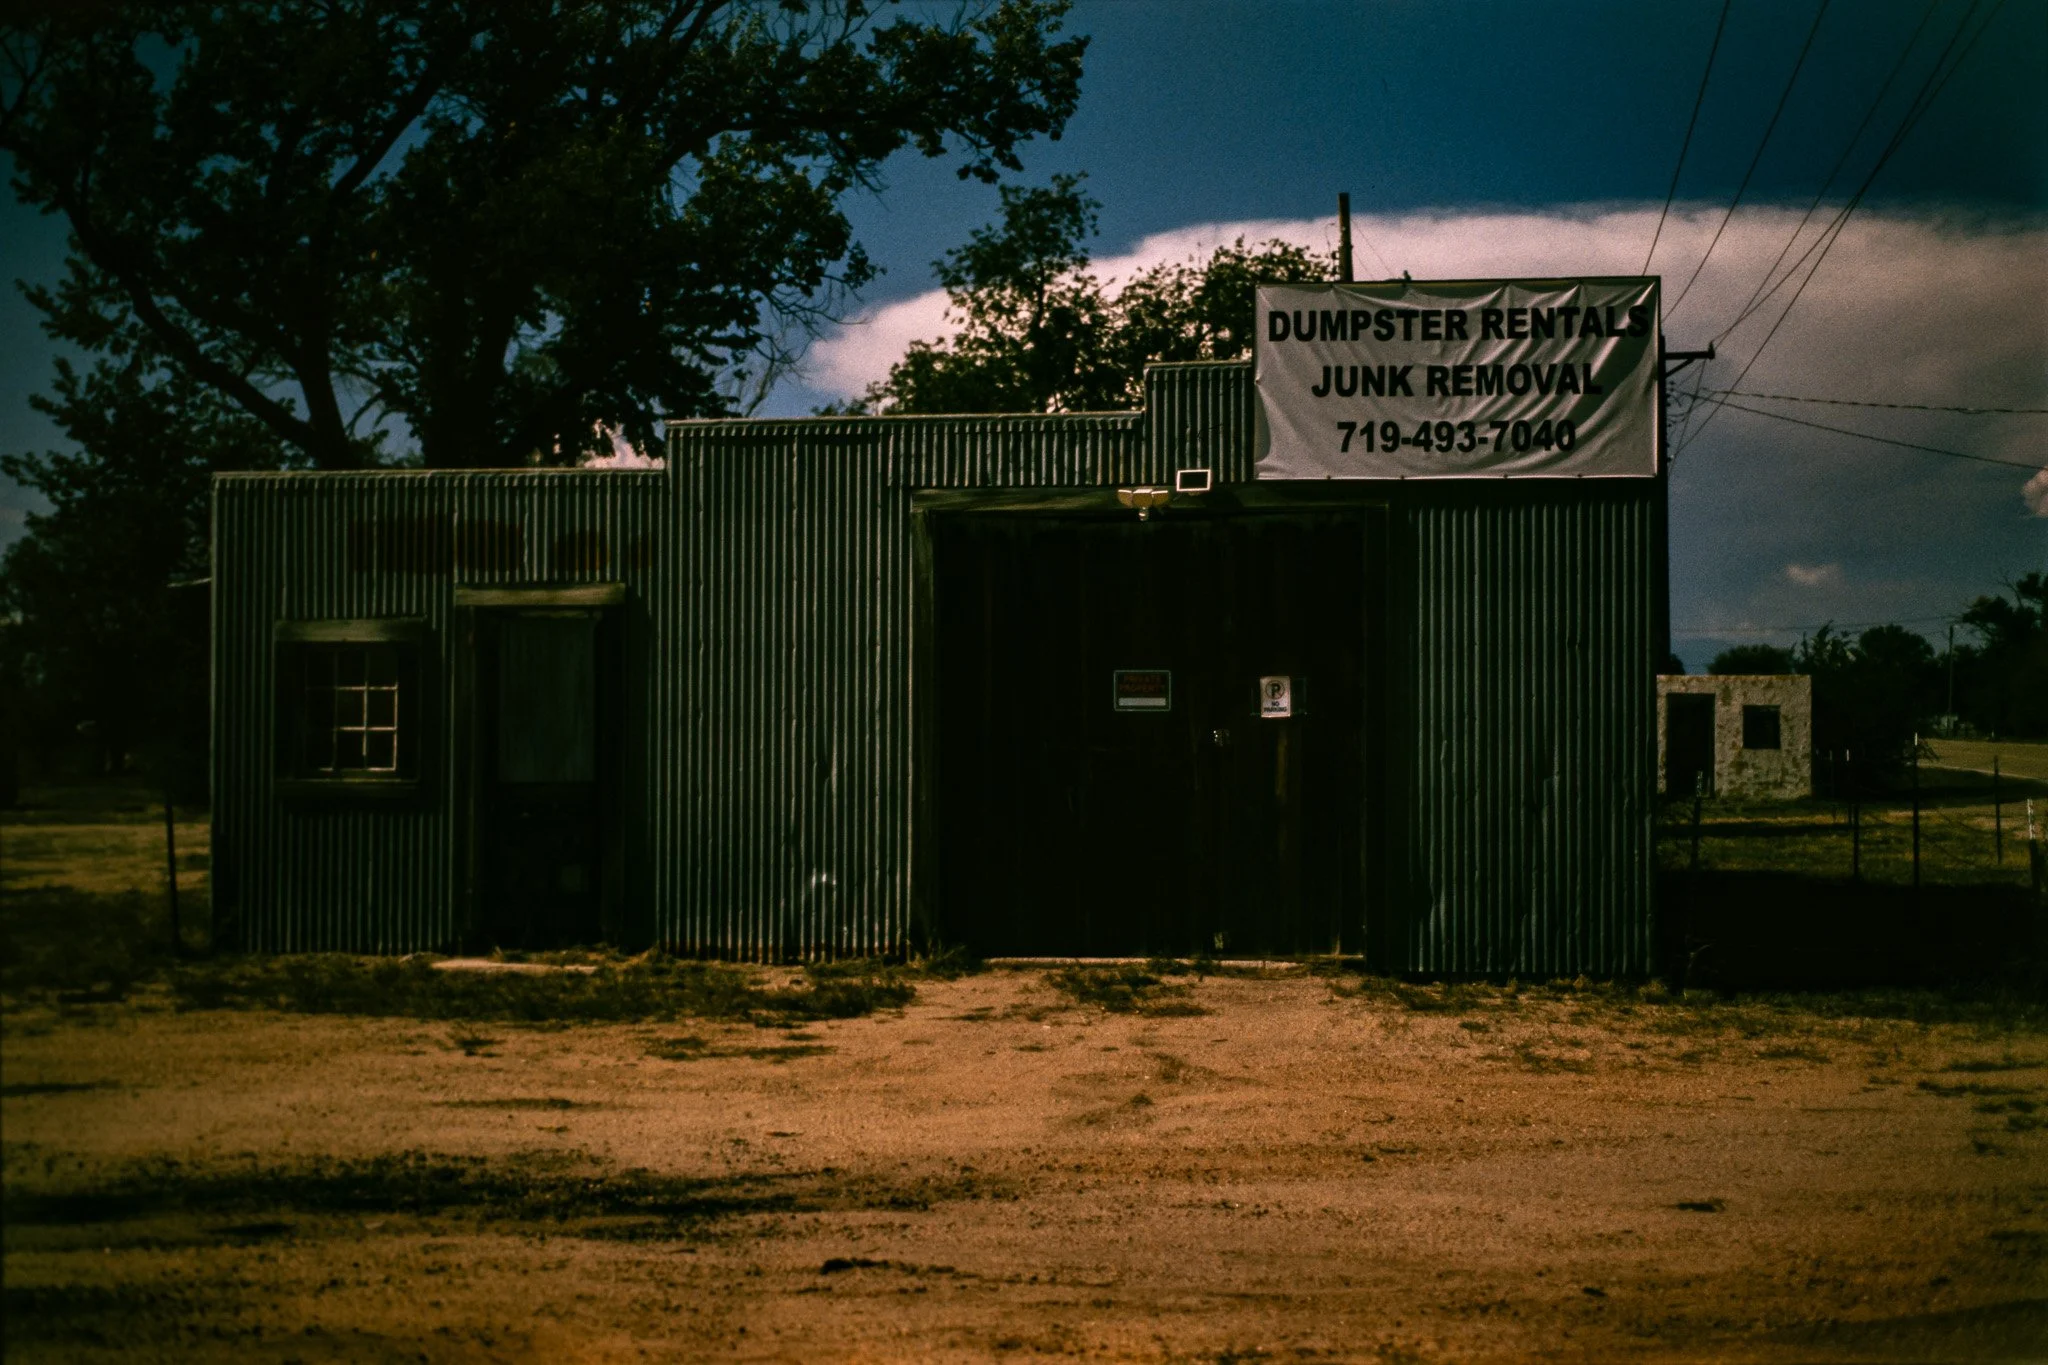
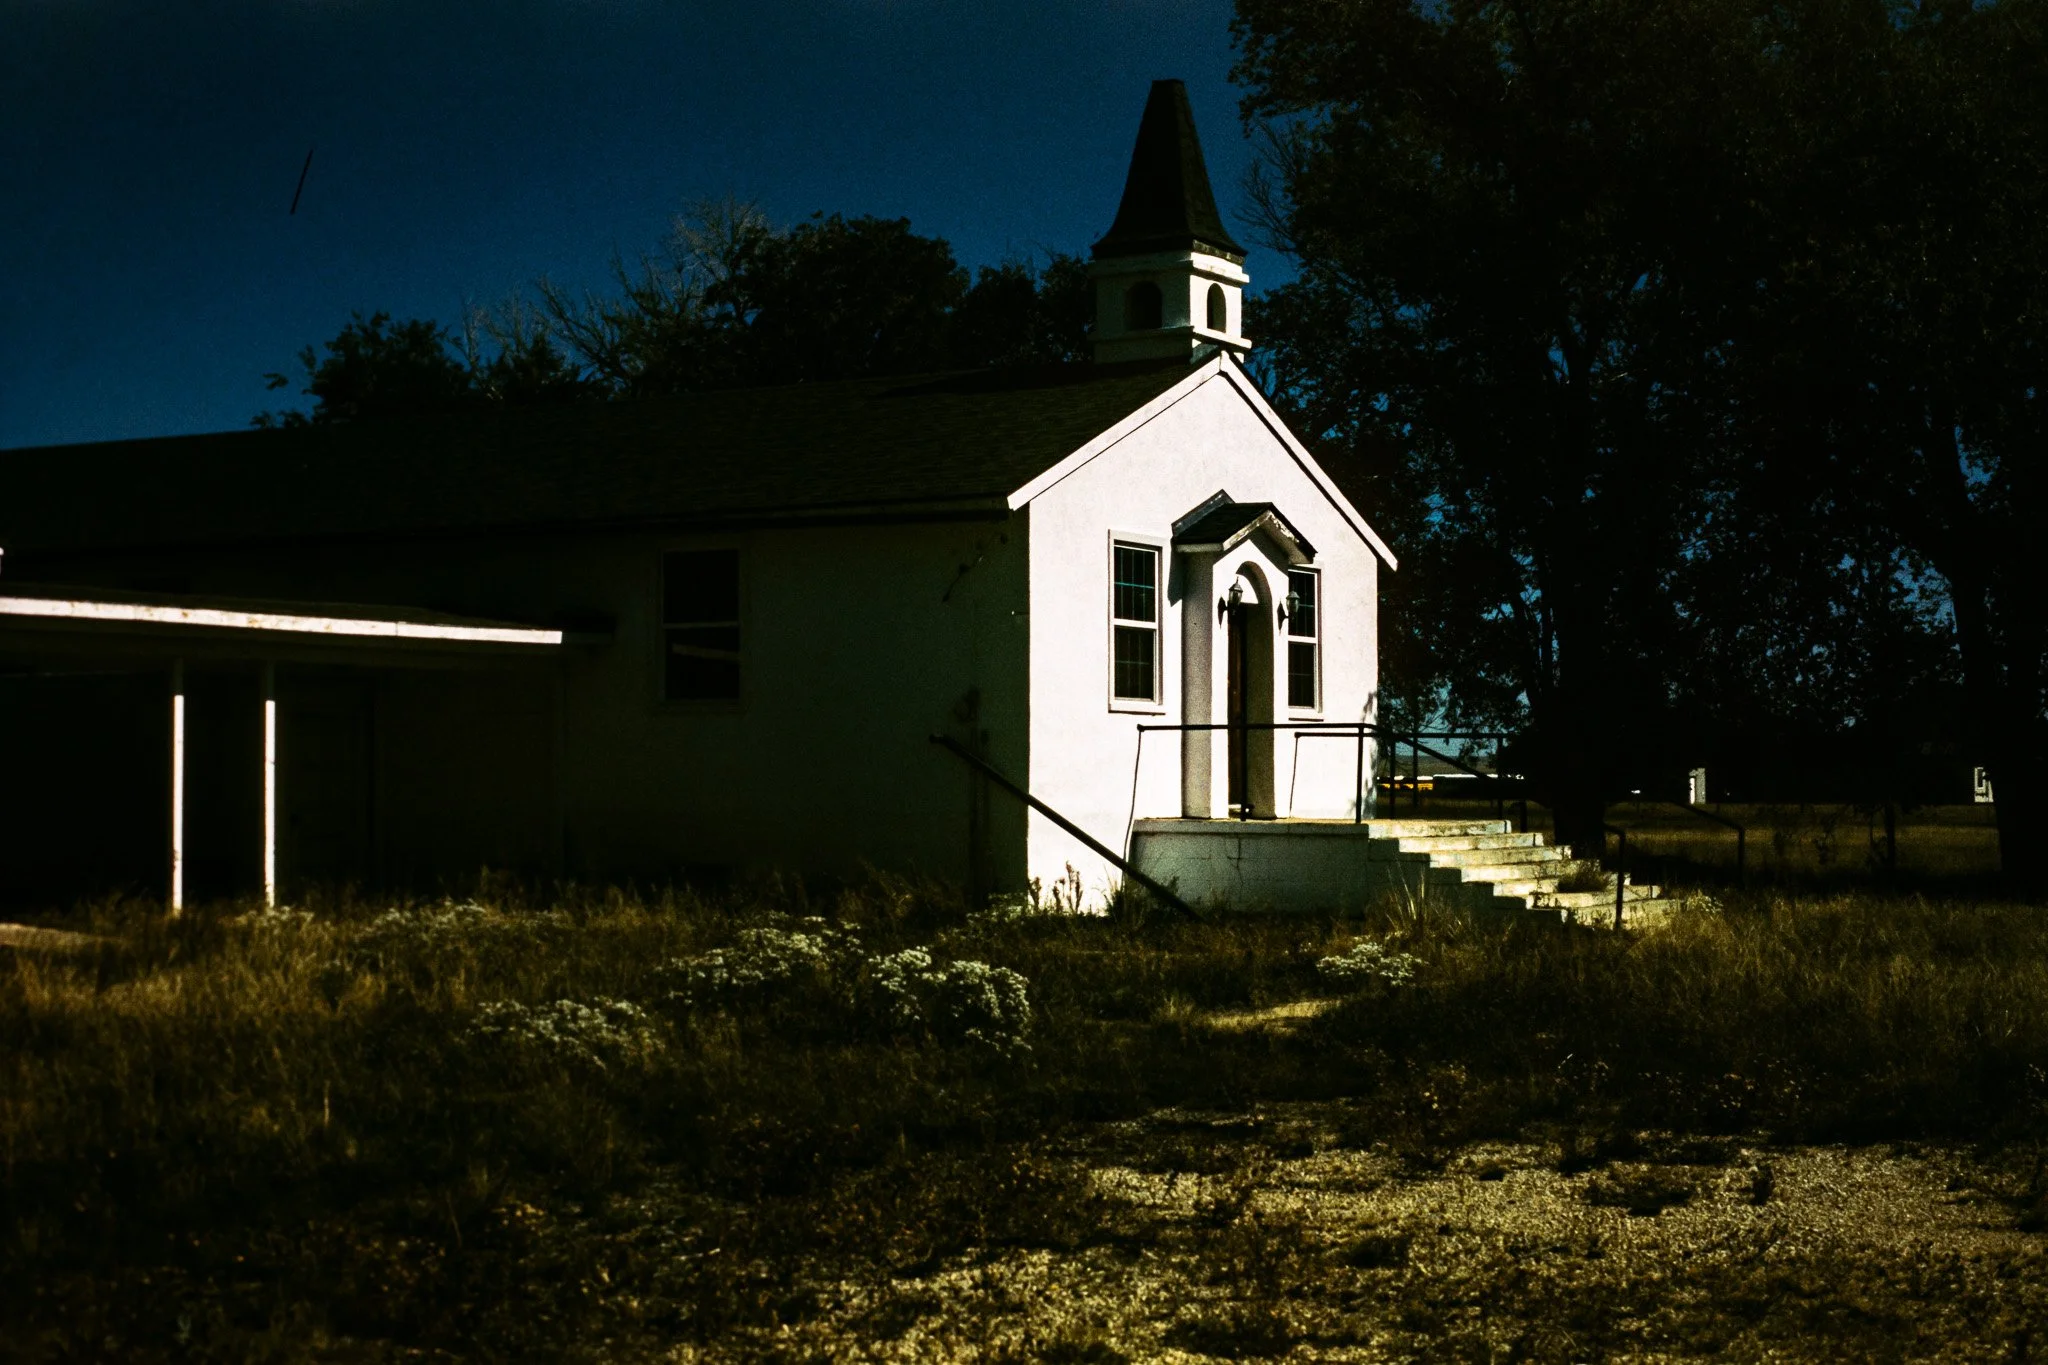
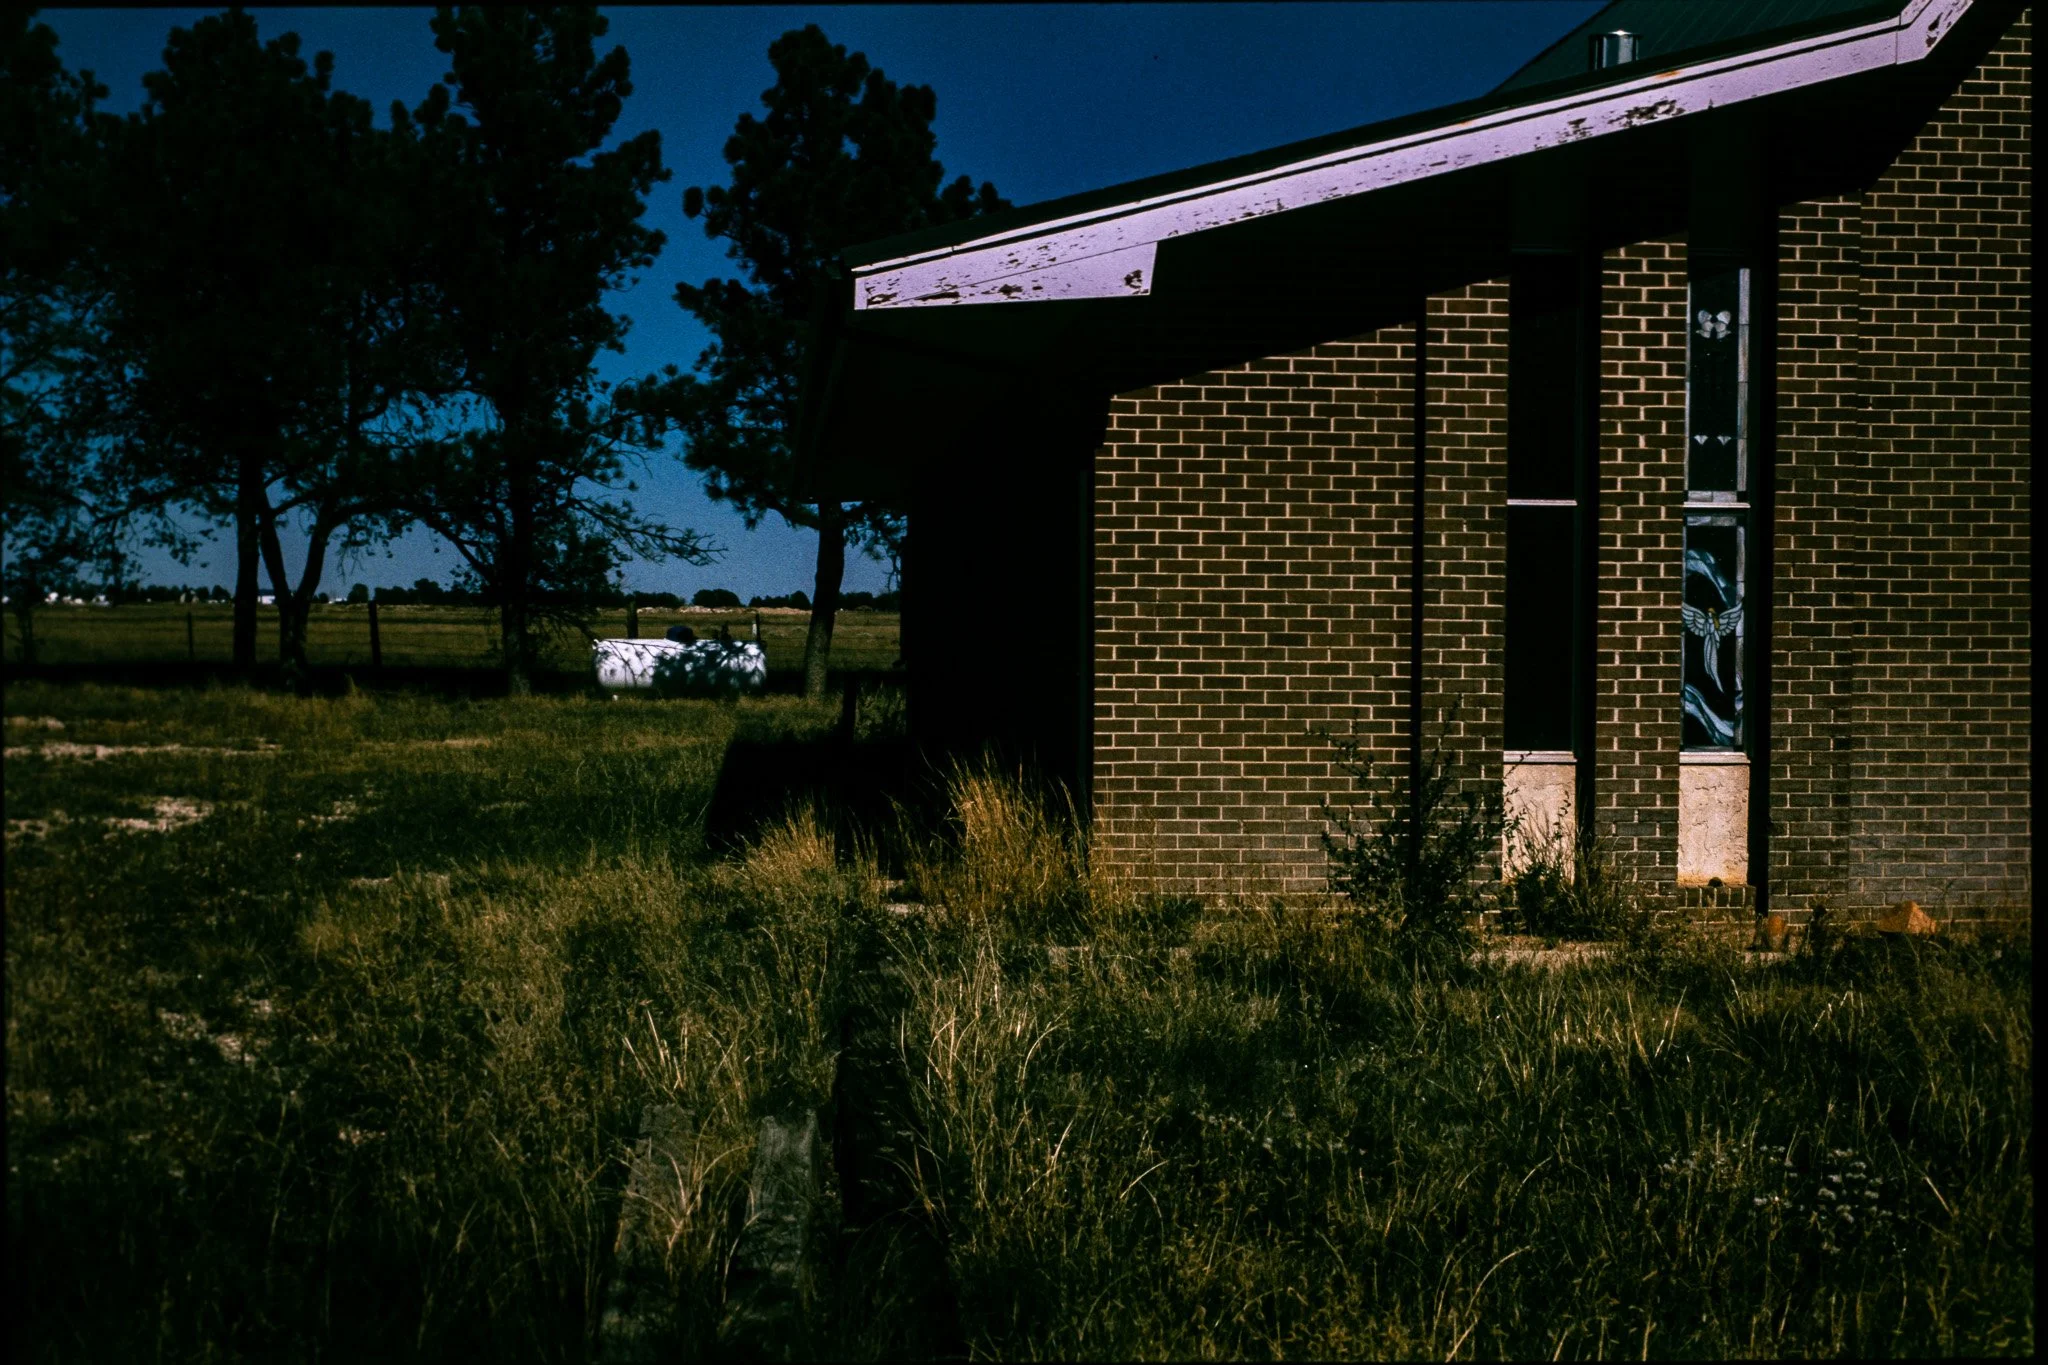
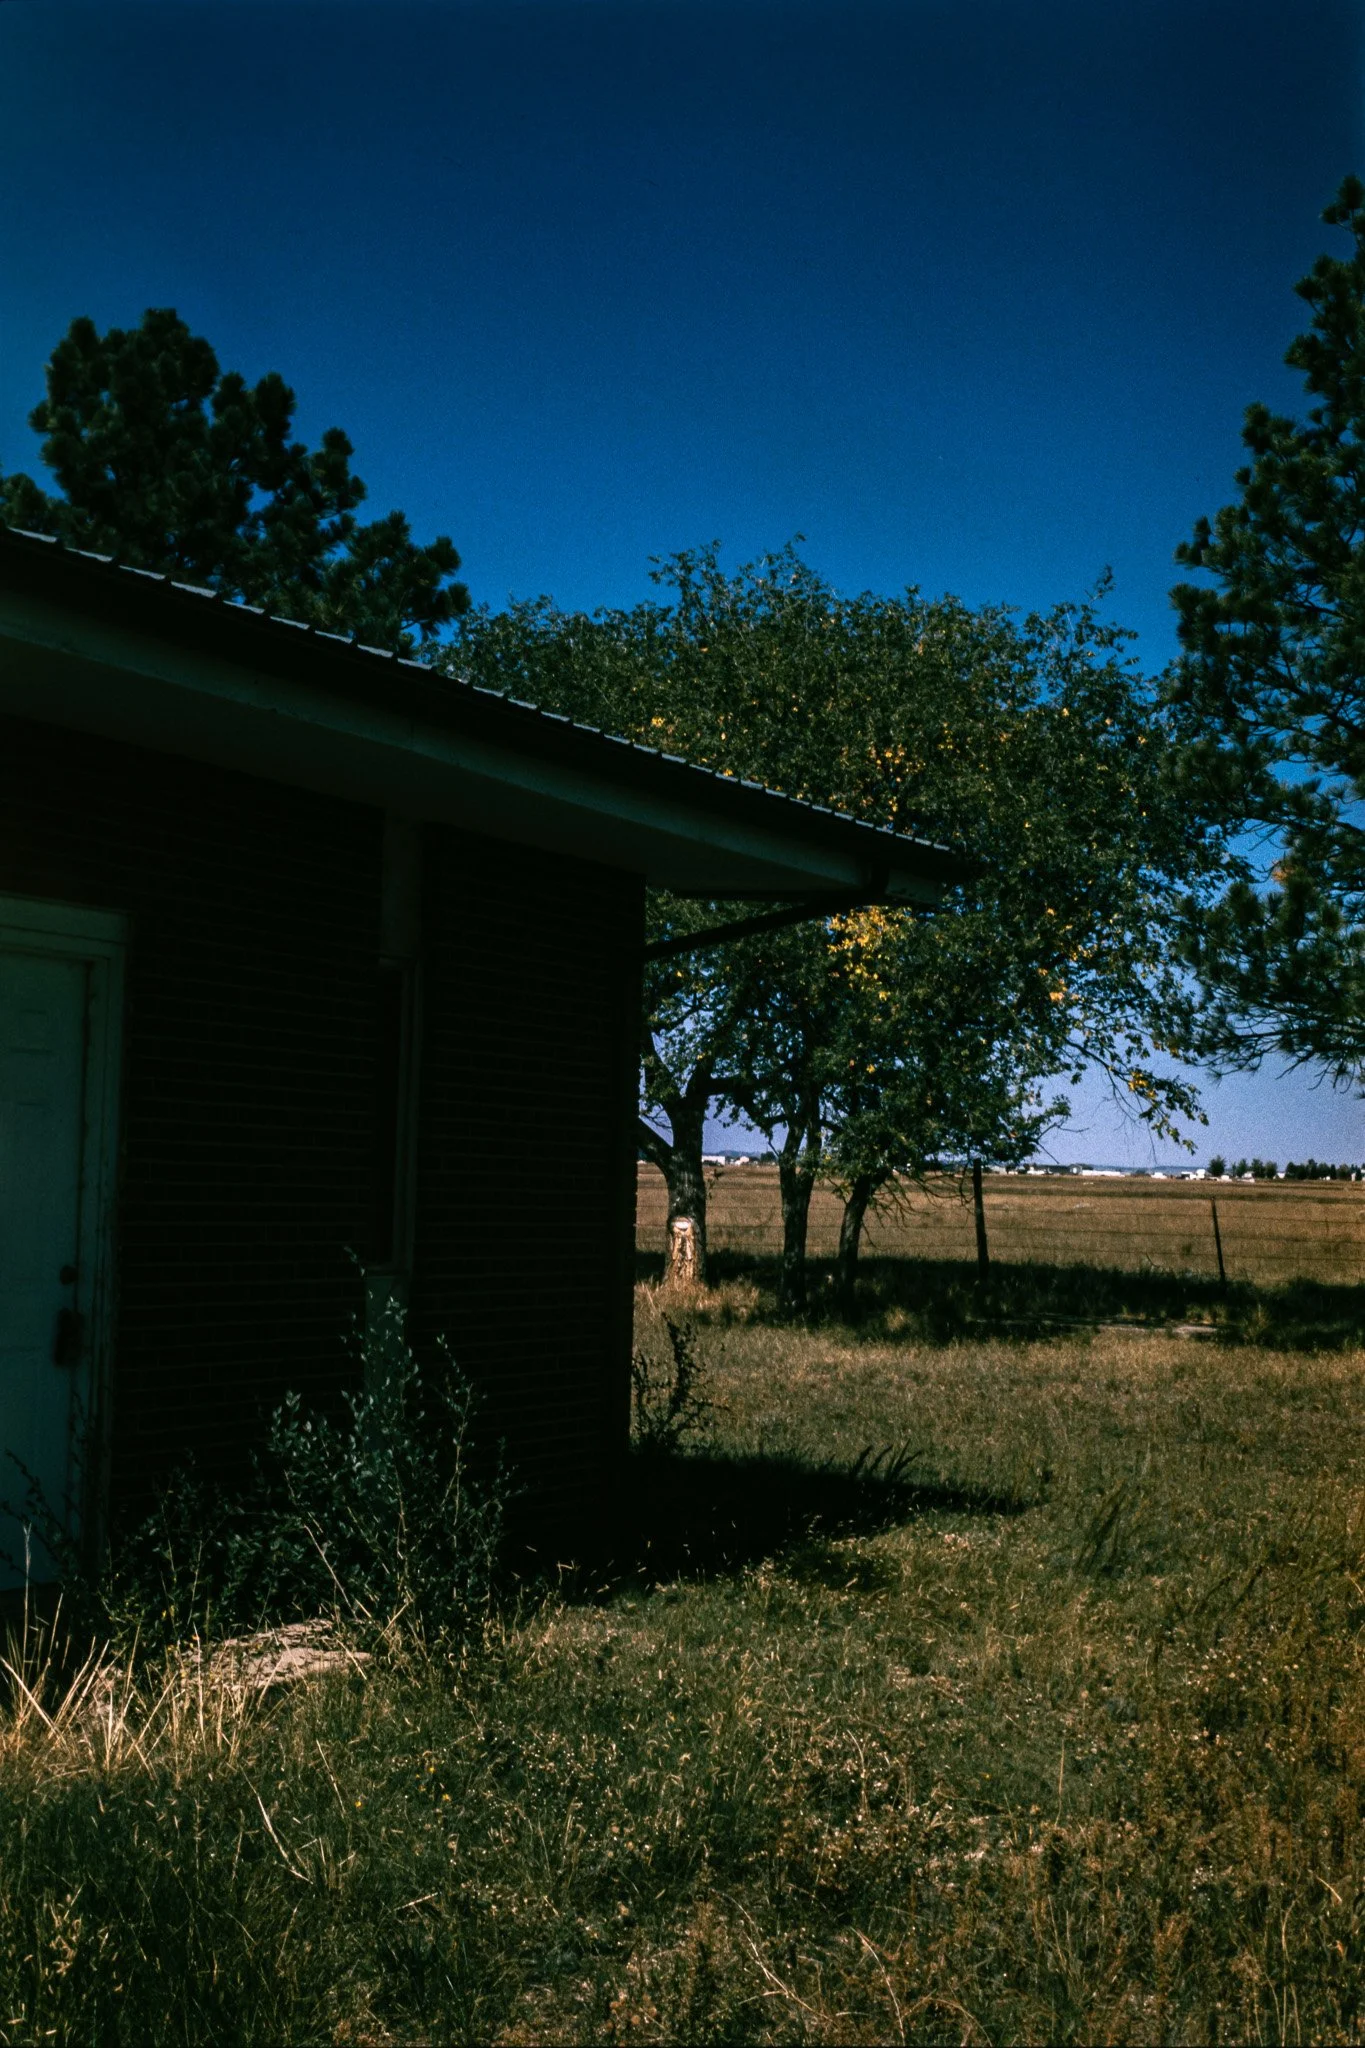
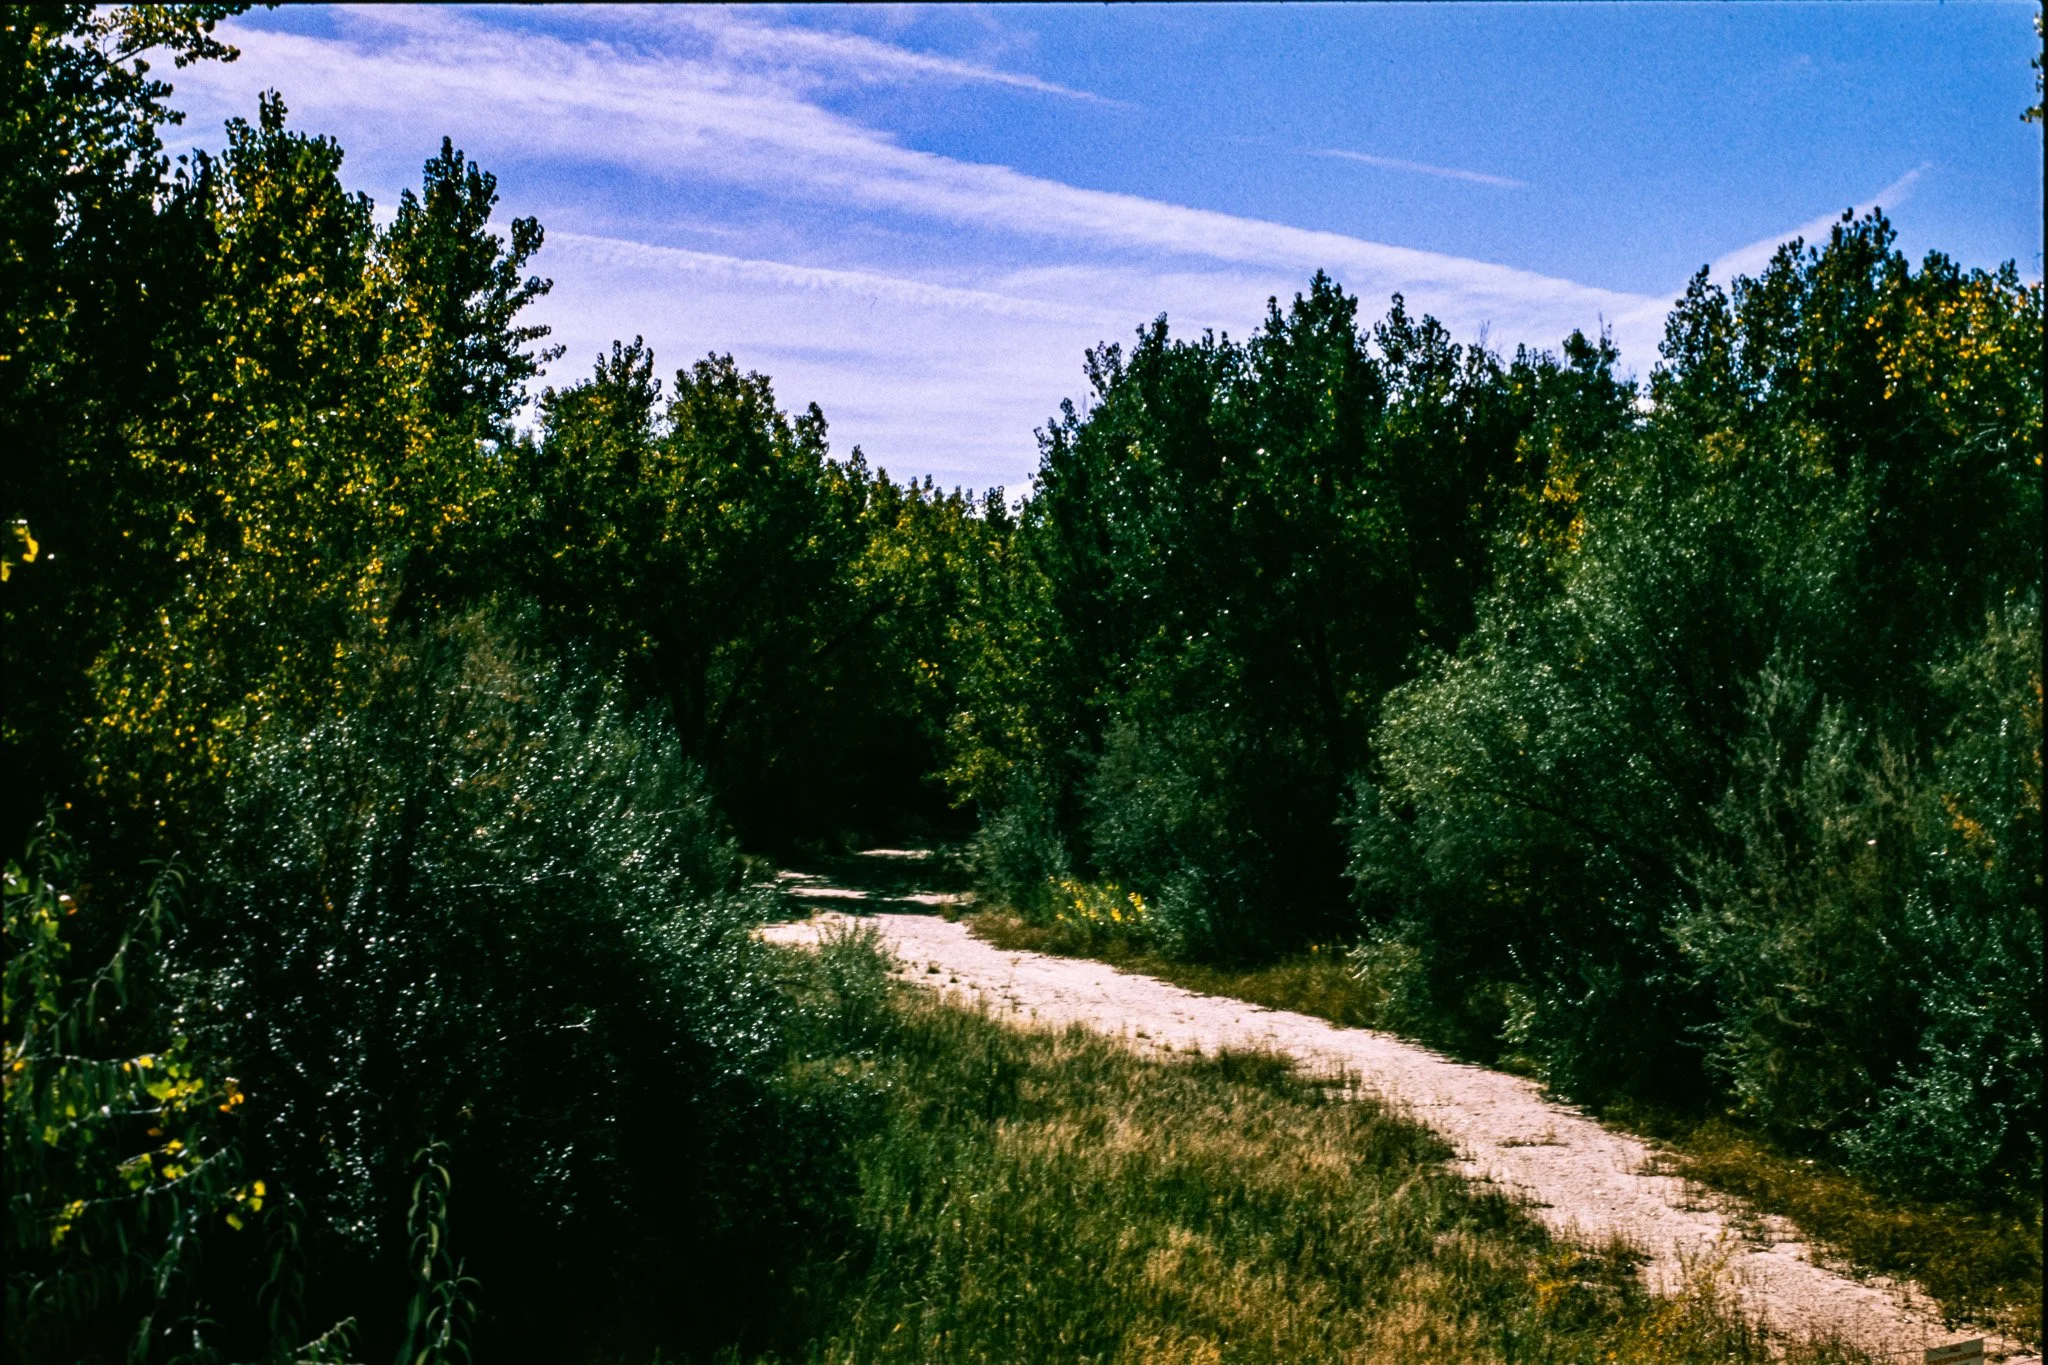
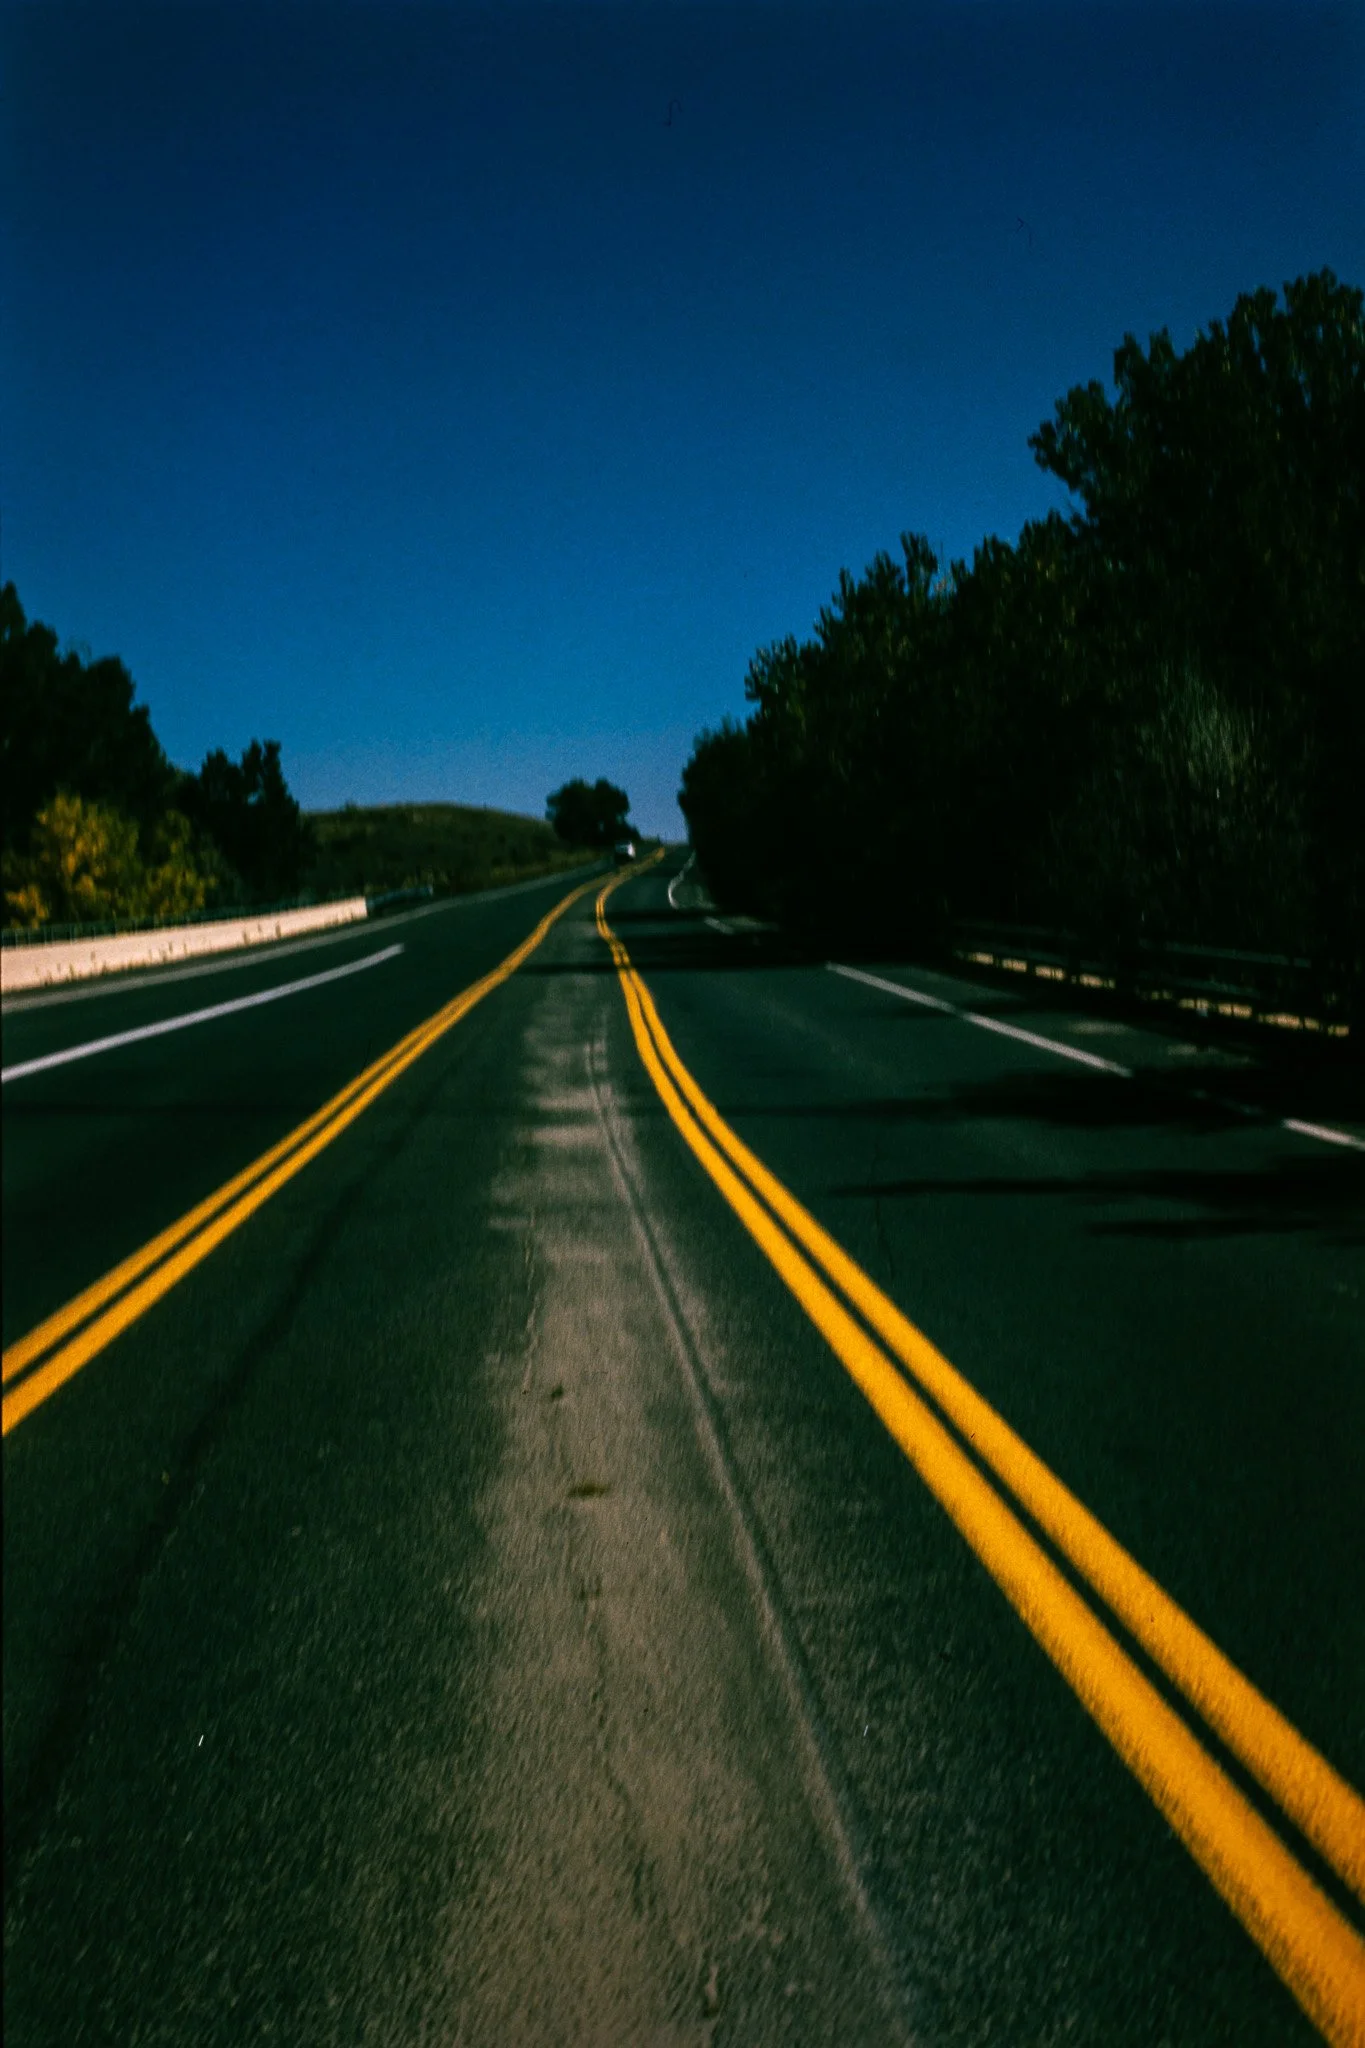
What happens when you shoot Kodak AeroColor IV at ISO 400, use an 85A warming filter, and develop it in E-6 chemistry? I wasn't expecting these results.
Every once in a while, a film photography experiment produces something that genuinely surprises you.
Not just an interesting technical result, but photographs that make you stop and wonder what you've stumbled onto.
This was one of those experiments.
I recently shot a roll of Panther Air 100, a repackaged version of Kodak AeroColor IV, through my Nikon F4E. Rather than developing it in C-41 chemistry, as the film was designed for, I decided to process it in Bellini E-6 chemistry to produce color transparencies.
My original motivation was curiosity. With Kodak Ektachrome E100 becoming increasingly expensive, I wanted to explore whether AeroColor IV could provide an interesting alternative.
I'd seen examples of AeroColor IV cross-processed in E-6, including experiments where the resulting slides exhibited a strong blue cast. Even warming filters from the 81 series didn't always seem to correct it sufficiently.
So I decided to try something stronger: an 85A warming filter.
I shot the roll at approximately ISO 400, two stops faster than its nominal ISO 100 rating, and developed it using standard Bellini E-6 times.
When I first pulled the film from the developing tank, I thought I'd made a mistake.
The slides were incredibly dark.
Then I scanned them.
And everything changed.
The Film: Kodak AeroColor IV
Kodak AeroColor IV is a color negative film originally designed for aerial photography.
Unlike conventional consumer color negative films, AeroColor IV has a clear base rather than the familiar orange mask.
This makes it particularly interesting for experimental reversal processing.
The film has been repackaged and sold under several names, including Panther Air 100, Reflex Lab Pro 100, and Flic Film Elektra 100.
Although these products use the same underlying film stock, differences in storage, age, and finishing may influence individual results.
For this experiment, I used Panther Air 100 in 35mm format.
My Camera, Exposure, and Development Setup
I wanted to keep the development straightforward. Rather than experimenting with push processing immediately, I decided to use the standard Bellini E-6 process and see what happened.
Camera and Film
Camera: Nikon F4E
Film: Panther Air 100 / Kodak AeroColor IV
Format: 35mm
ISO: Approximately 400 ISO
Filter: 85A warming filter
Metering: Nikon F4 TTL metering
The Nikon F4 meters through the taking lens, meaning the camera automatically compensates for most of the light absorbed by the 85A filter.
This is important because the 85A has a noticeable filter factor.
Had I been using an external light meter, I would have needed to compensate for that light loss manually.
Development
Chemistry: Bellini E-6
First Developer: 6 minutes, 30 seconds
Color Developer: 6 minutes, 30 seconds
Push Processing: None
I followed the standard process rather than extending the first developer to compensate for the higher exposure index.
That decision would turn out to be particularly interesting.
Scanning
Camera: Leica SL2
Lens: Sigma 105mm f/2.8 Macro
Light Source: Negative Supply 4×5 Light Source Basic MK2
Film Carrier: Negative Supply 35mm Film Carrier
Editing: Adobe Lightroom
I captured the transparencies digitally and made relatively modest adjustments in Lightroom.
Most photographs required additional exposure, clarity, and some dehaze.
Surprisingly, very little deliberate color correction was necessary.
The First Look: Did I Underexpose Everything?
When I removed the film from the developing tank, the transparencies looked exceptionally dense.
There were recognizable images, but most of the shadows appeared nearly black.
At first, I was concerned that rating the film at 400 without push processing had been too aggressive.
One frame stood out immediately.
I'd accidentally photographed an indoor scene using shutter-priority mode. Under the warm 2700K lighting in my house, the Nikon F4 selected a much longer exposure than I intended.
The resulting photograph had motion blur, but the transparency was noticeably lighter than the outdoor frames.
That gave me an early clue that additional exposure could produce more usable transparencies.
Still, I wasn't sure how much information was actually present in the darker frames.
I decided to wait until the film was completely dry before making any judgments.
The Scans Were a Complete Surprise
Once I placed the film in my Negative Supply carrier and began scanning with the Leica SL2, my opinion changed almost immediately.
The photographs contained substantially more visible detail than I'd expected.
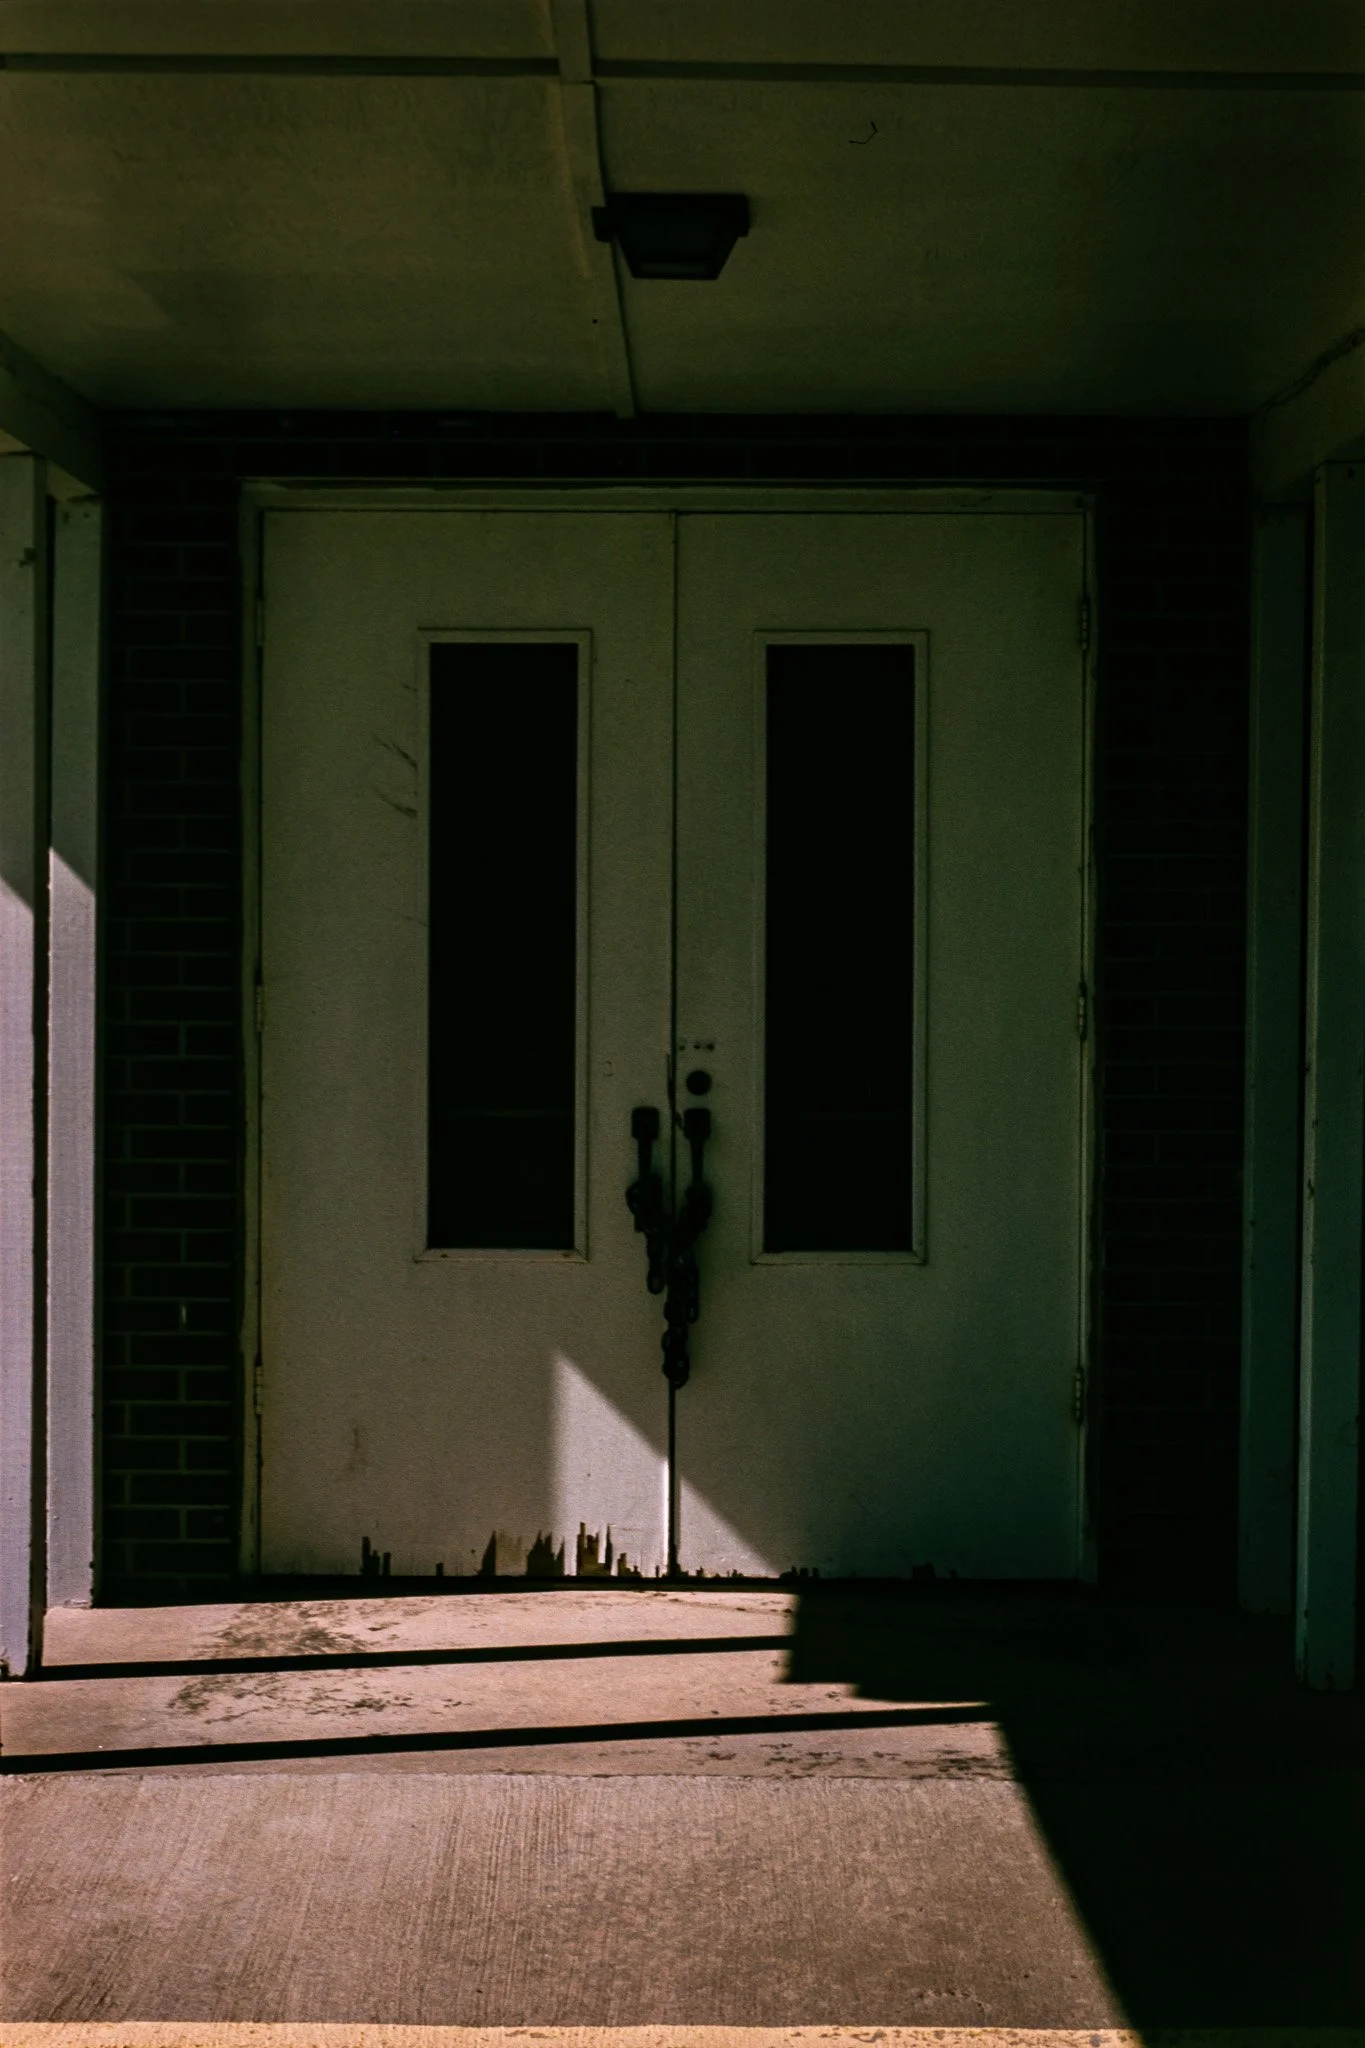
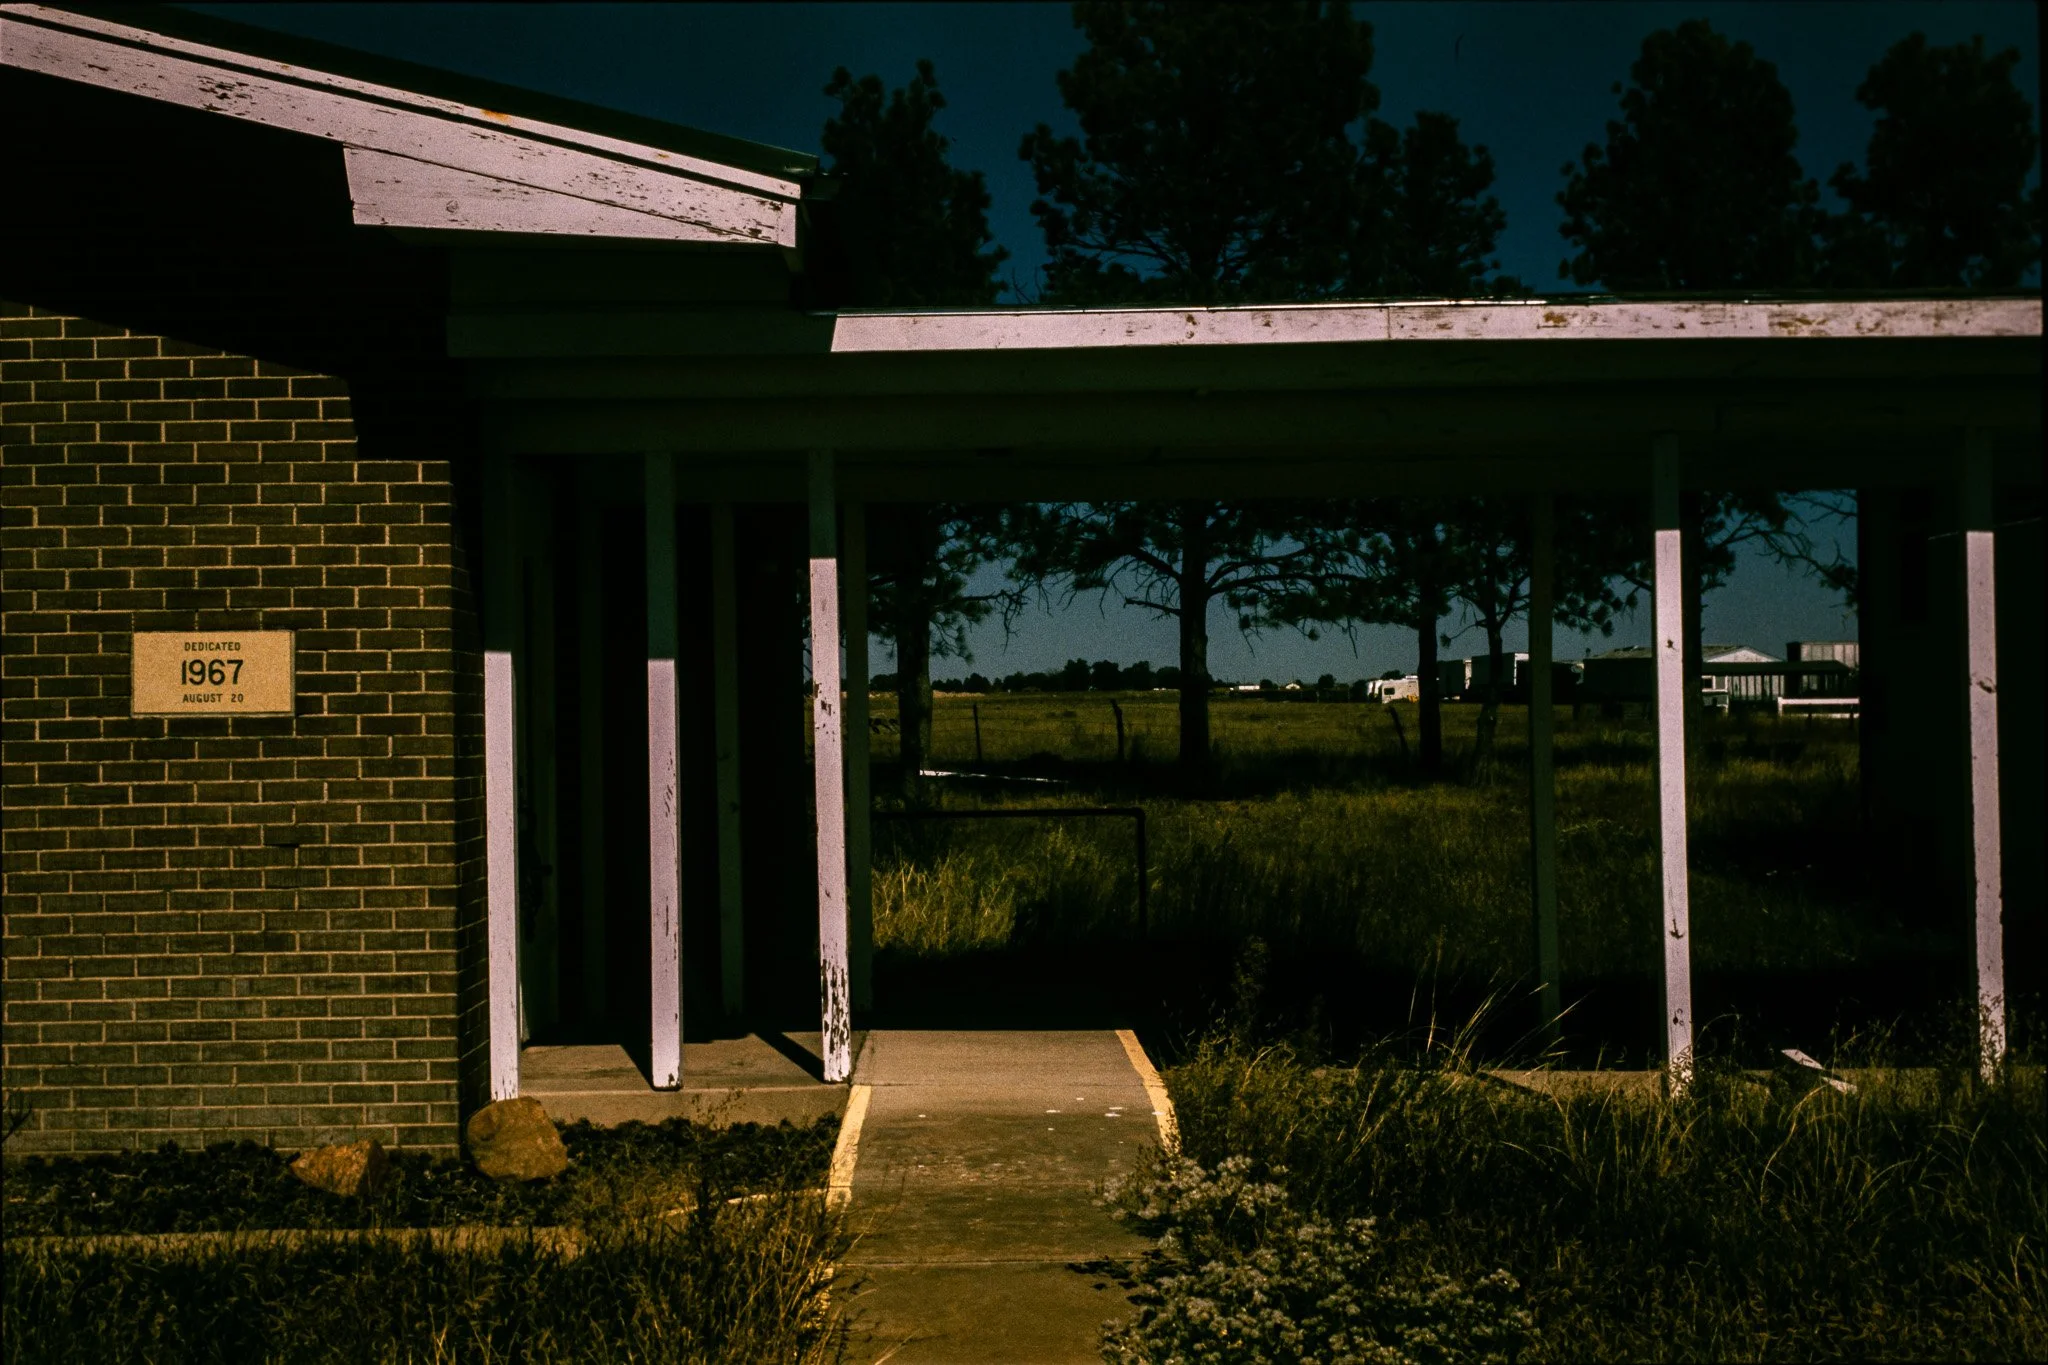
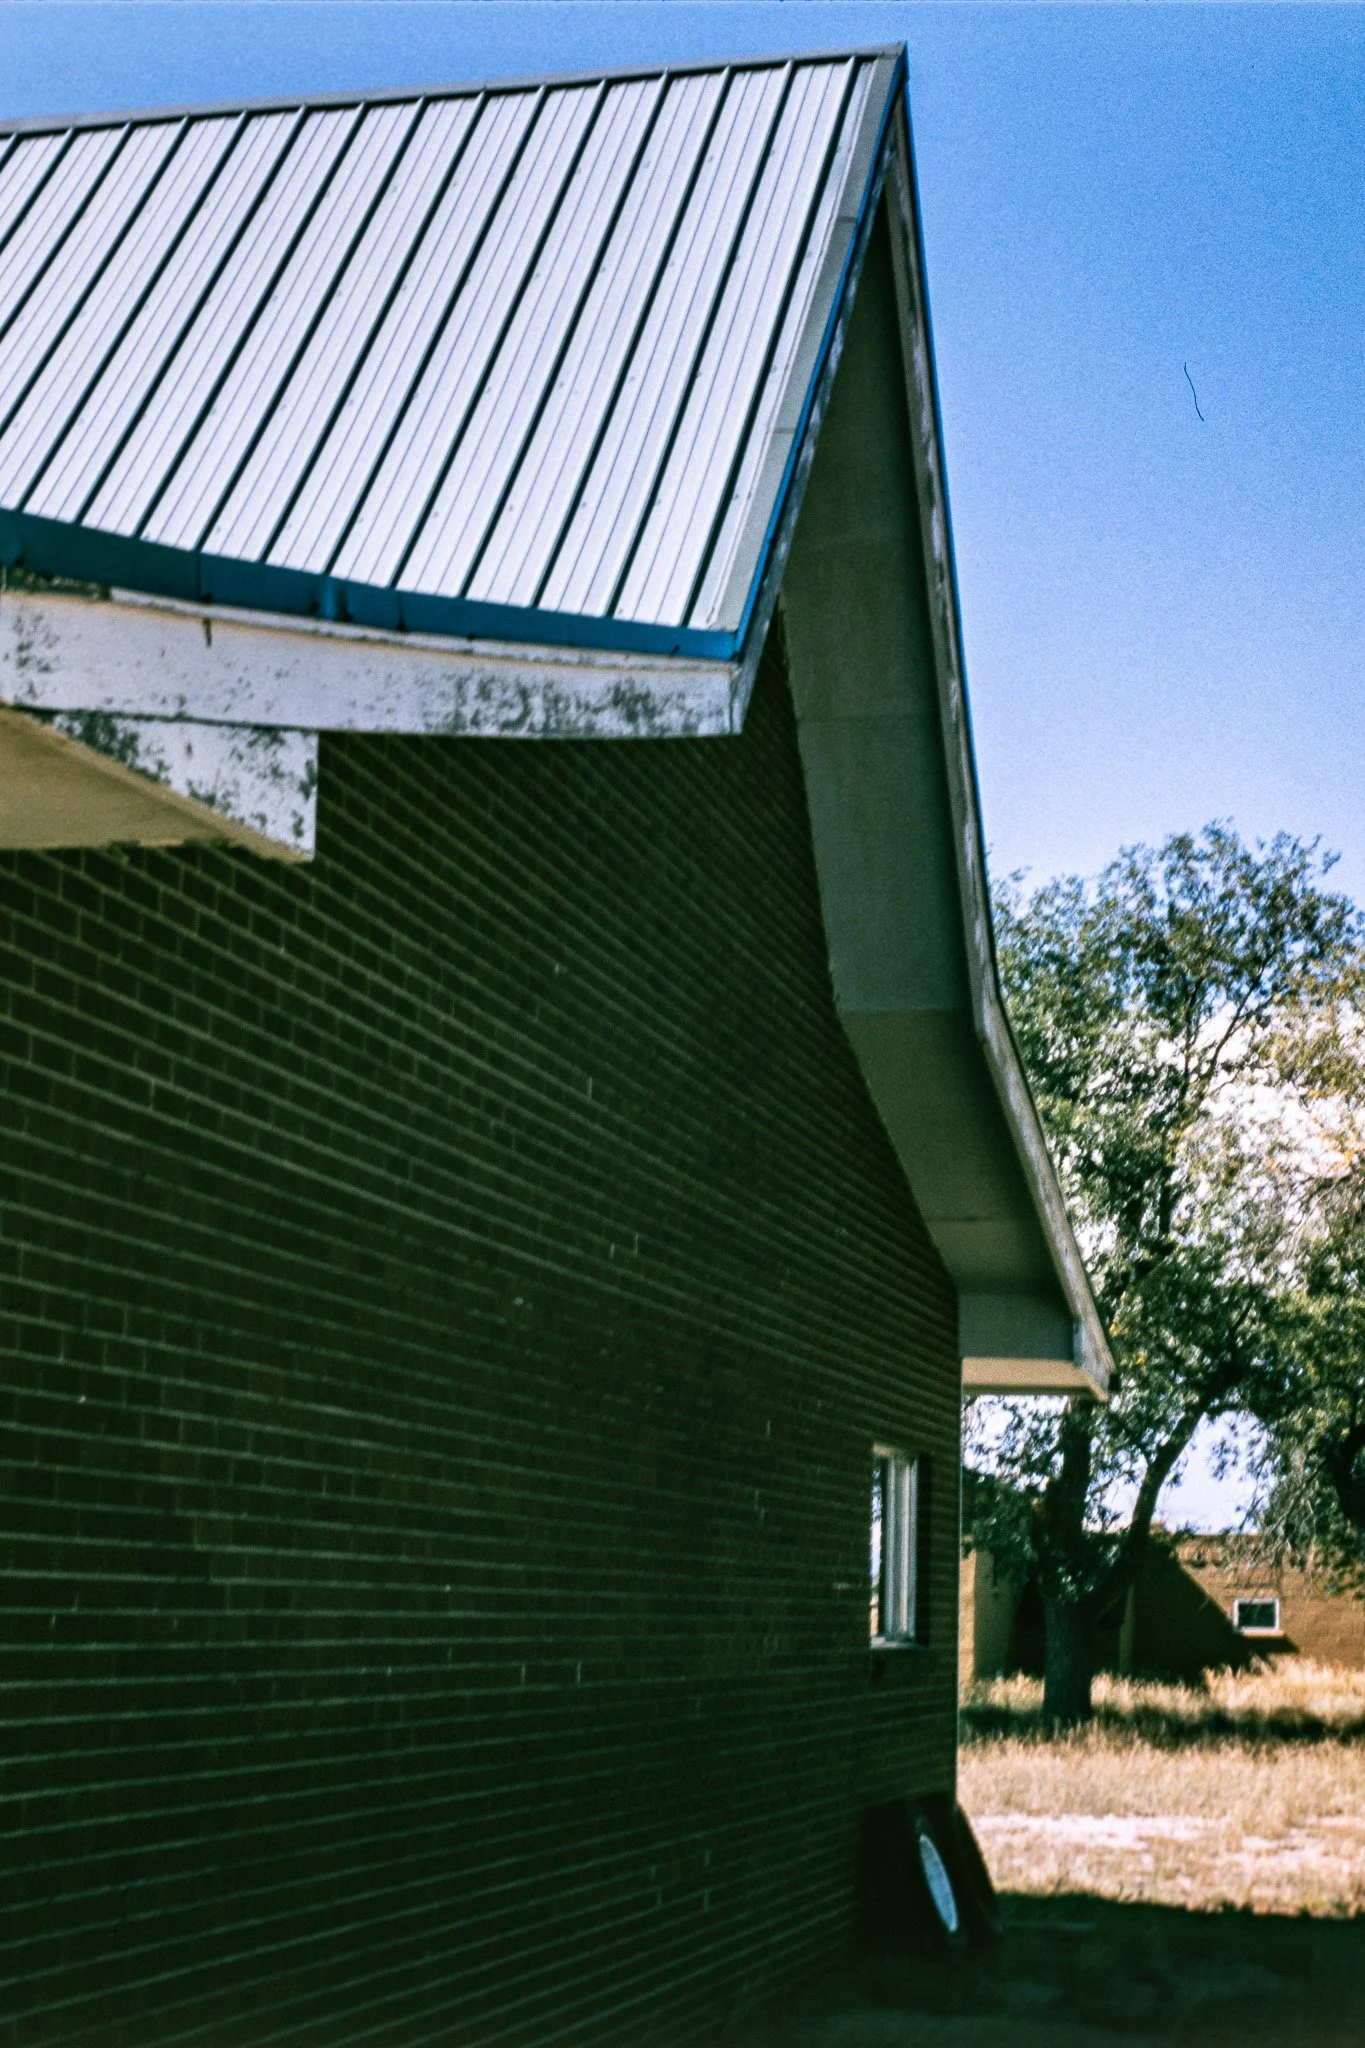
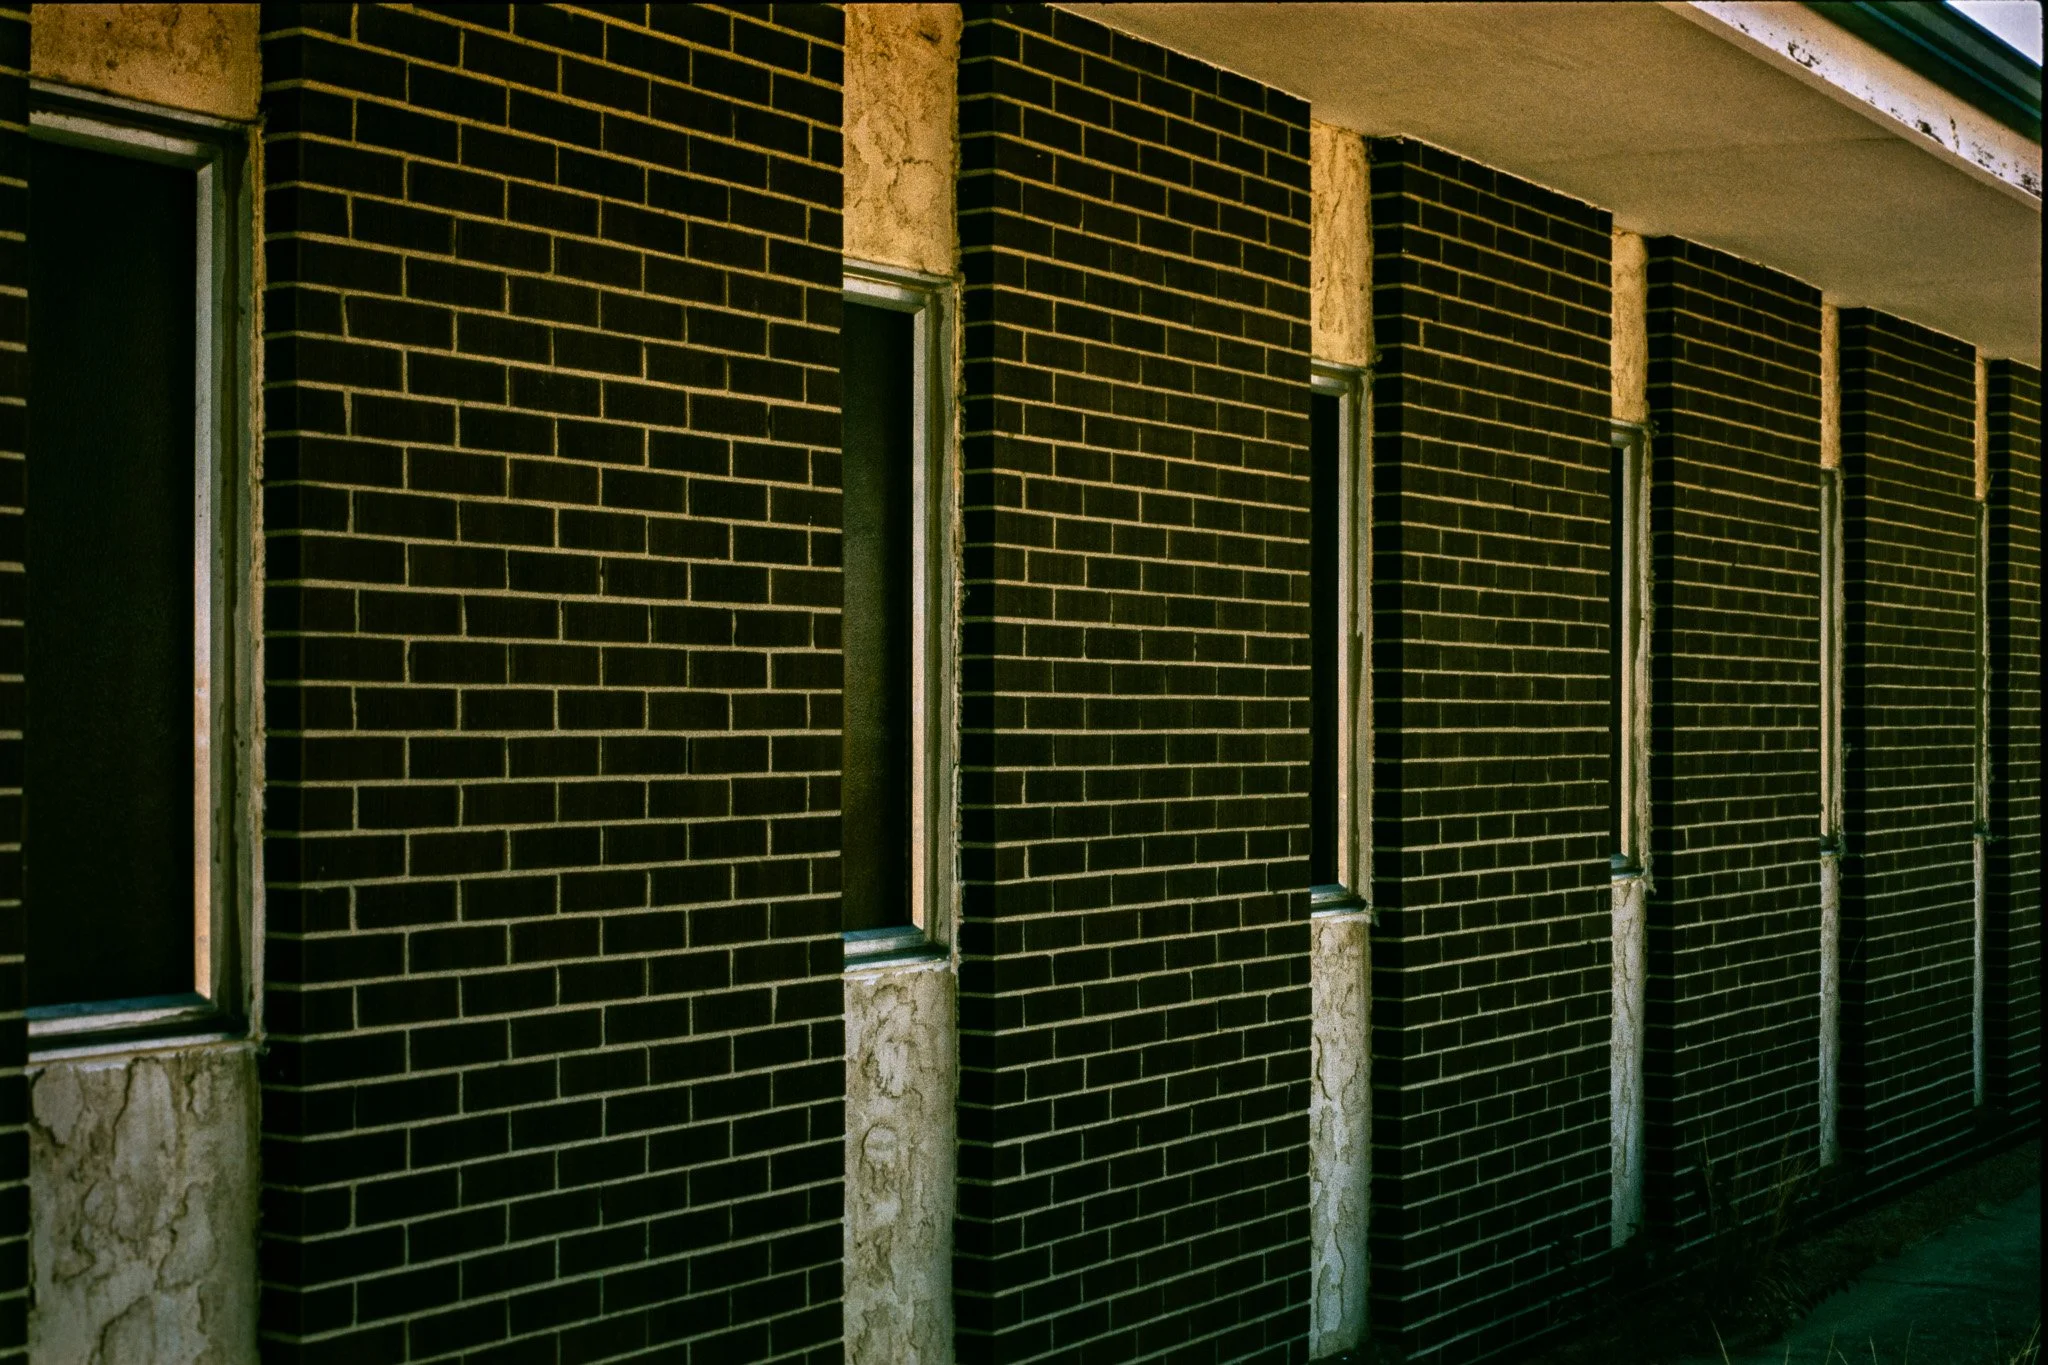
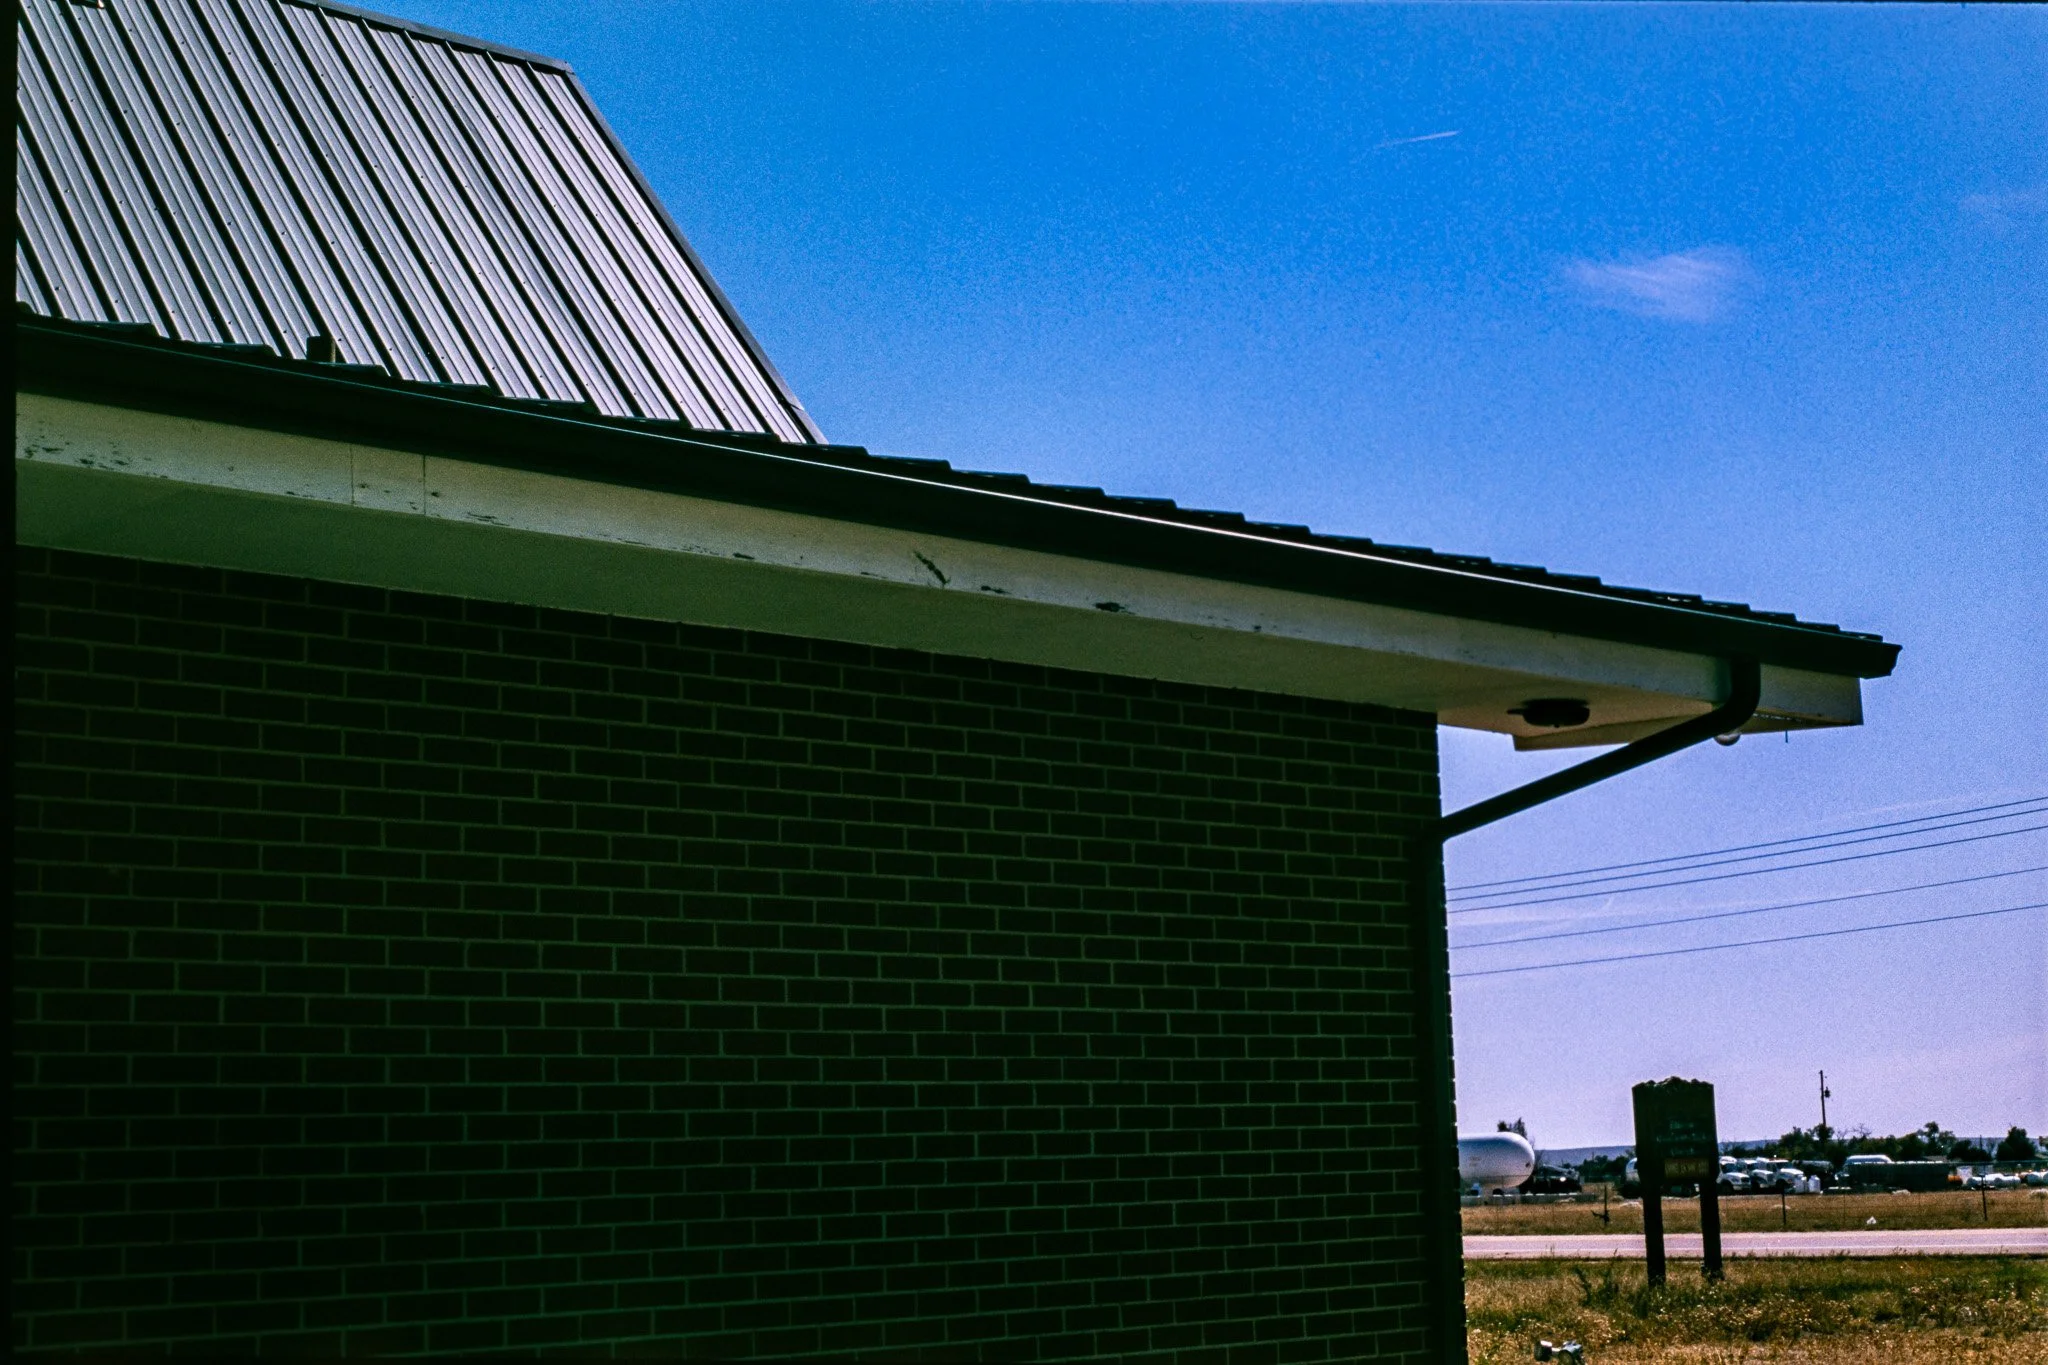
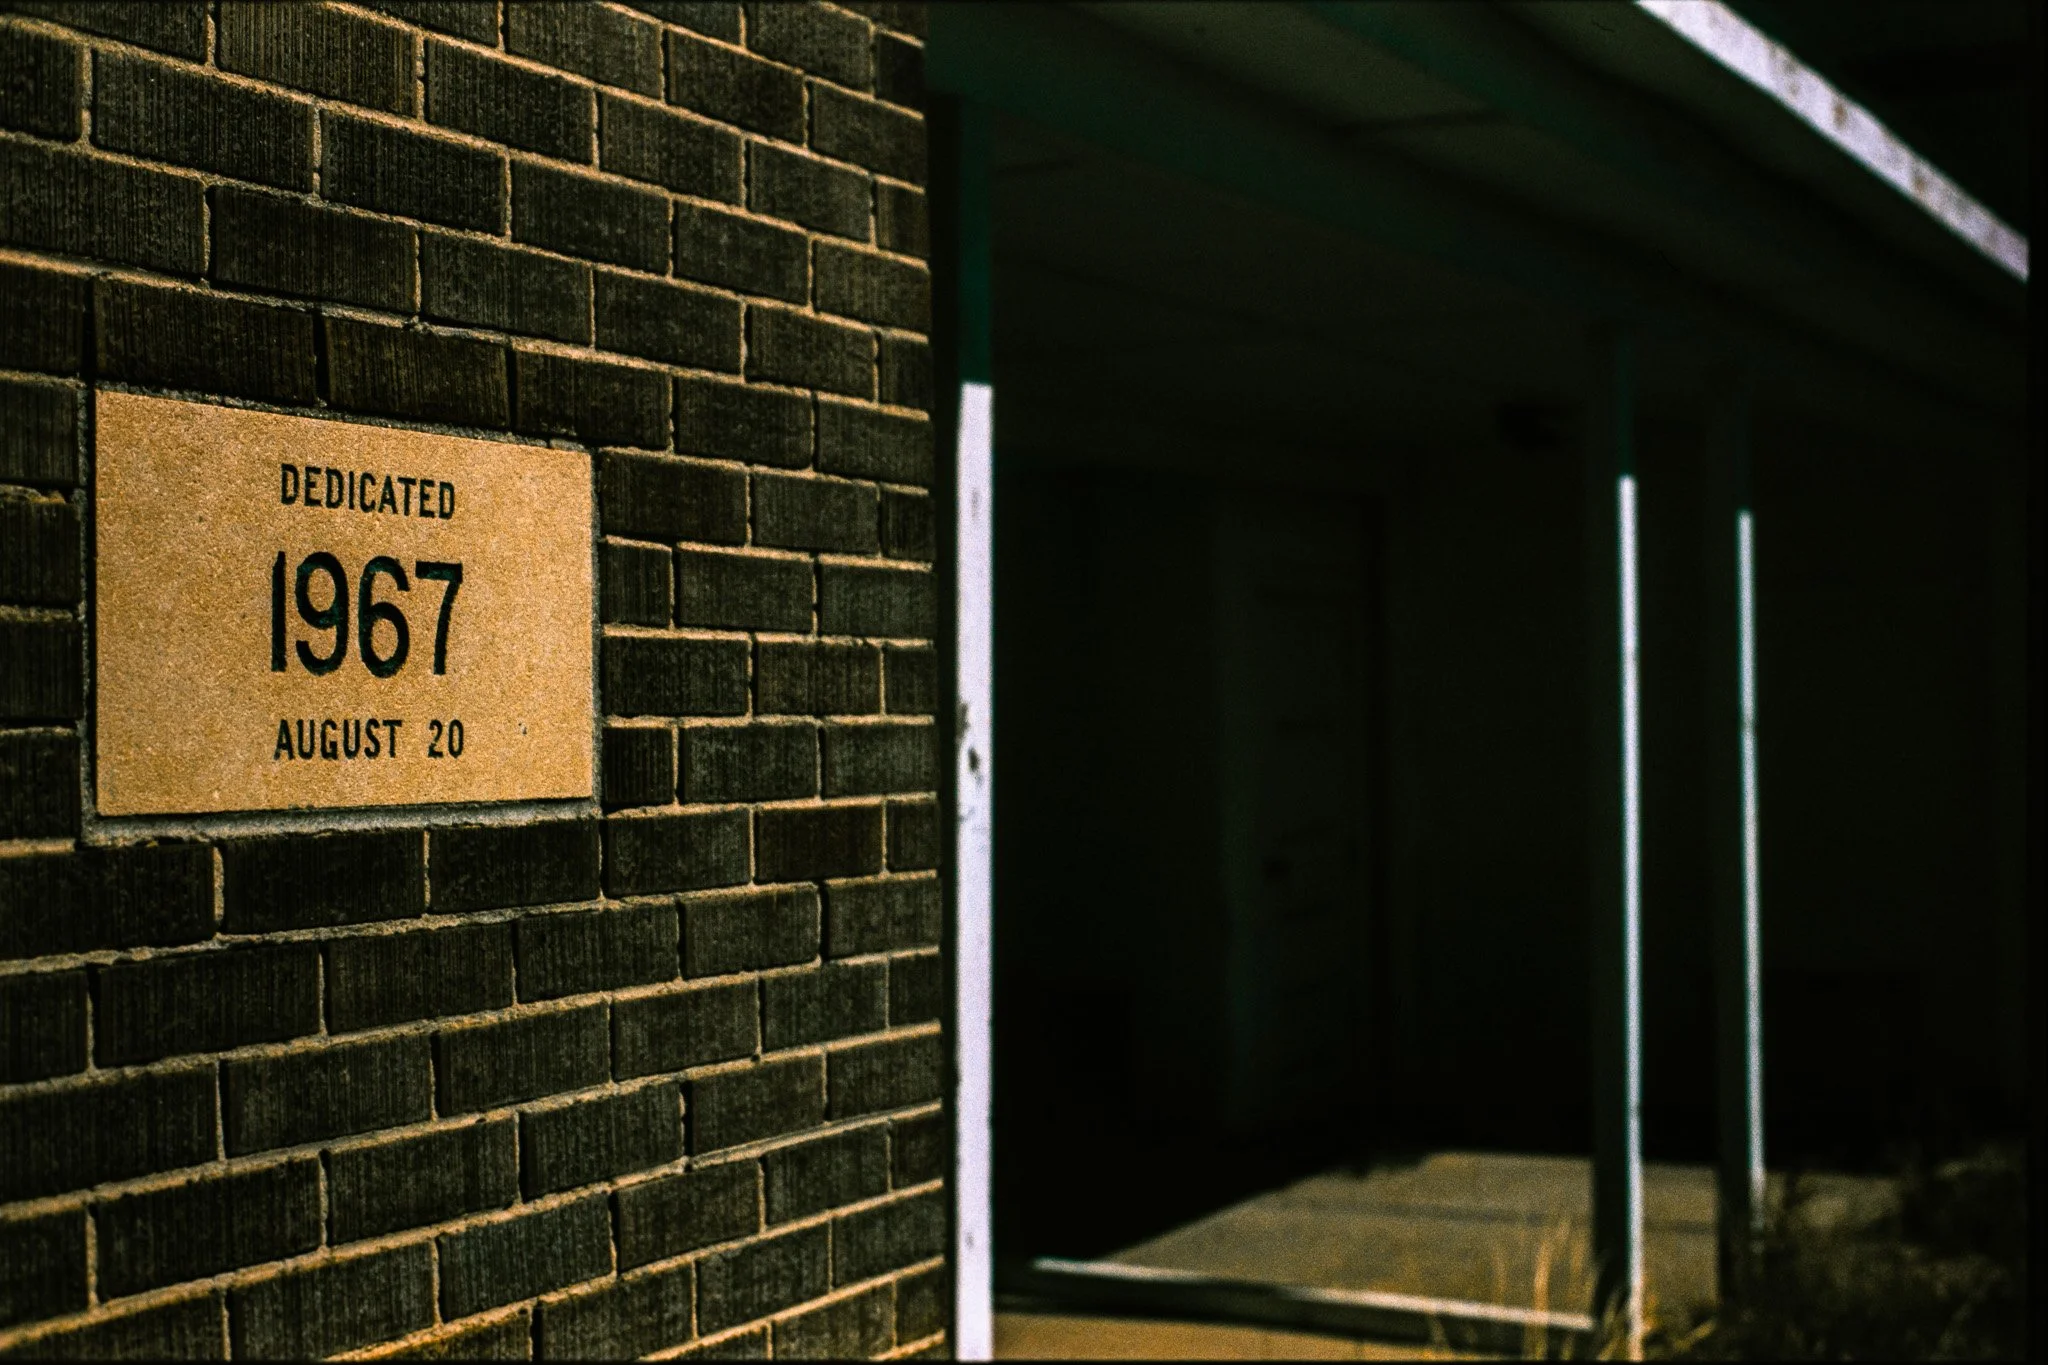
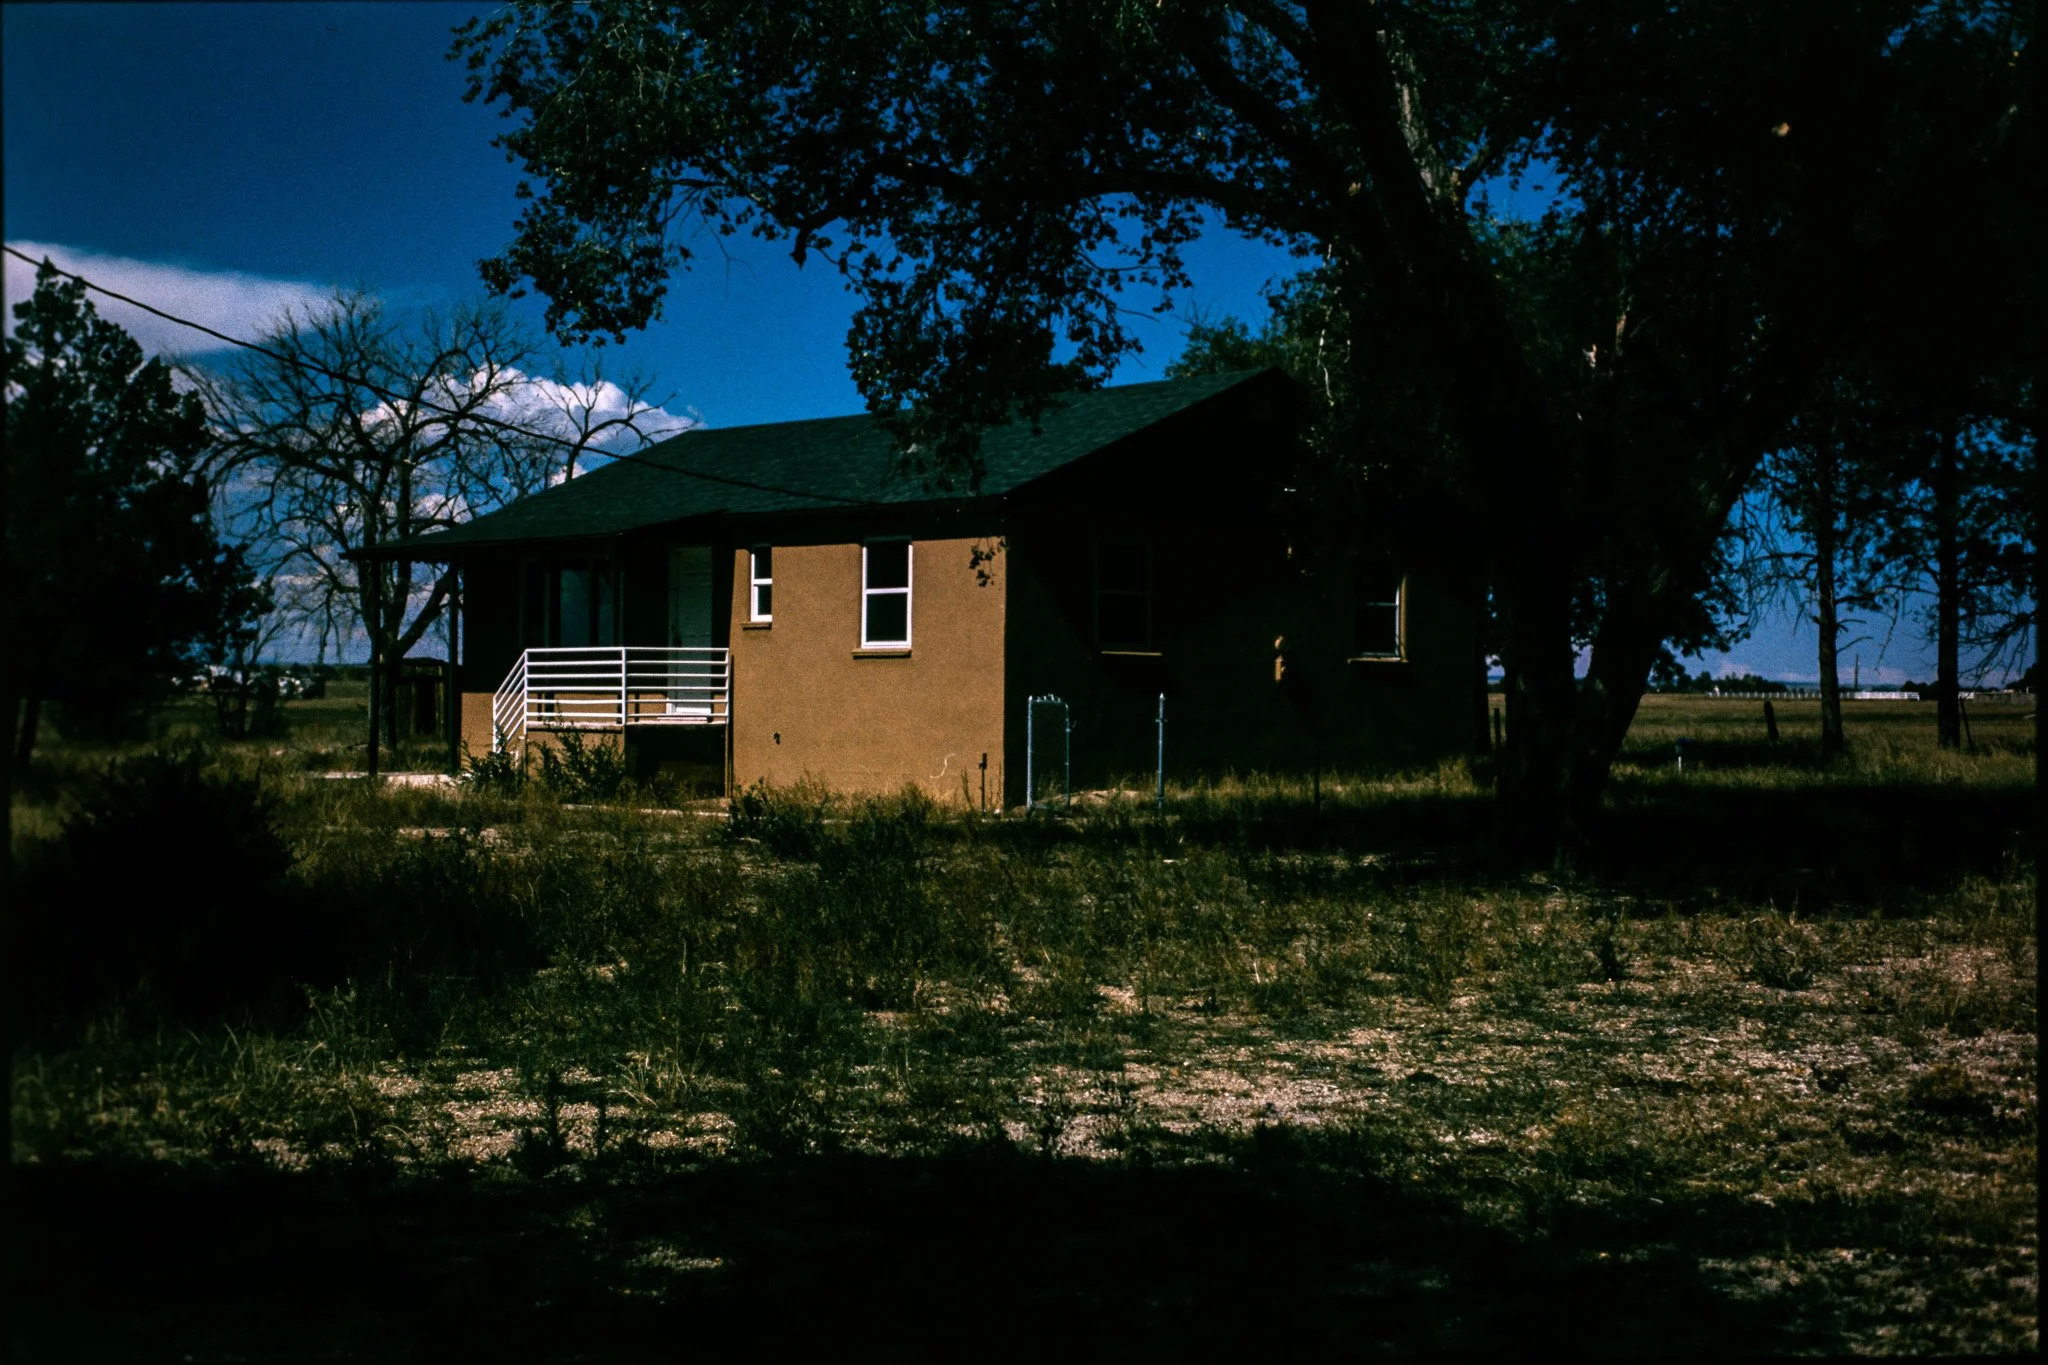
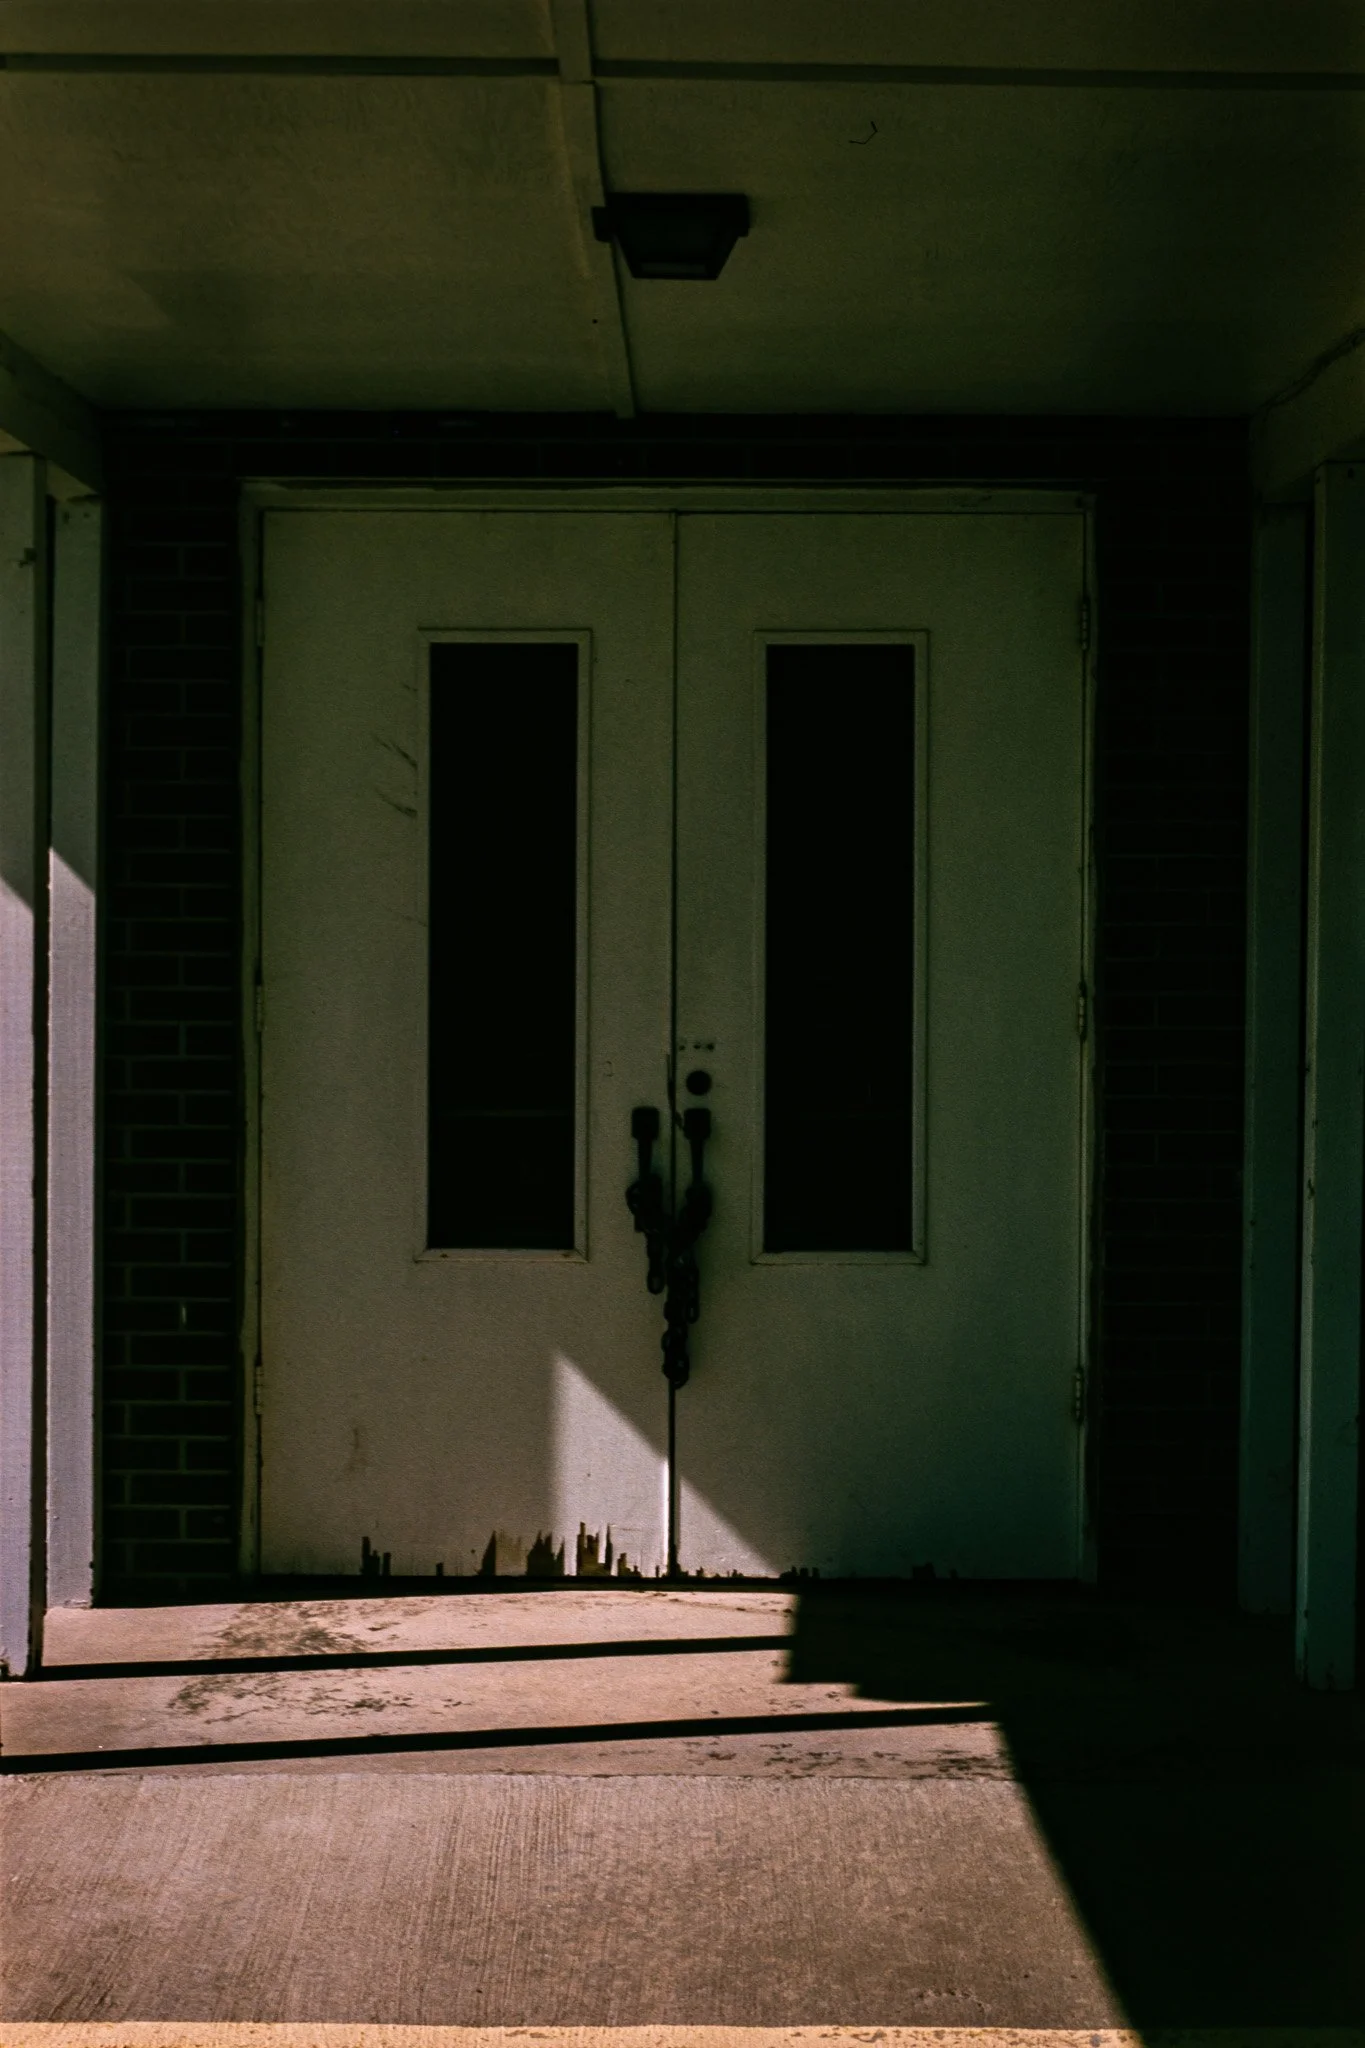
Brick walls that appeared nearly black on the filmstrip revealed individual bricks and mortar lines.
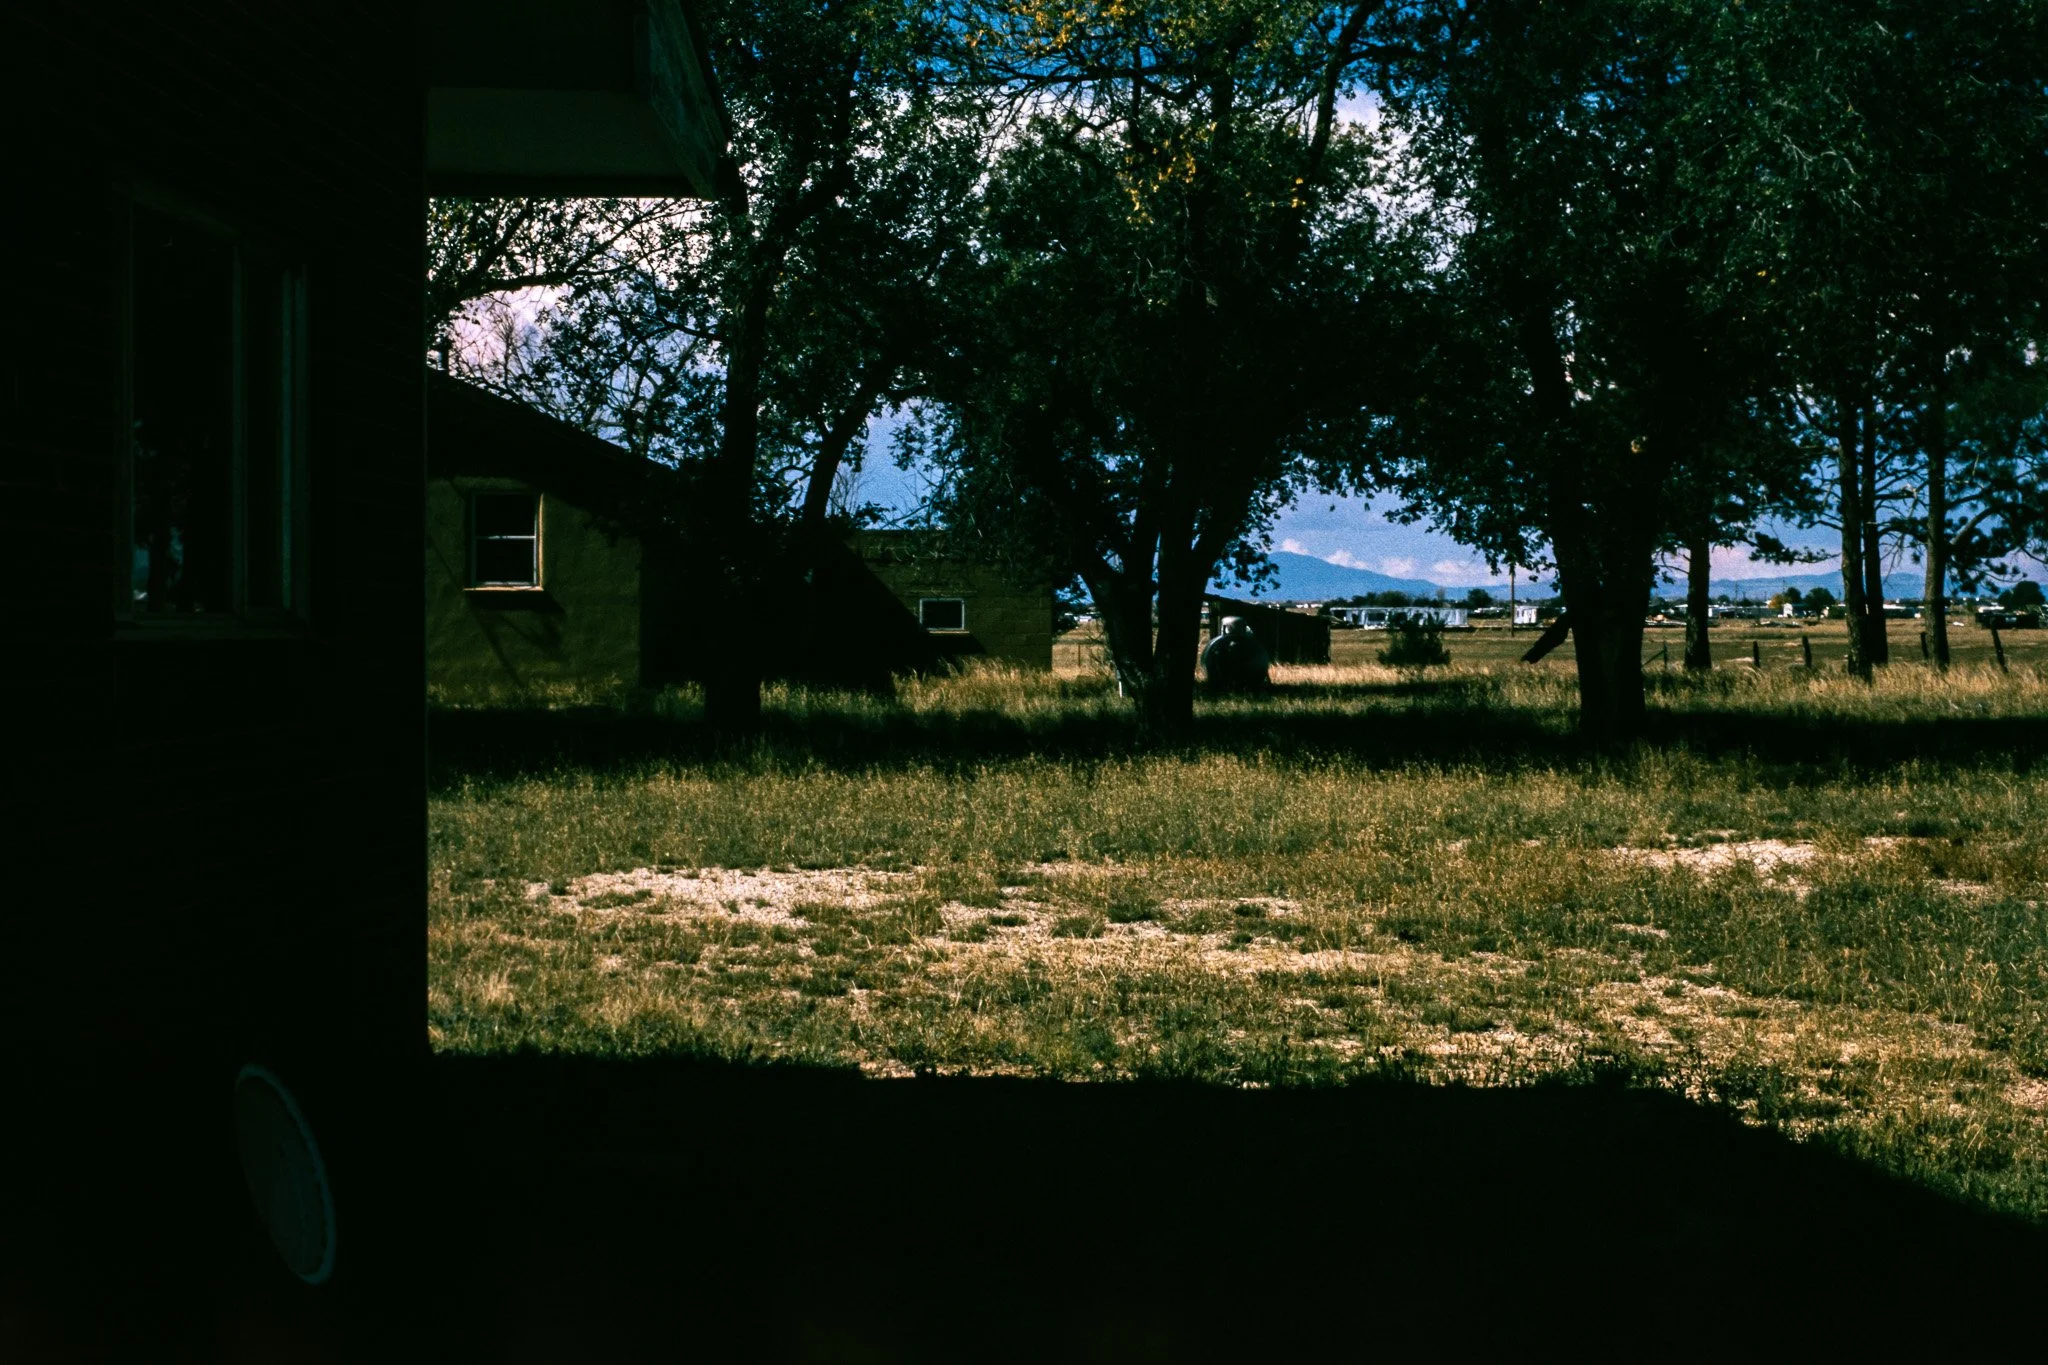
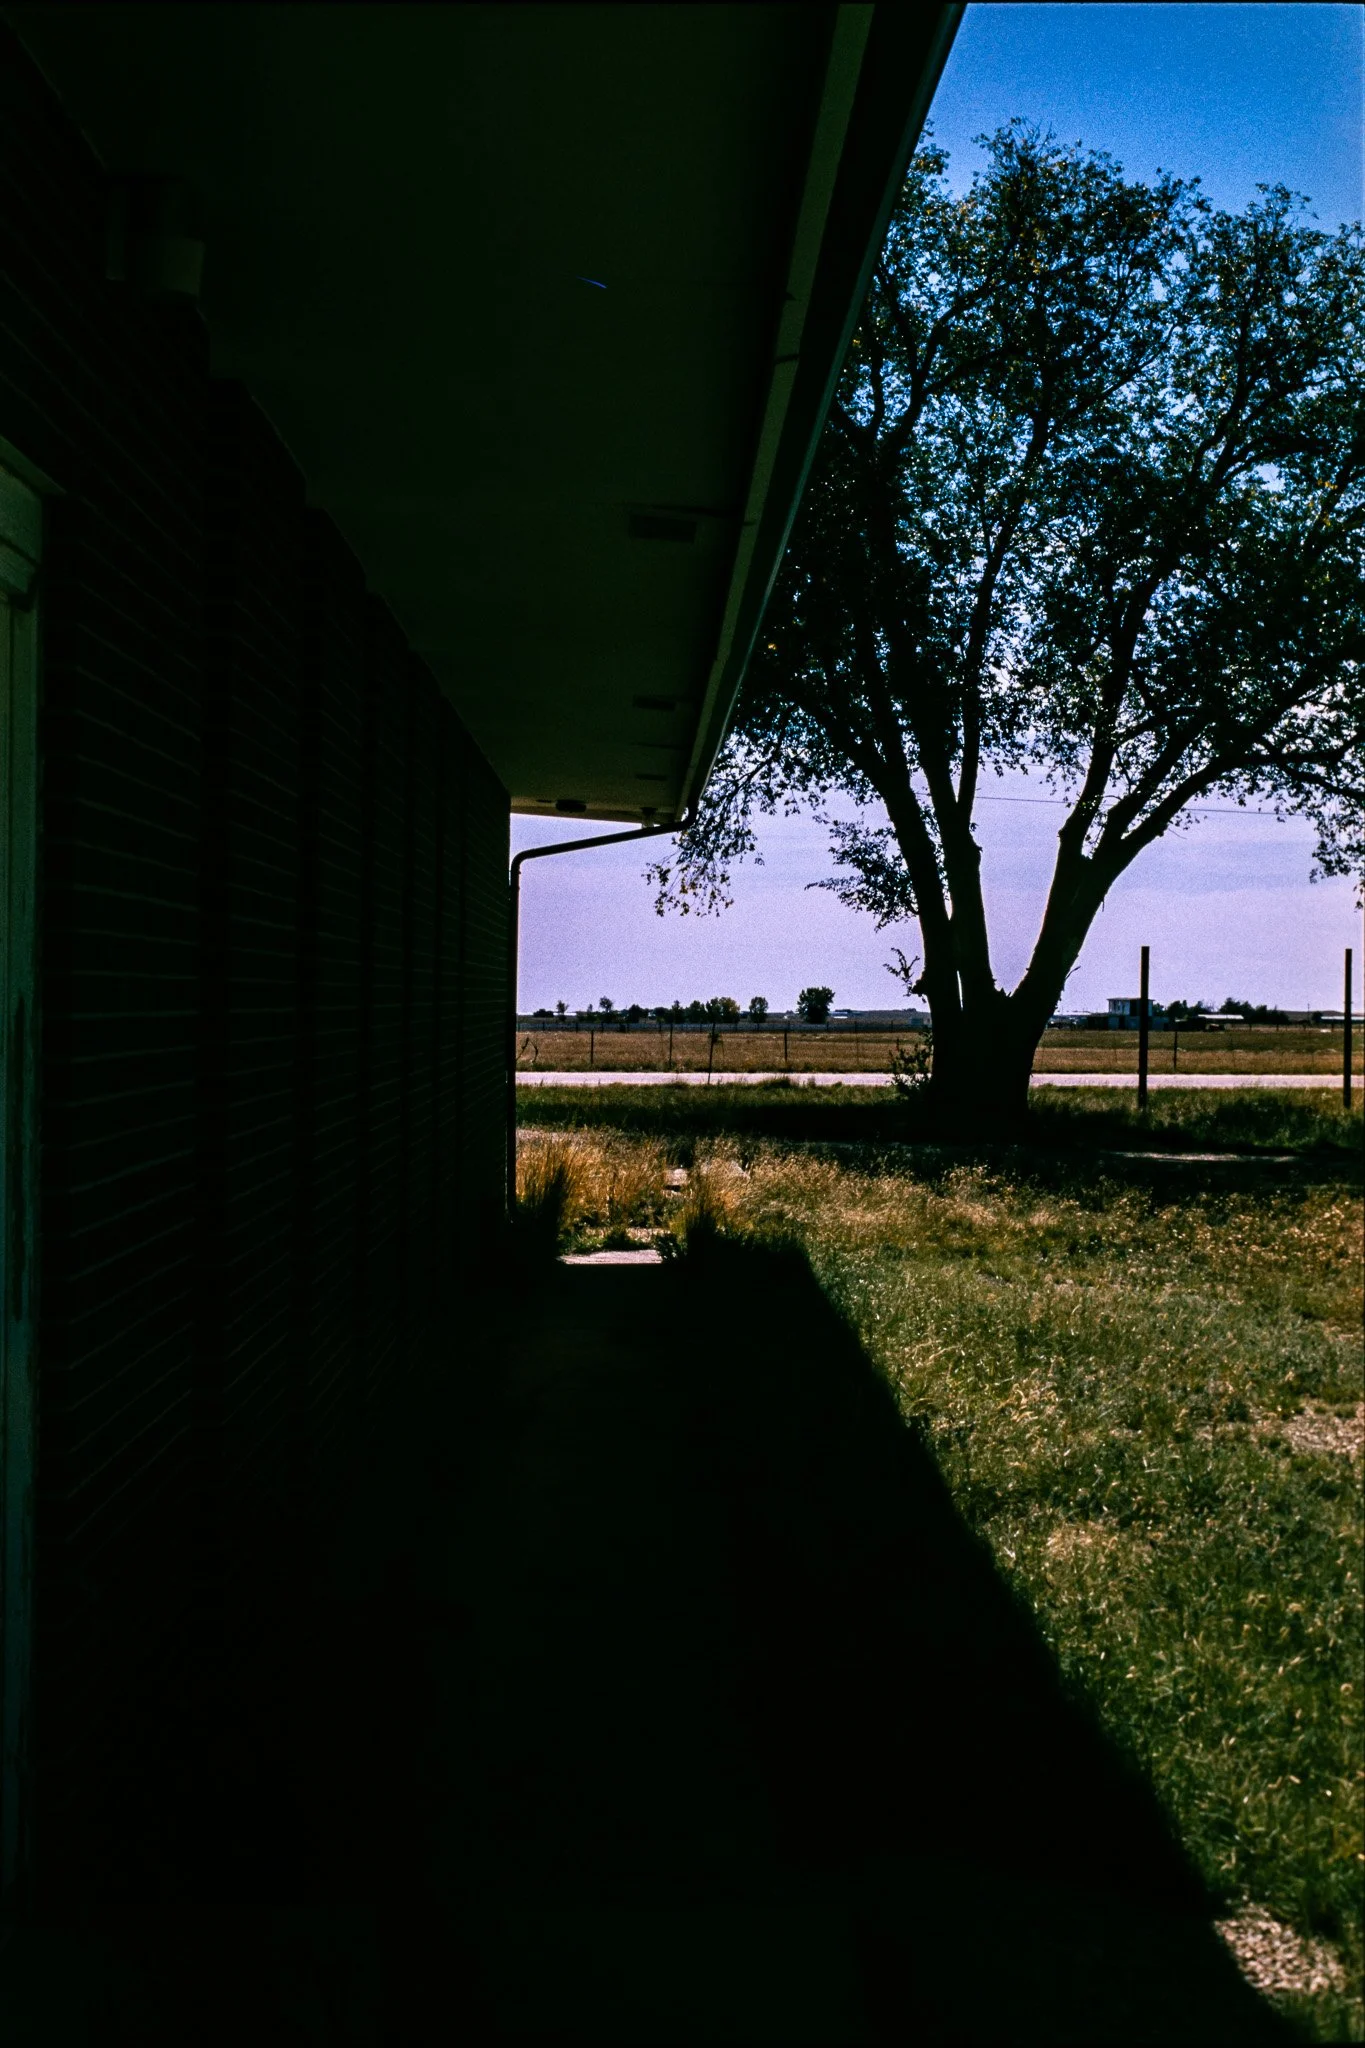
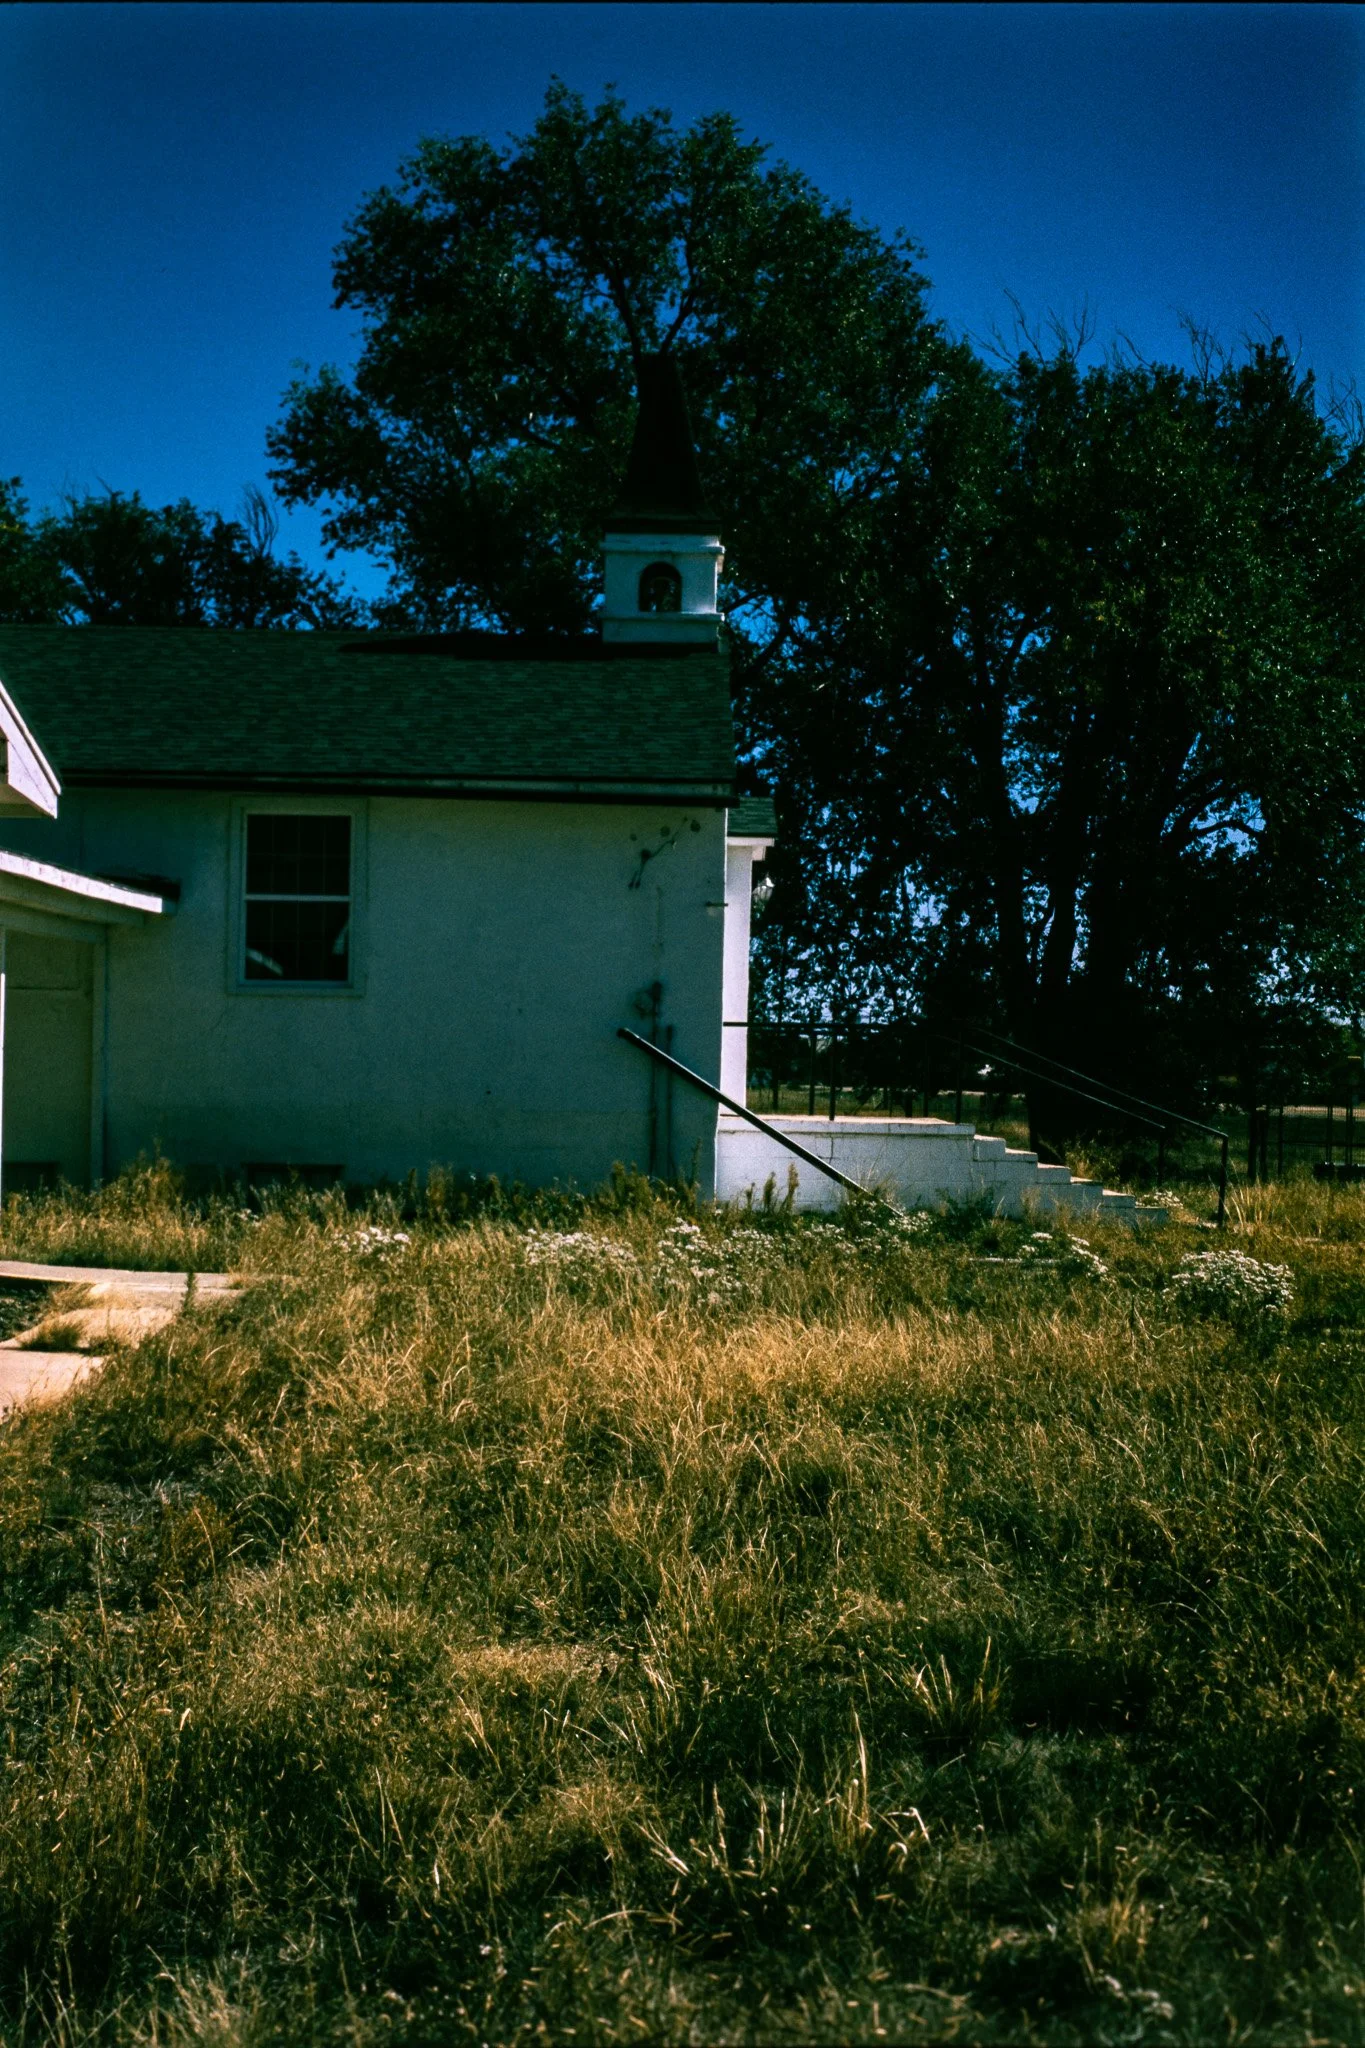
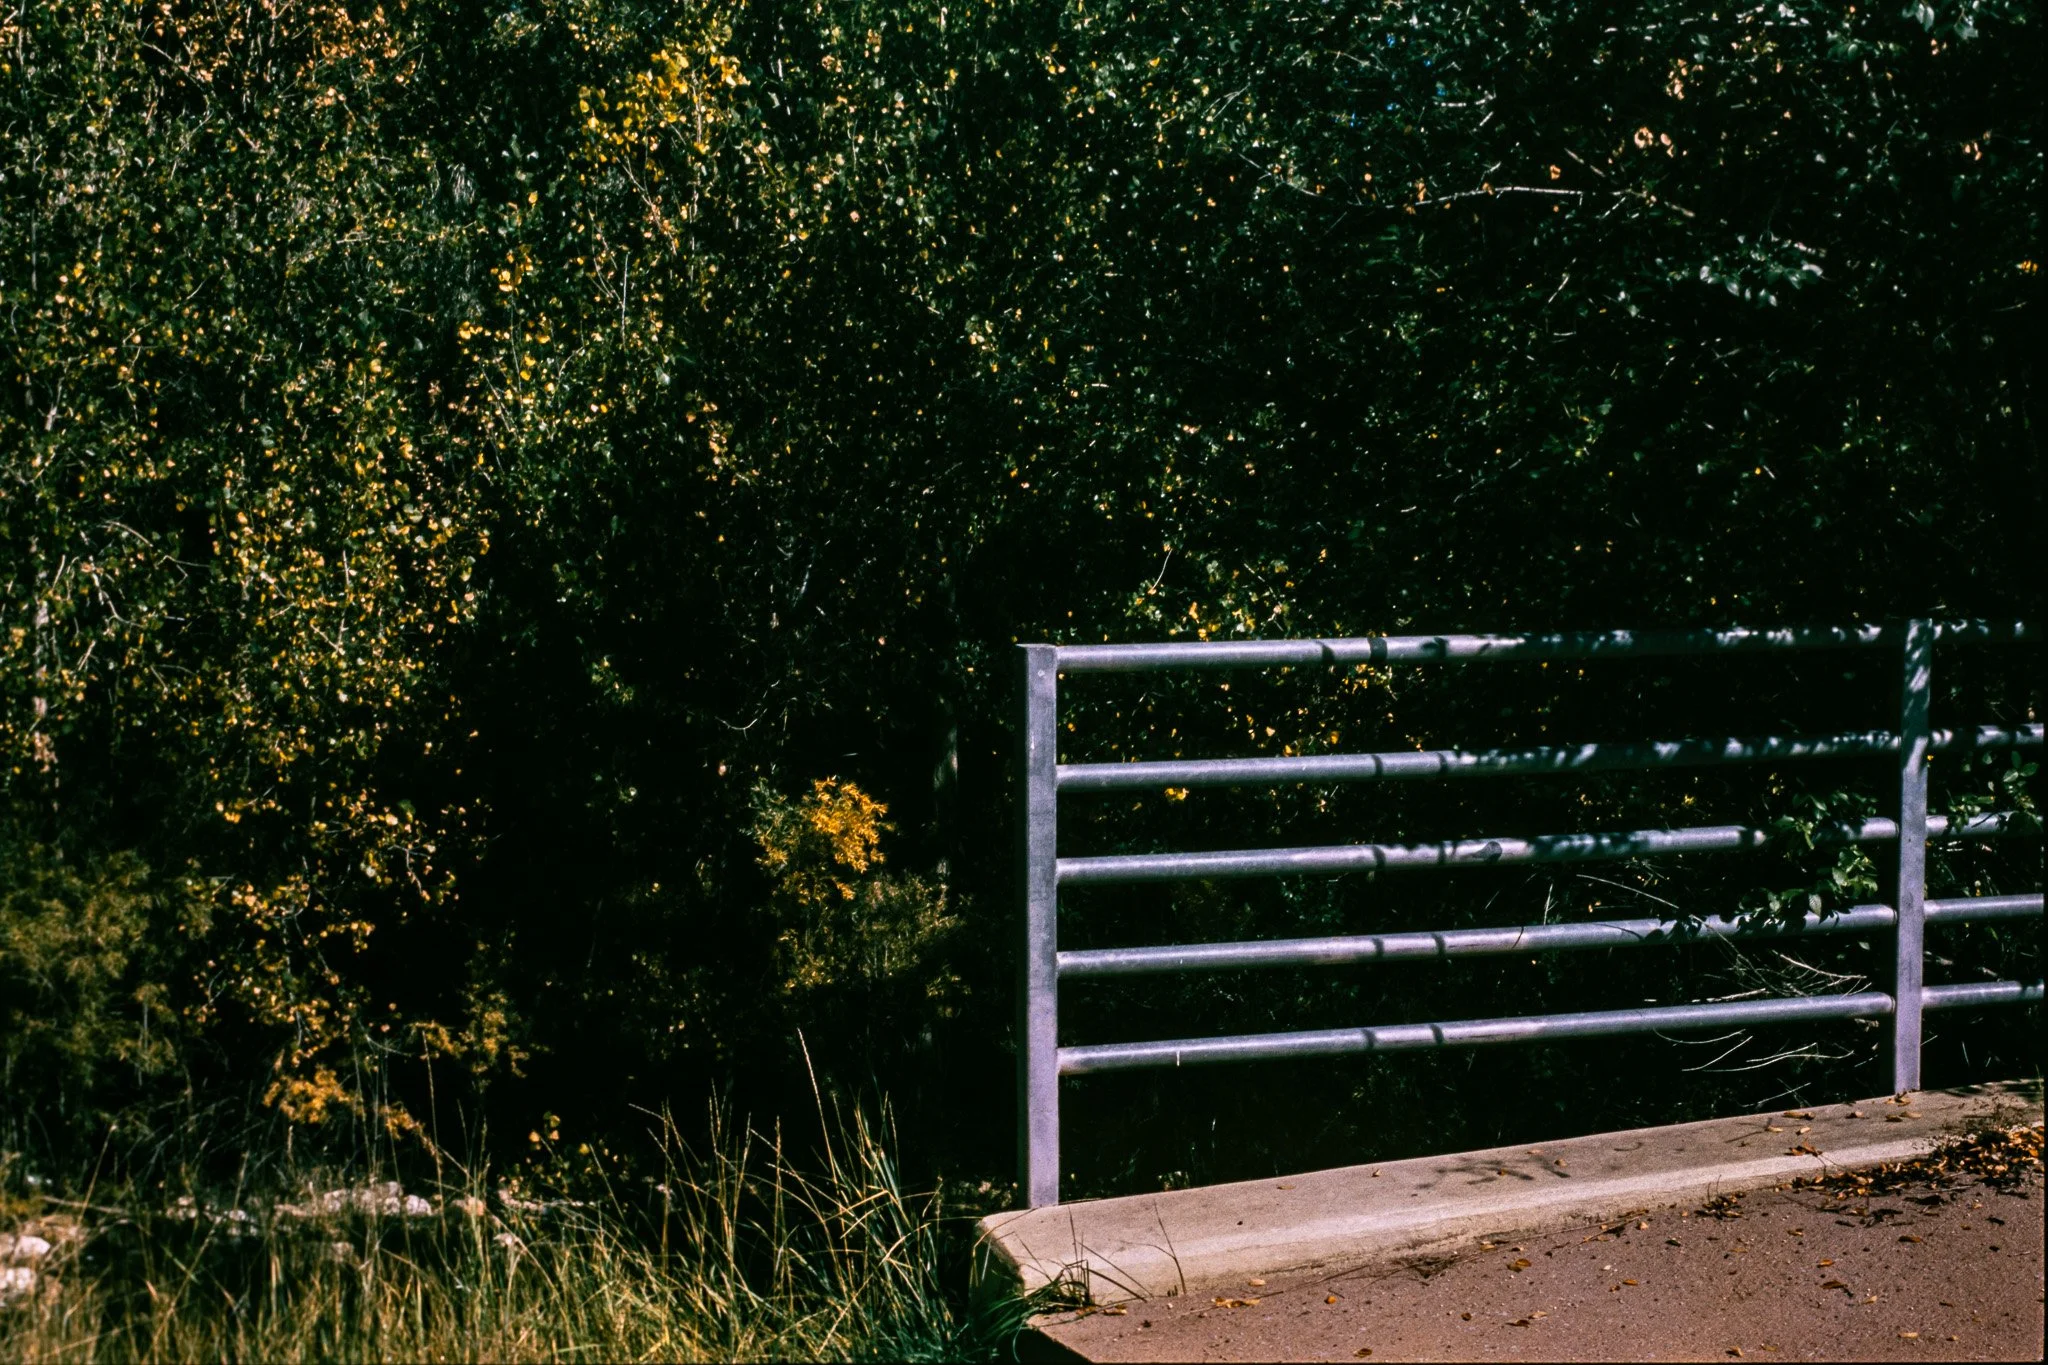
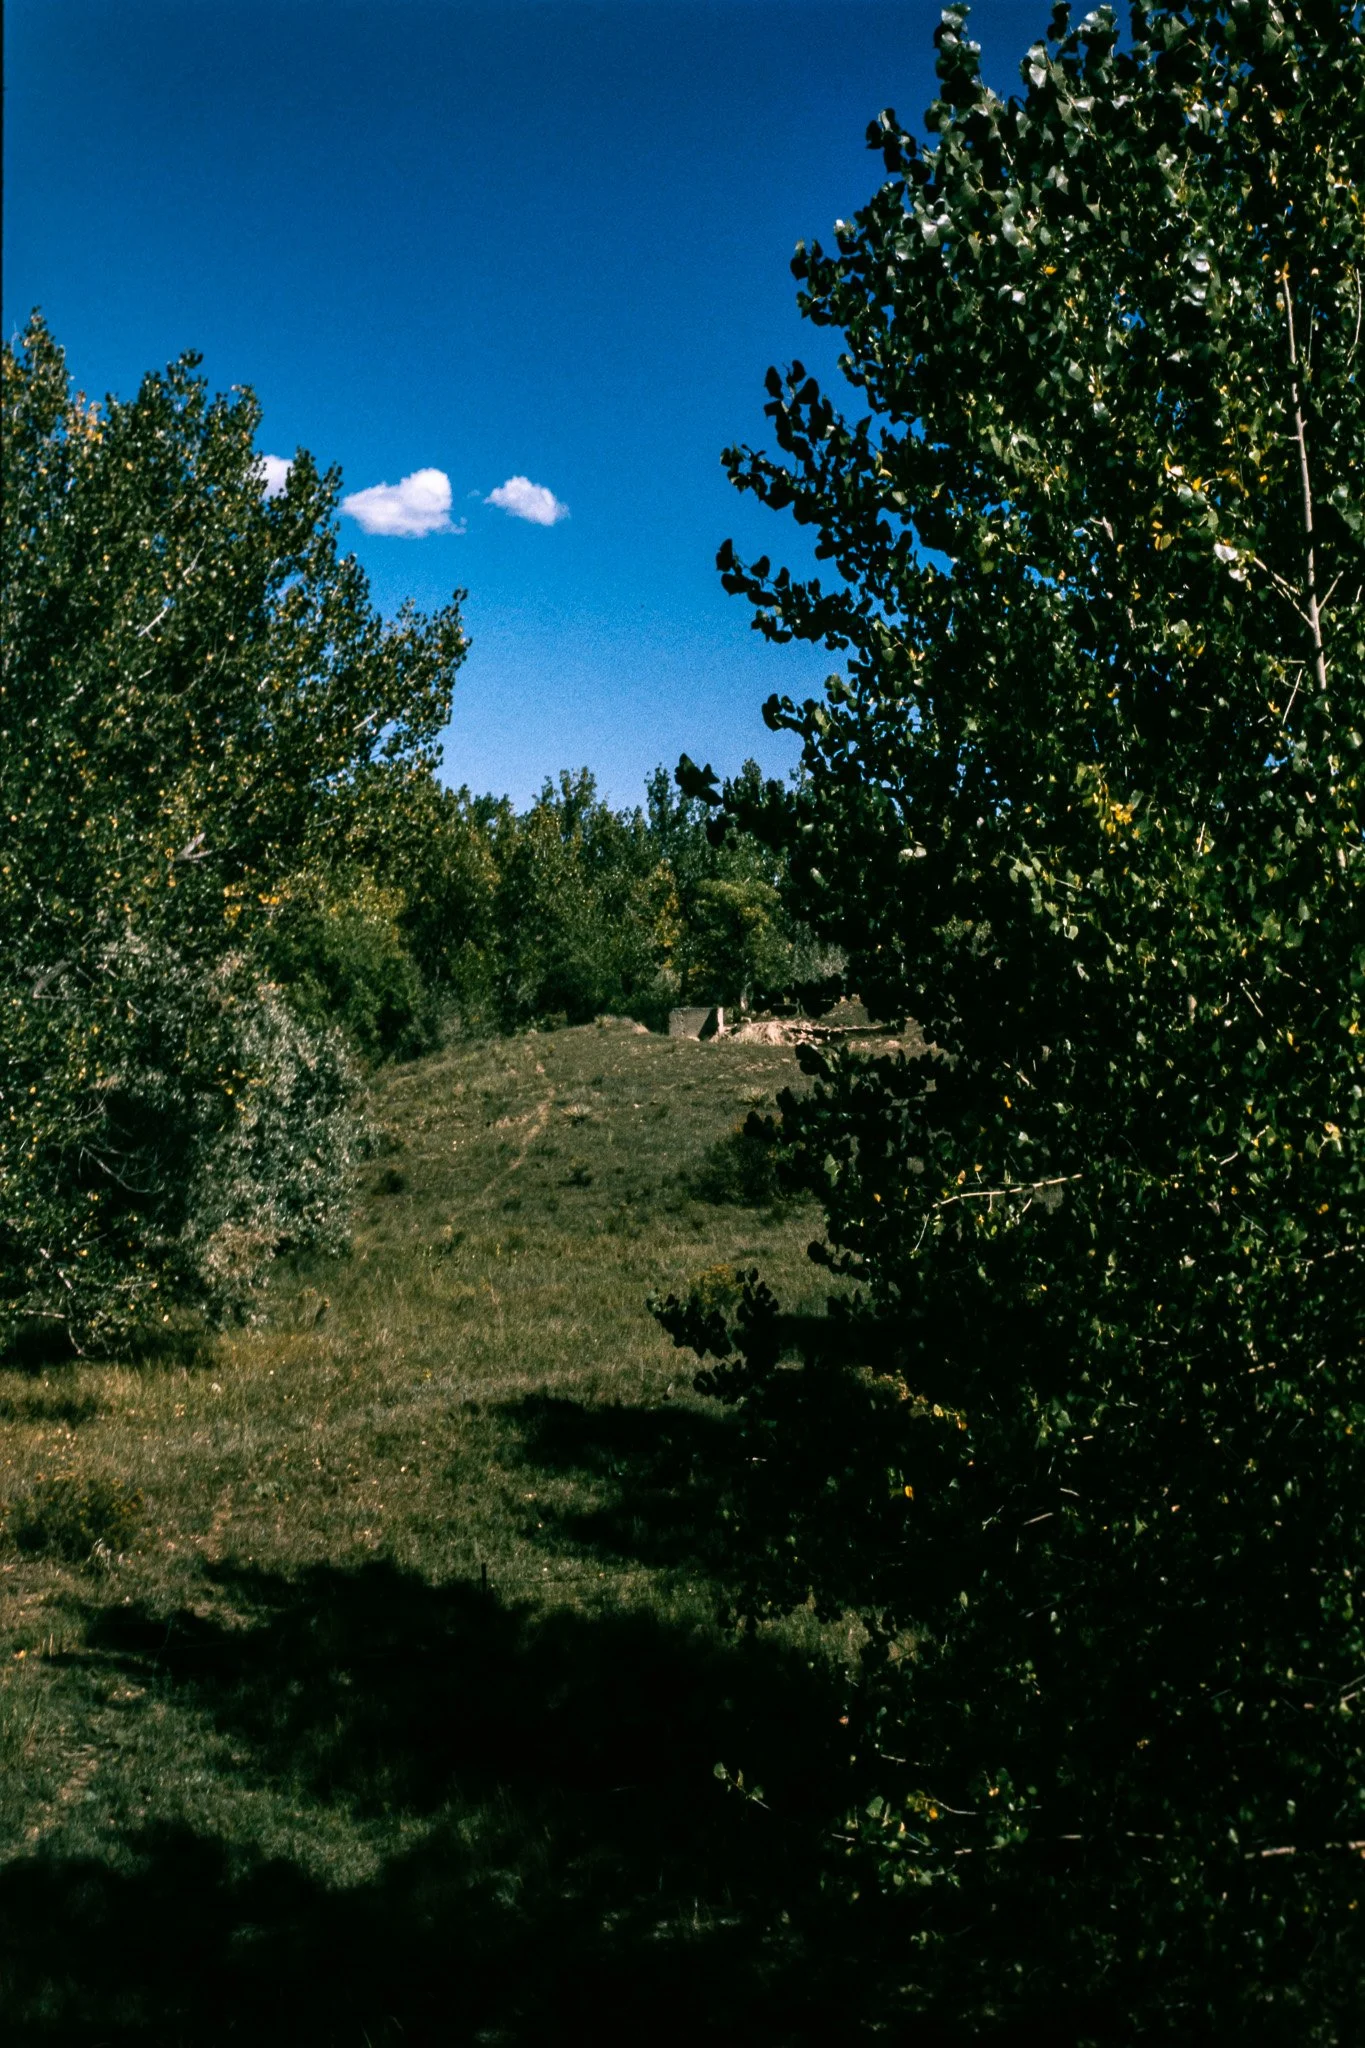
Trees that initially looked like featureless shadows contained recognizable foliage.
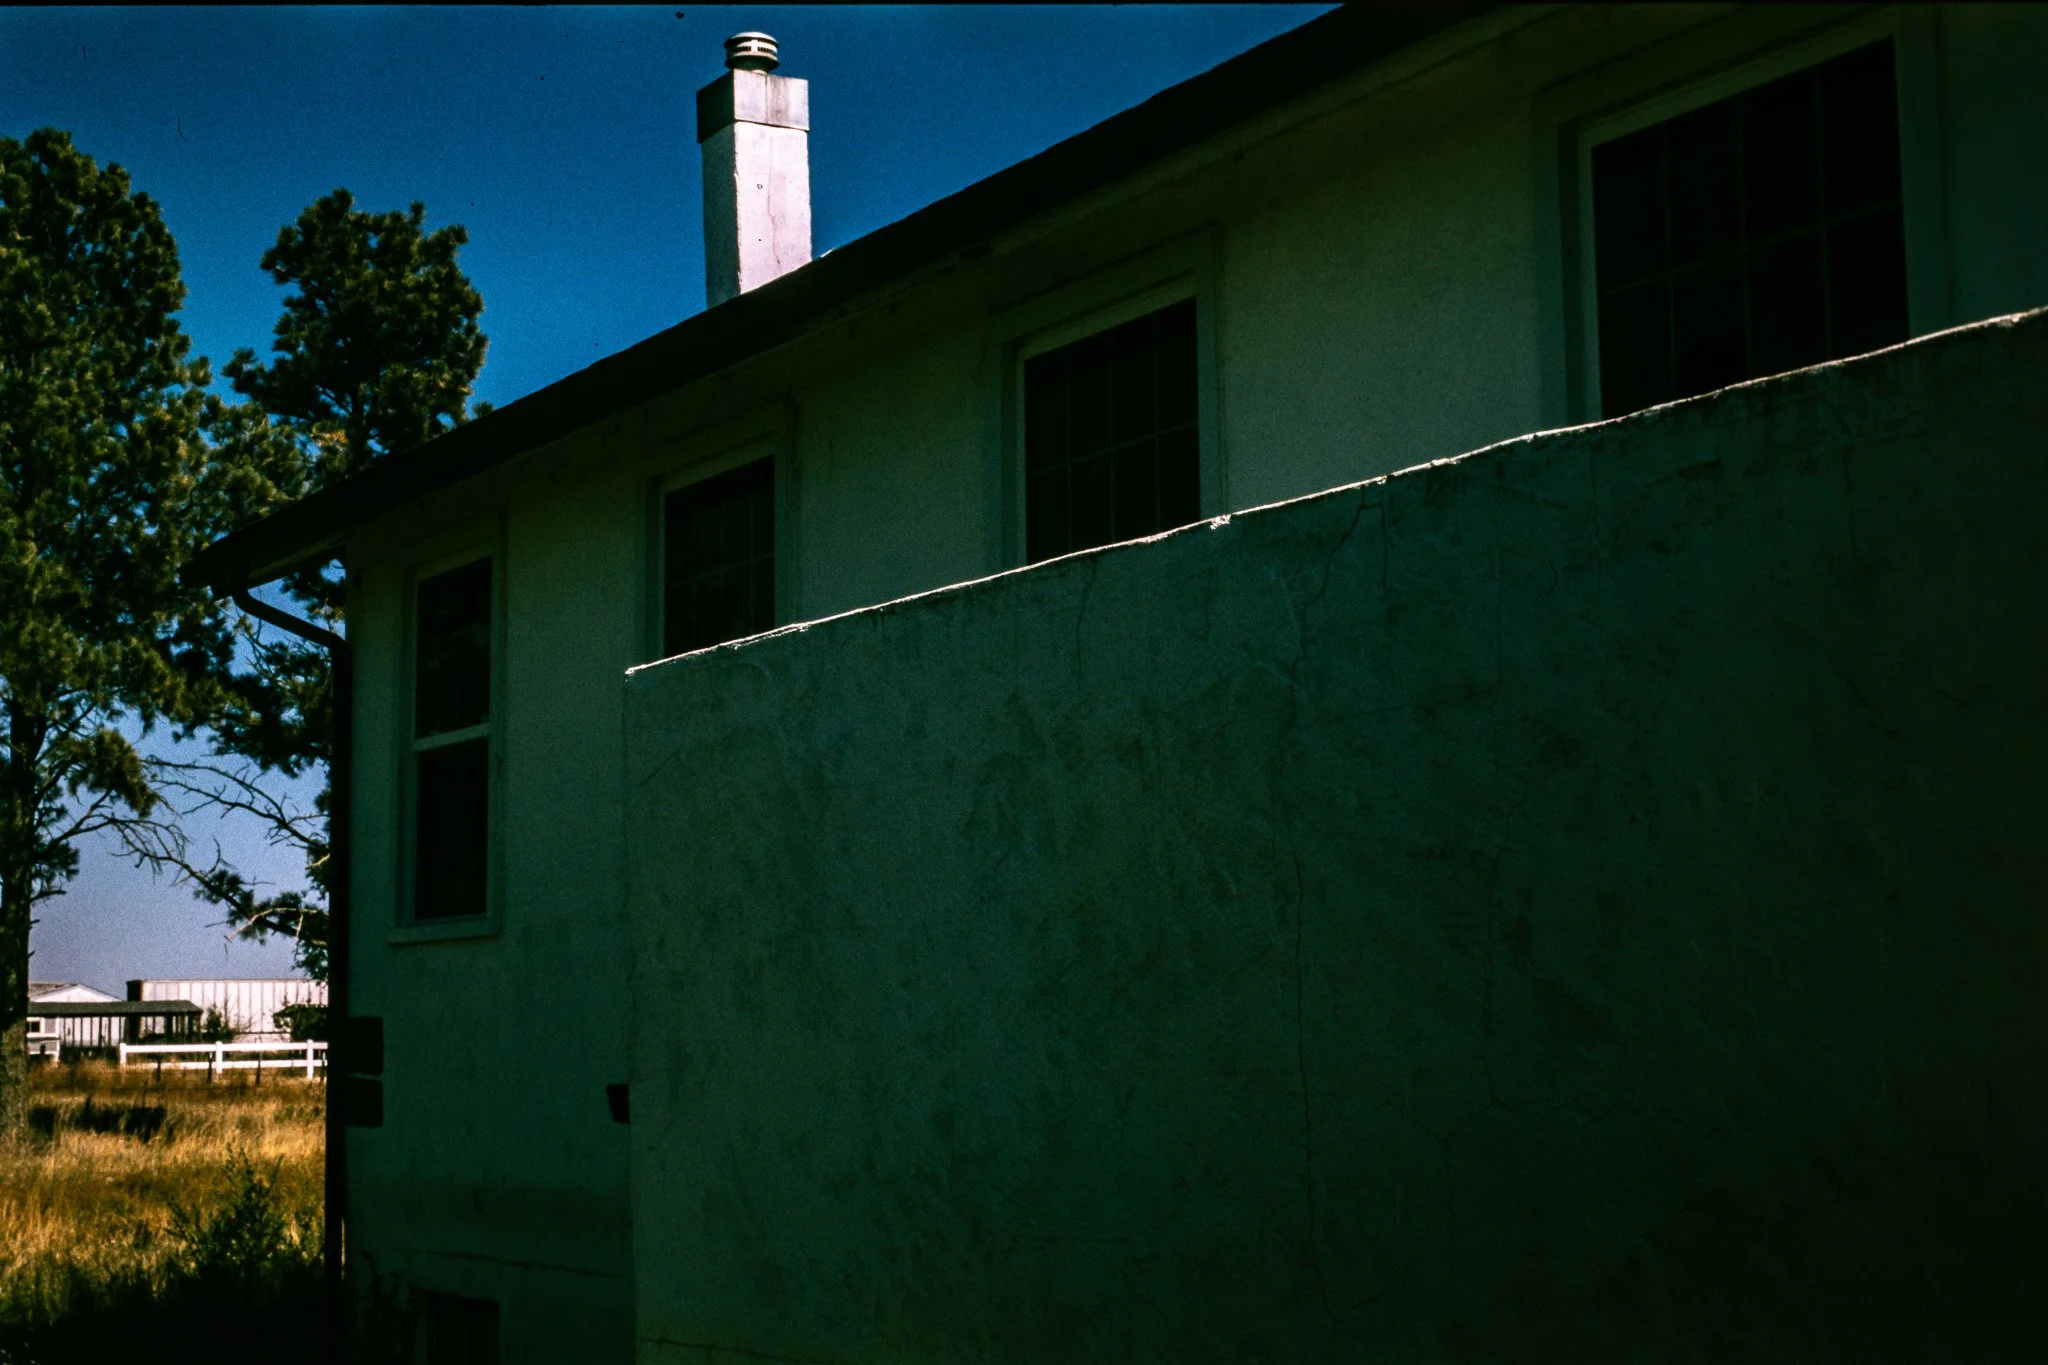
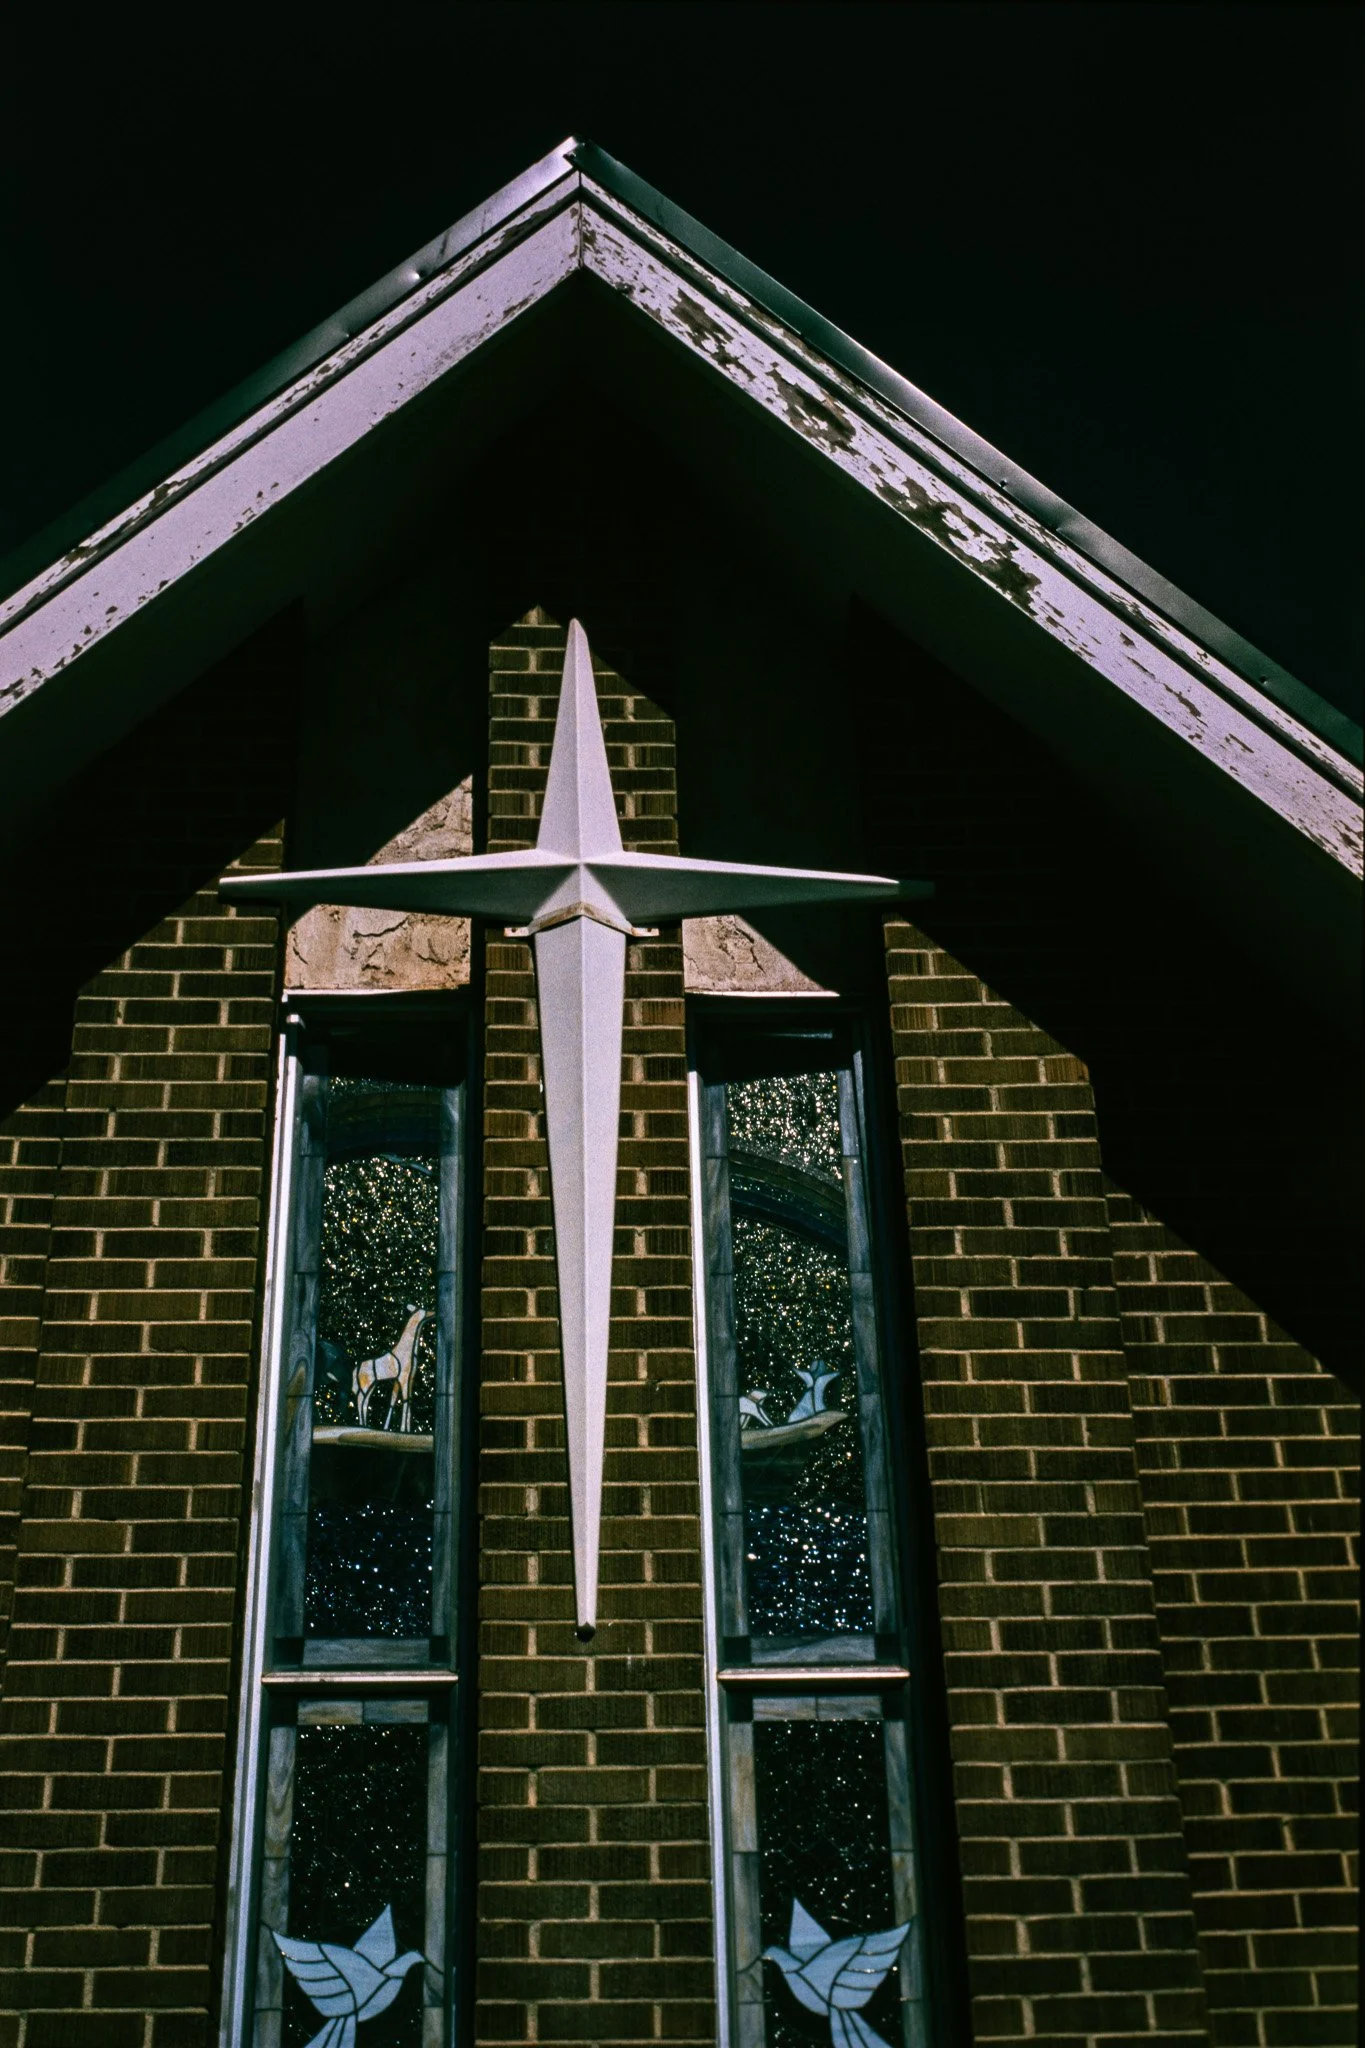
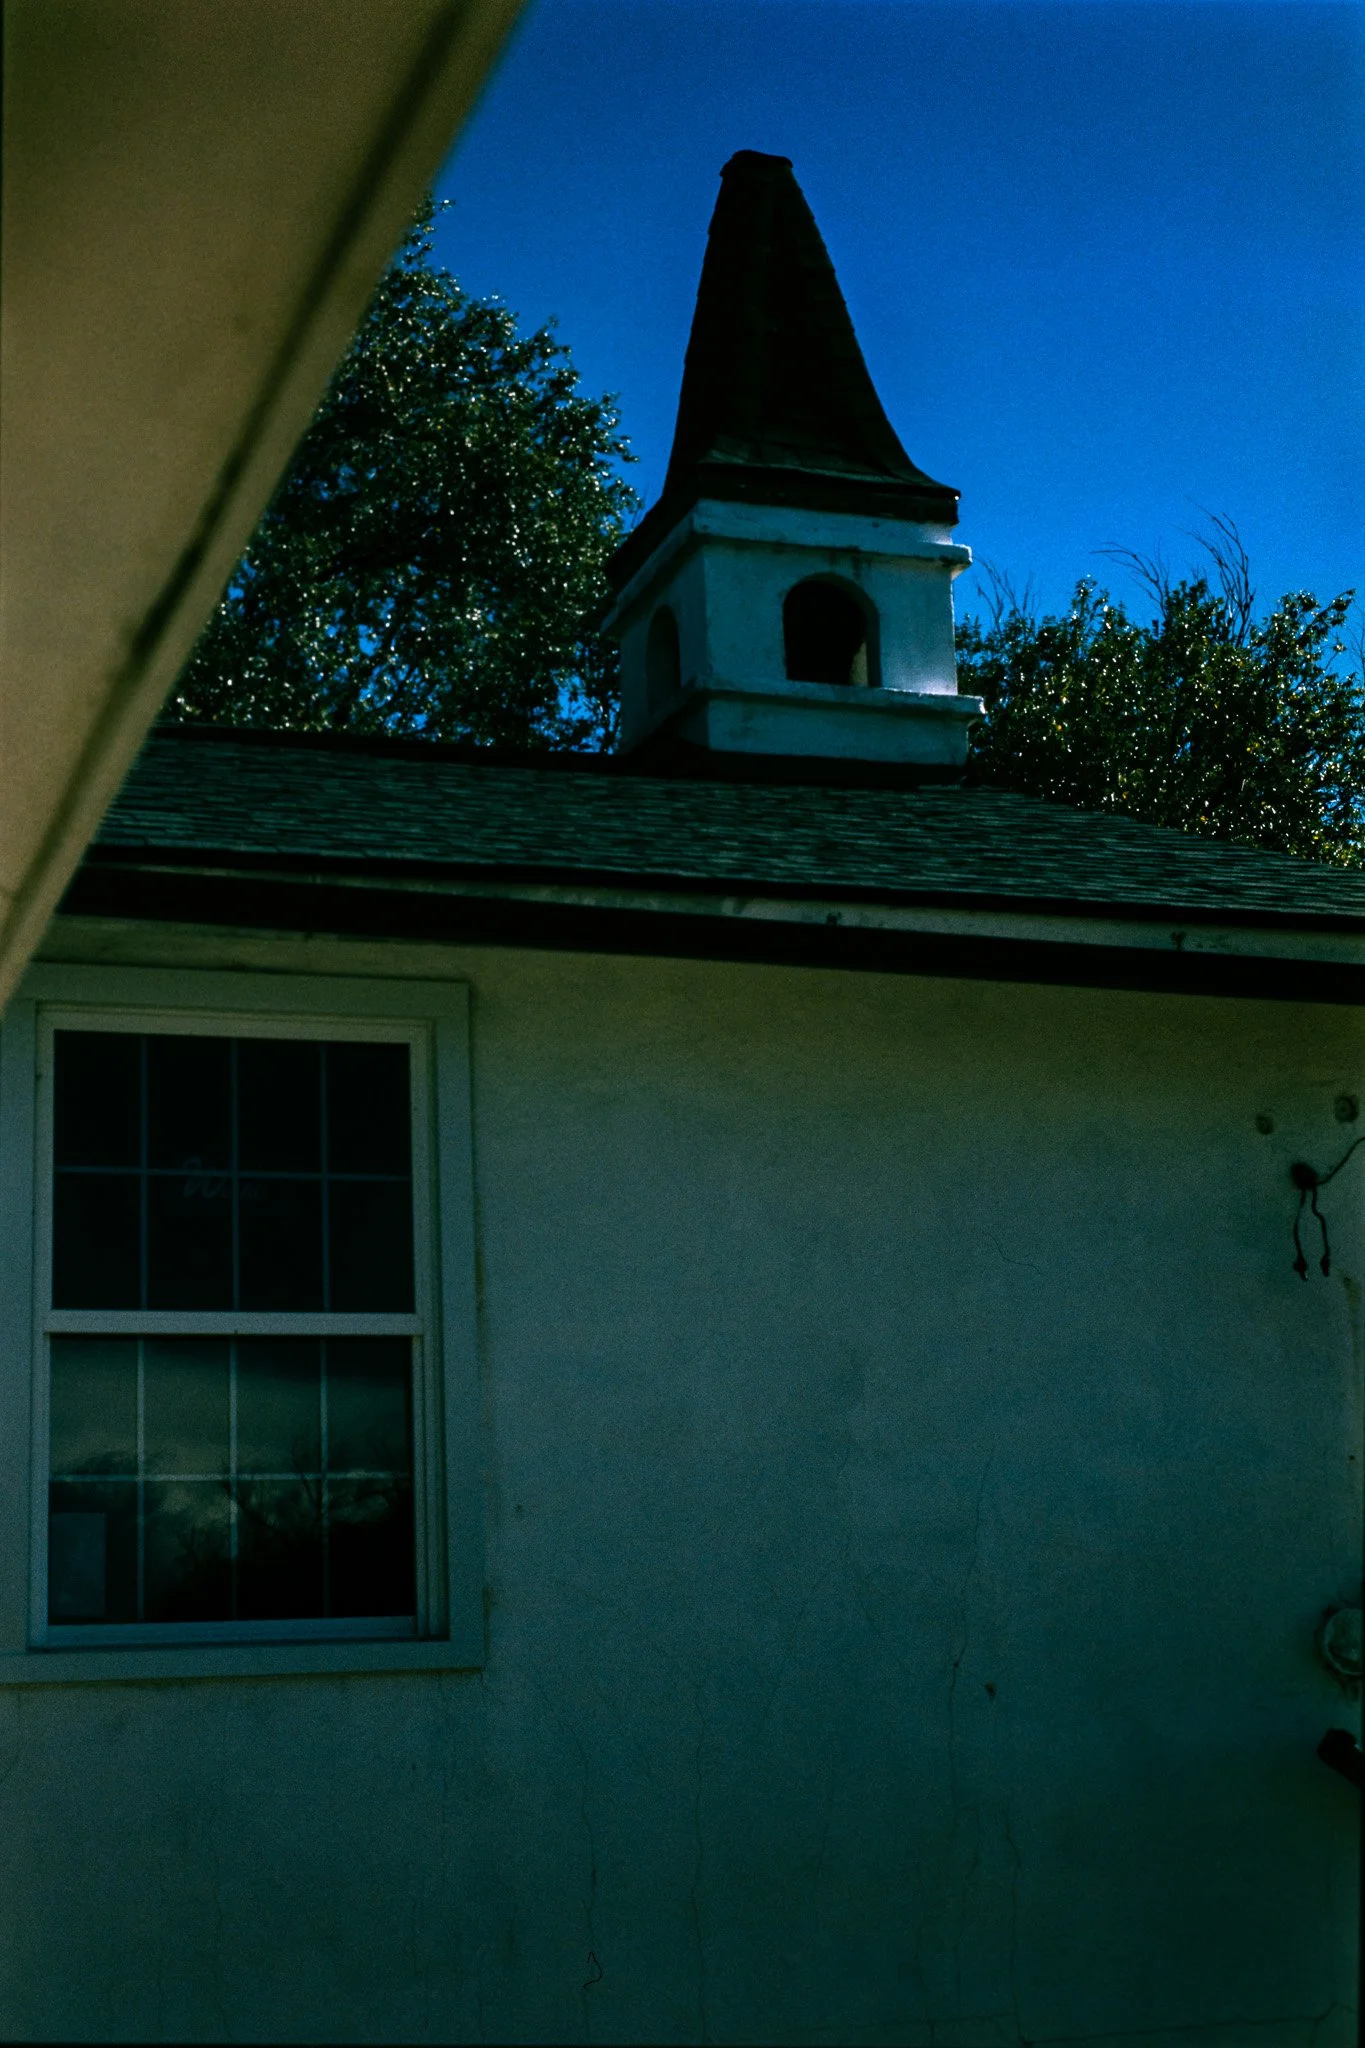
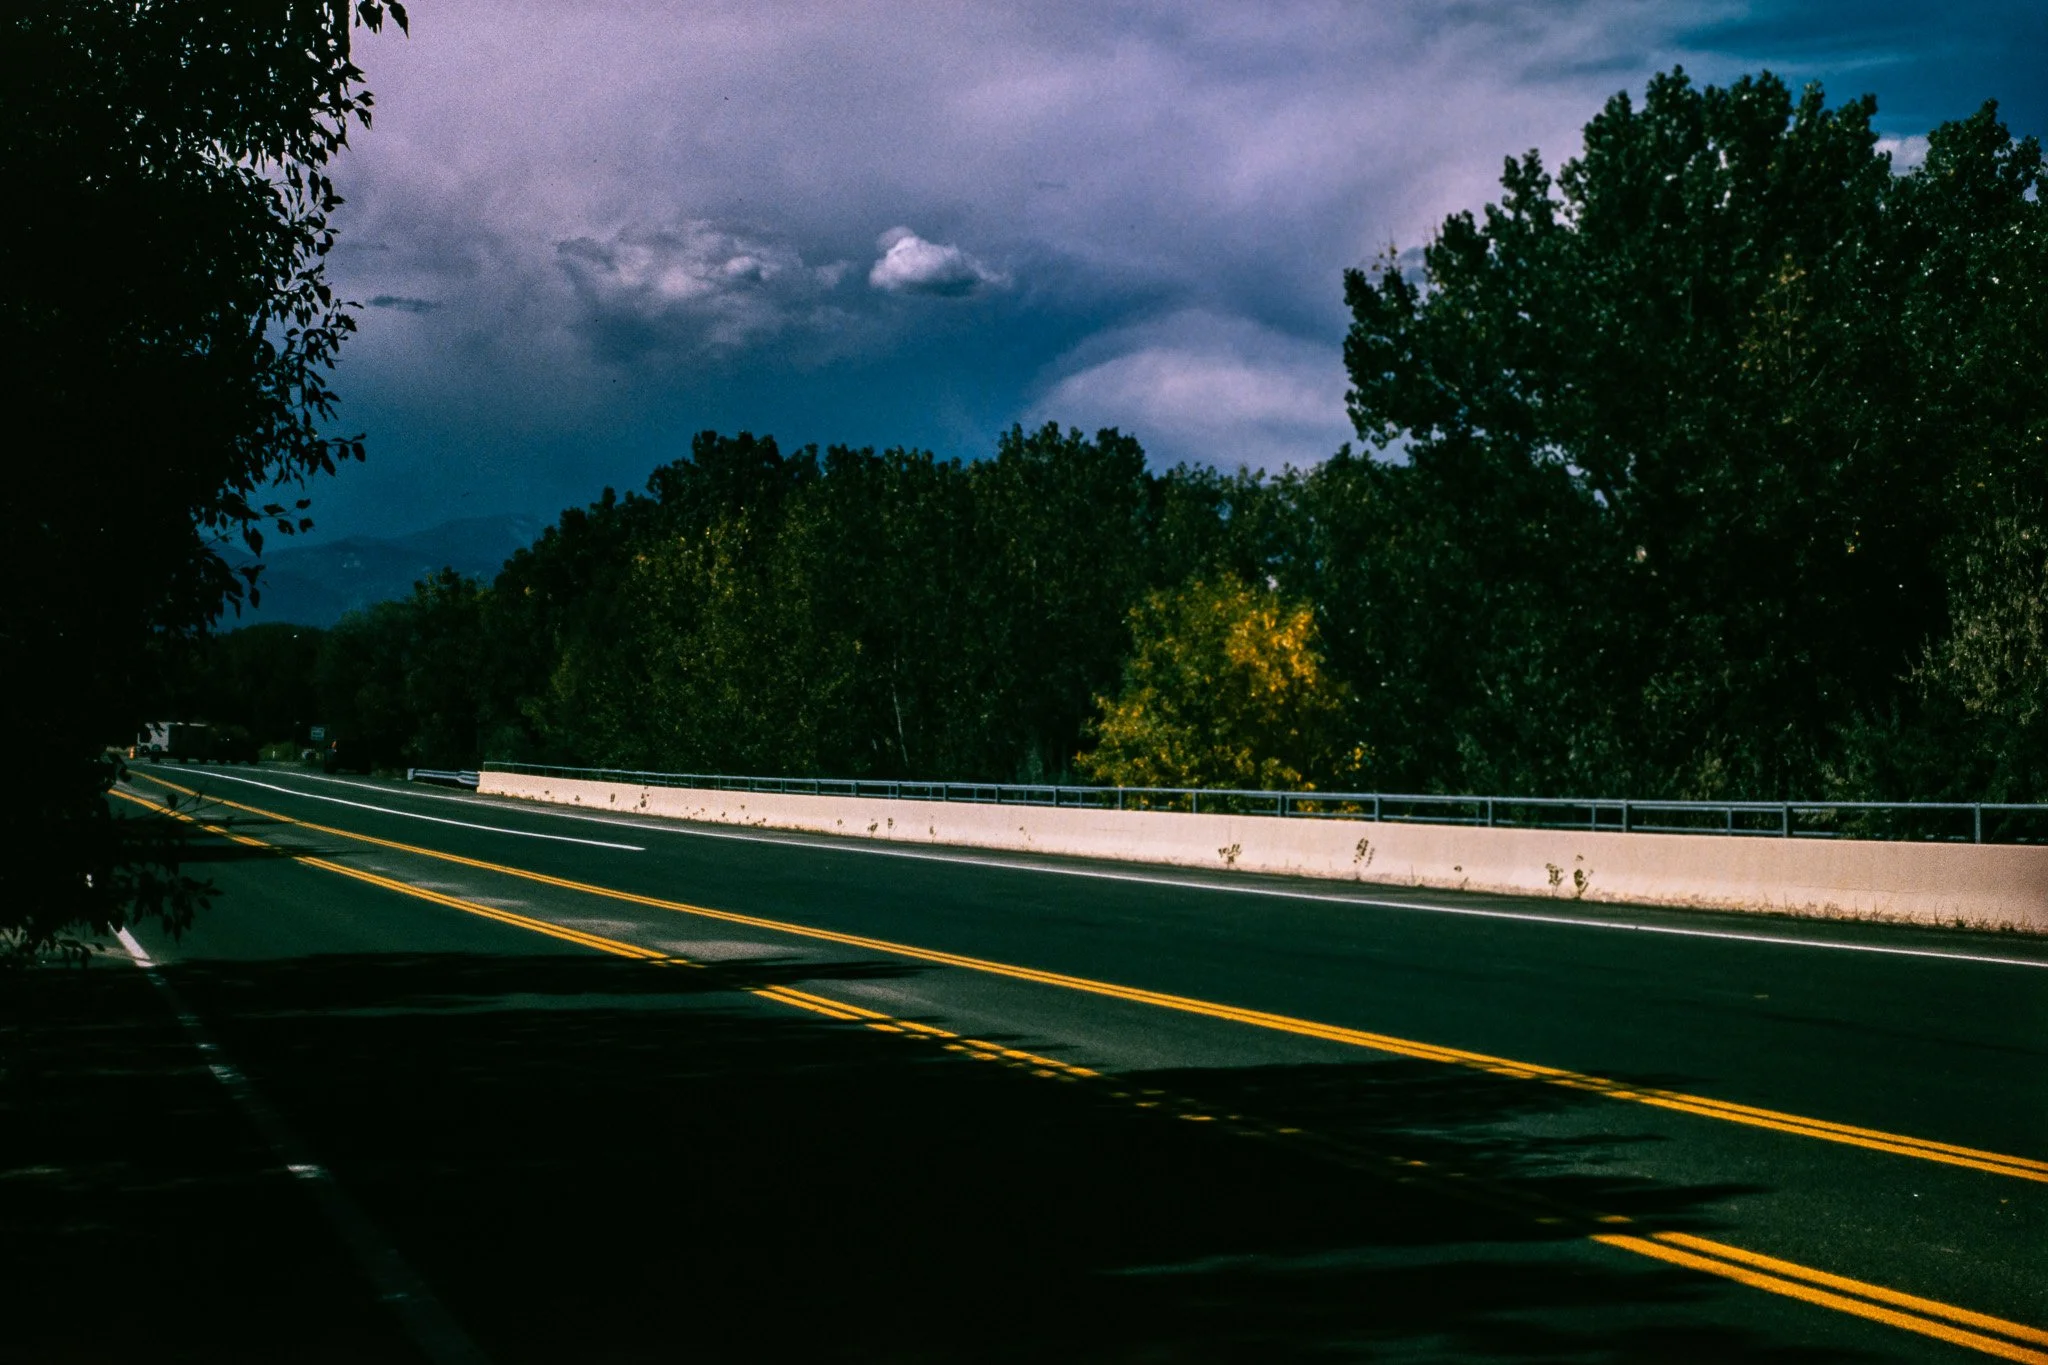
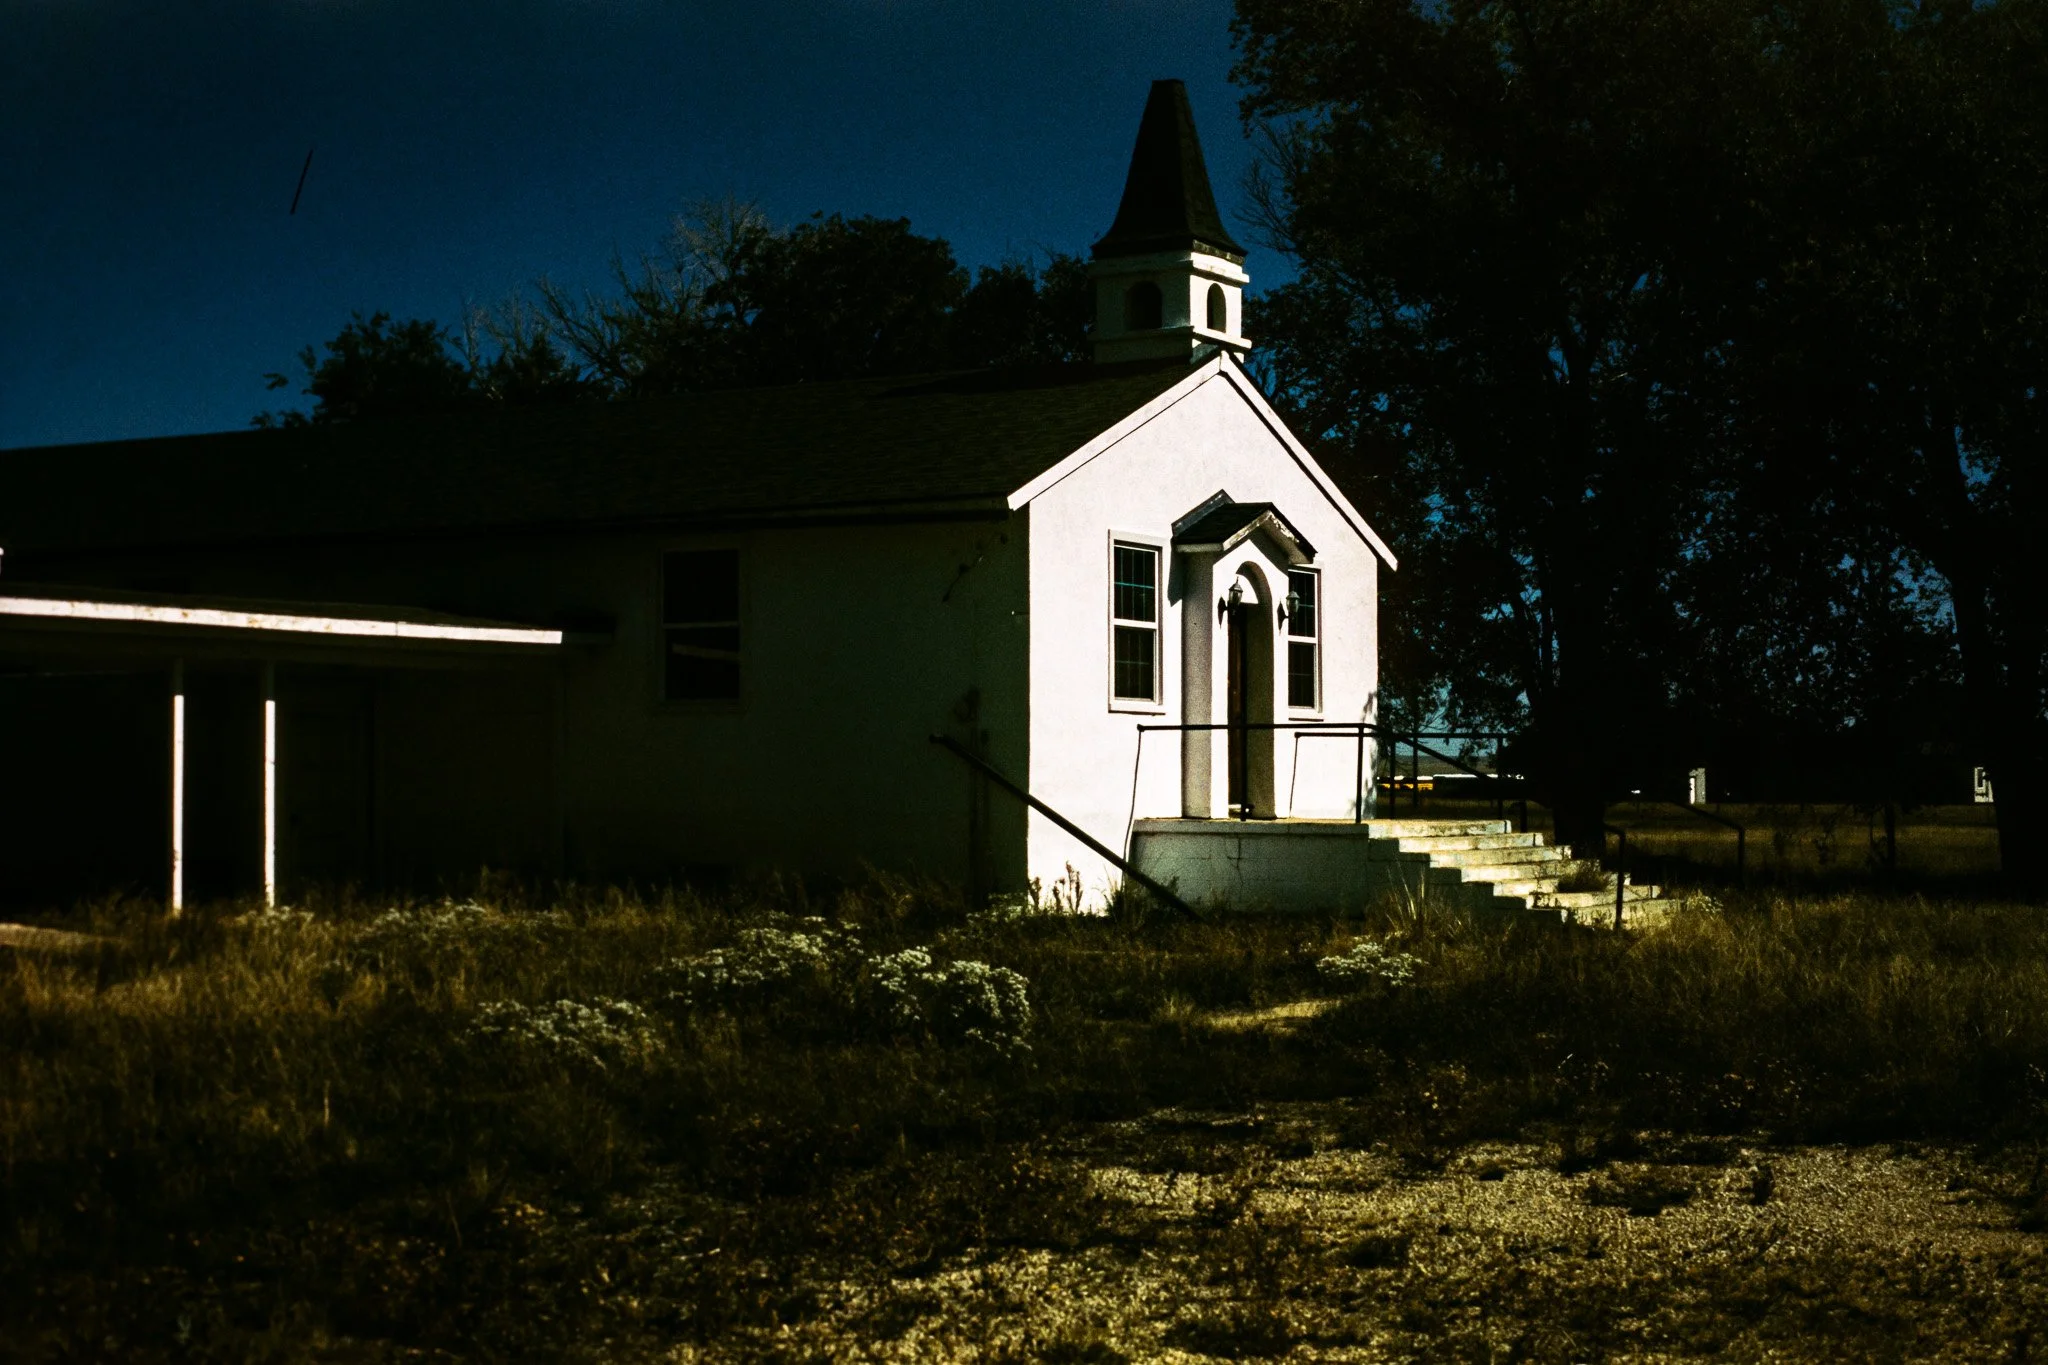
Bright architectural surfaces retained detail, while the surrounding darkness created an unusually dramatic atmosphere.
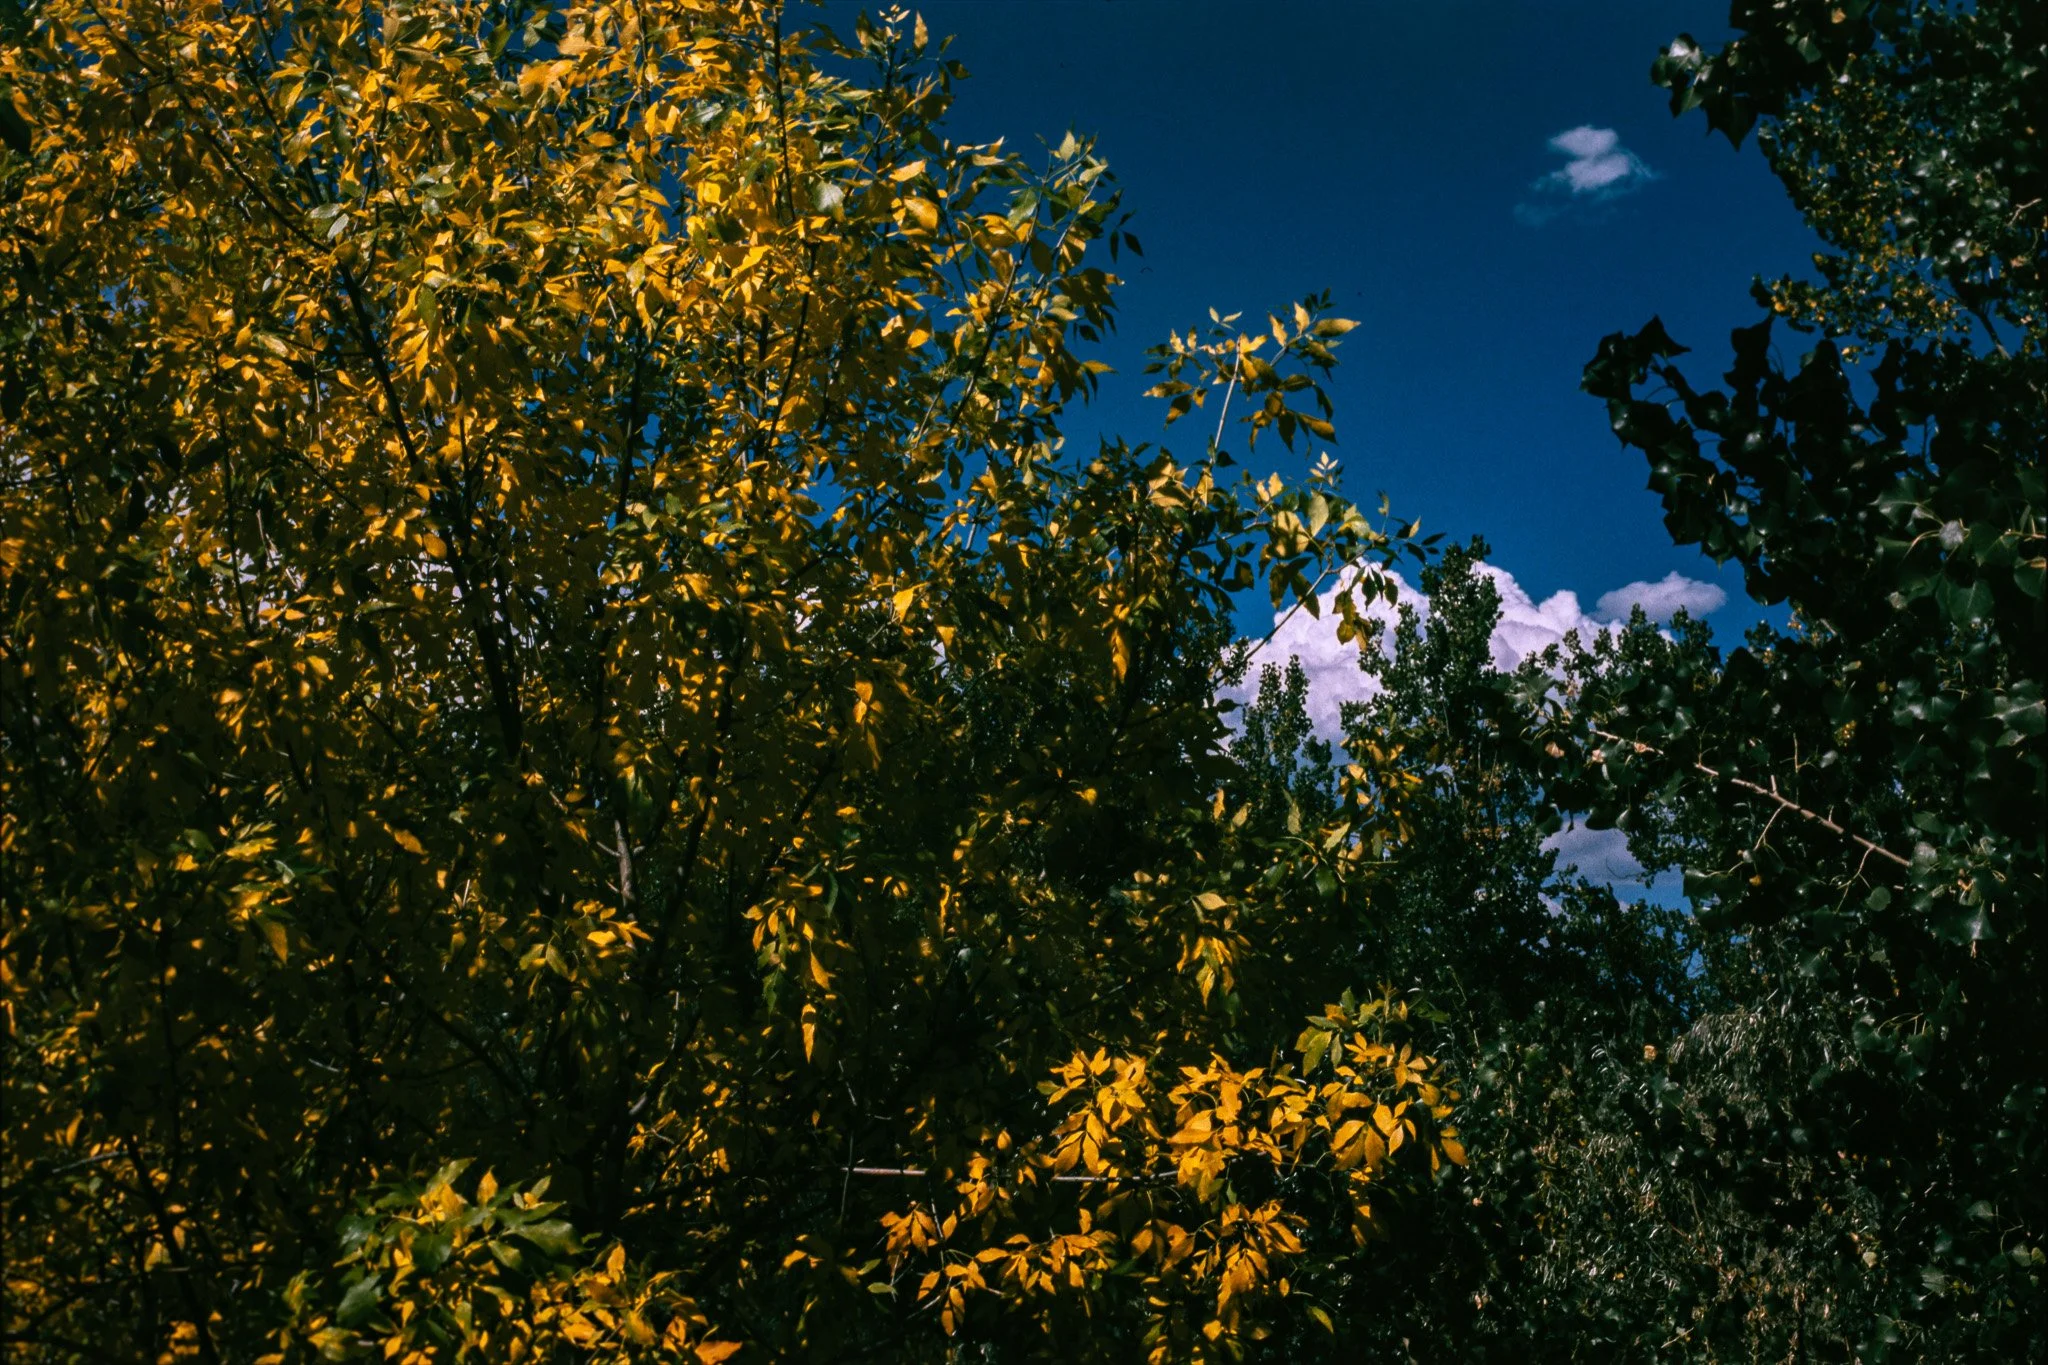
But the most surprising discovery was the color.
The Colors: Deep Blues, Golden Highlights, and Green Shadows
I expected the 85A warming filter to counteract the blue cast I'd seen in other AeroColor E-6 experiments.
What I didn't expect was how complex the resulting colors would be.
The Blues
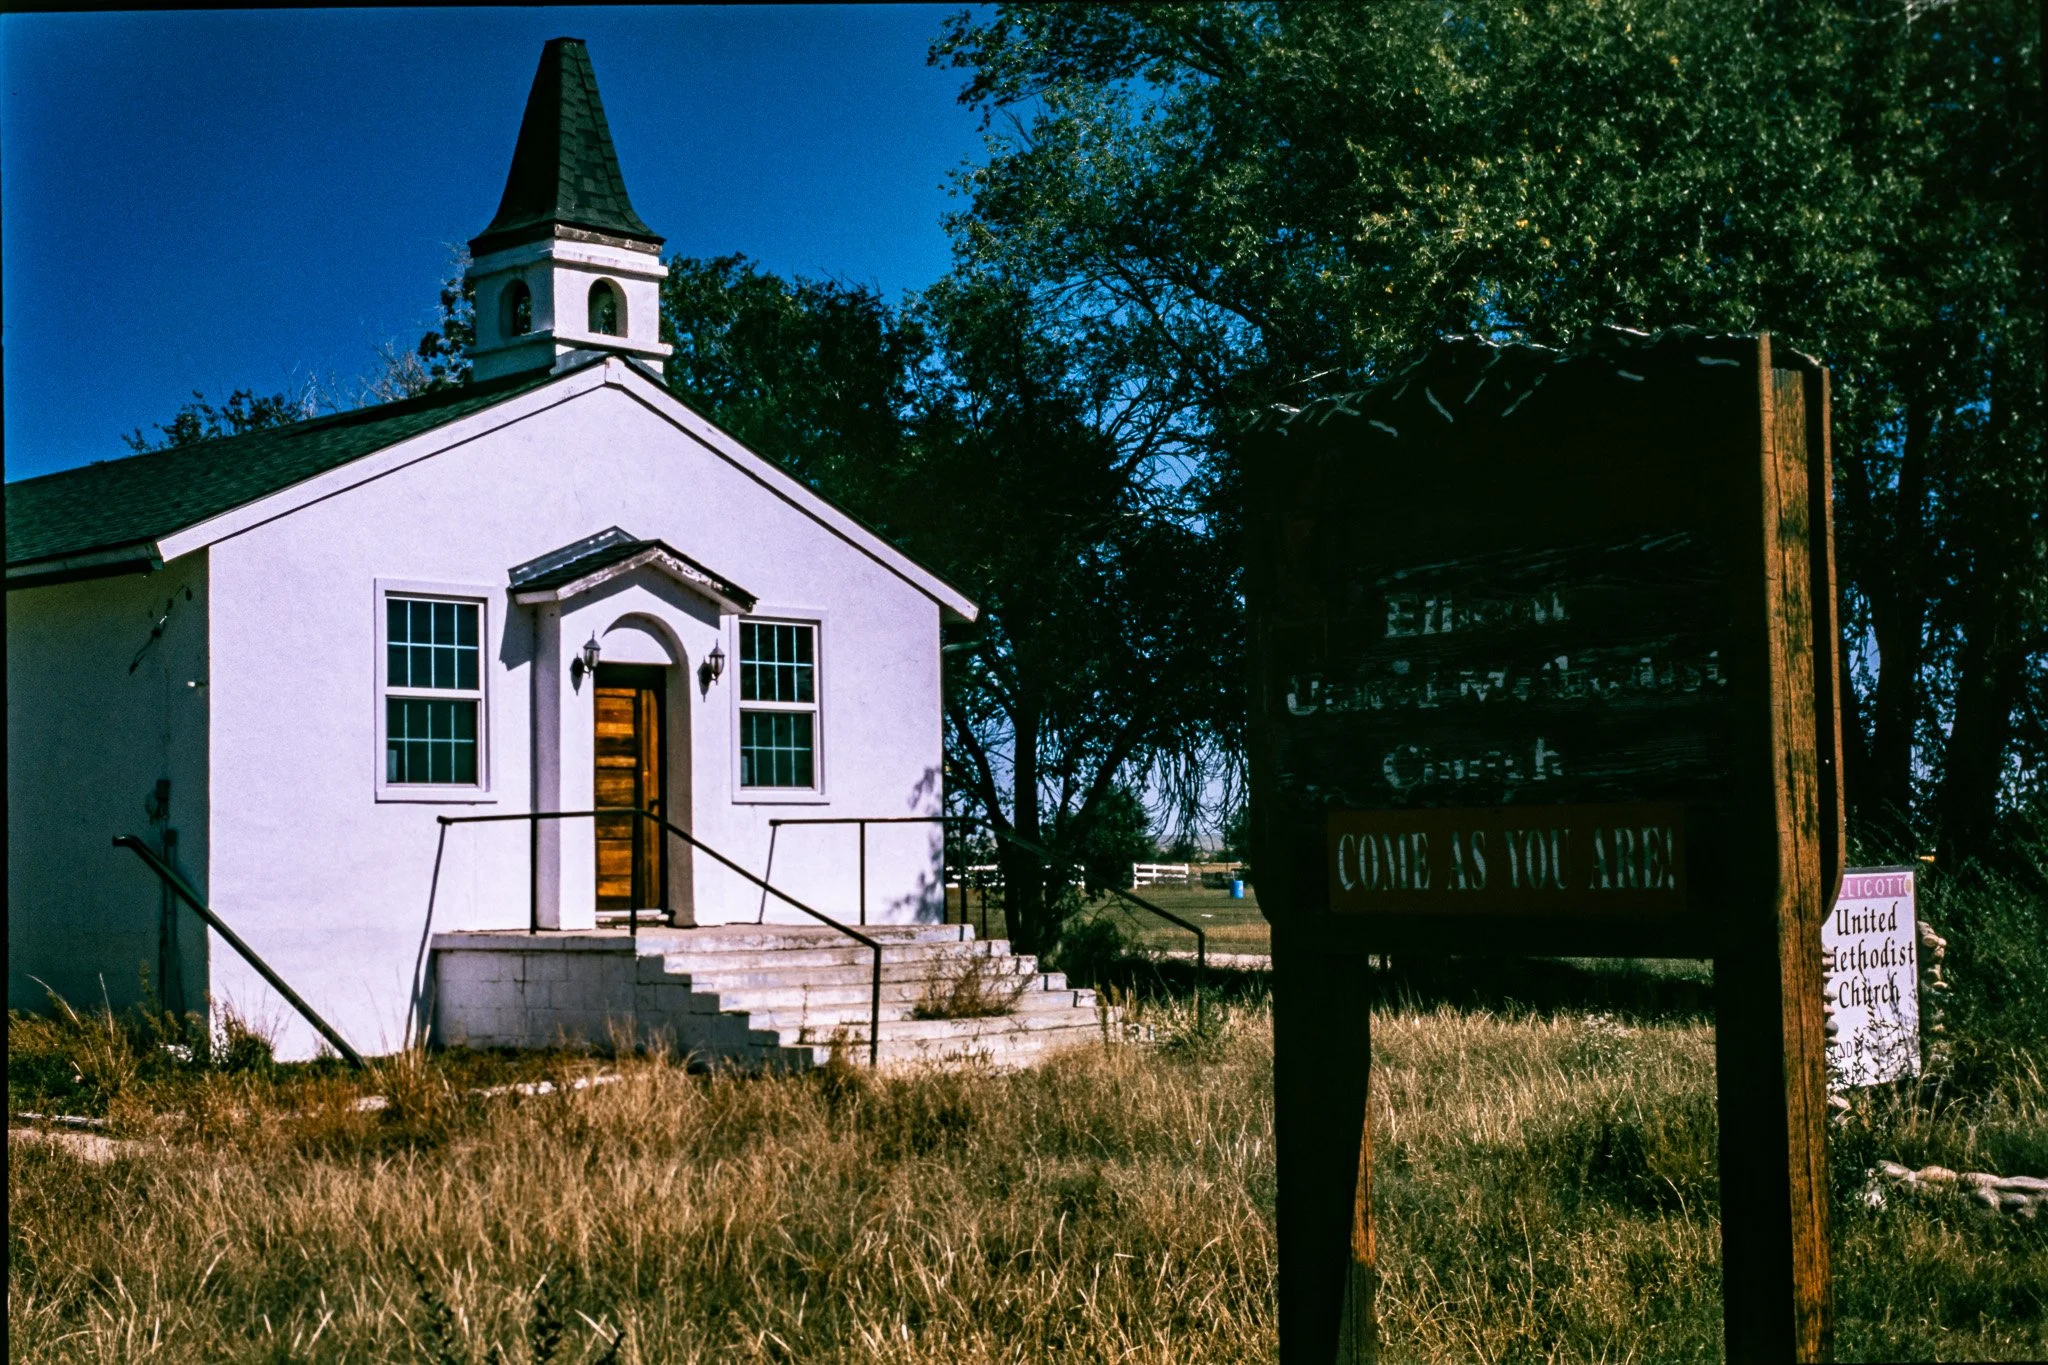
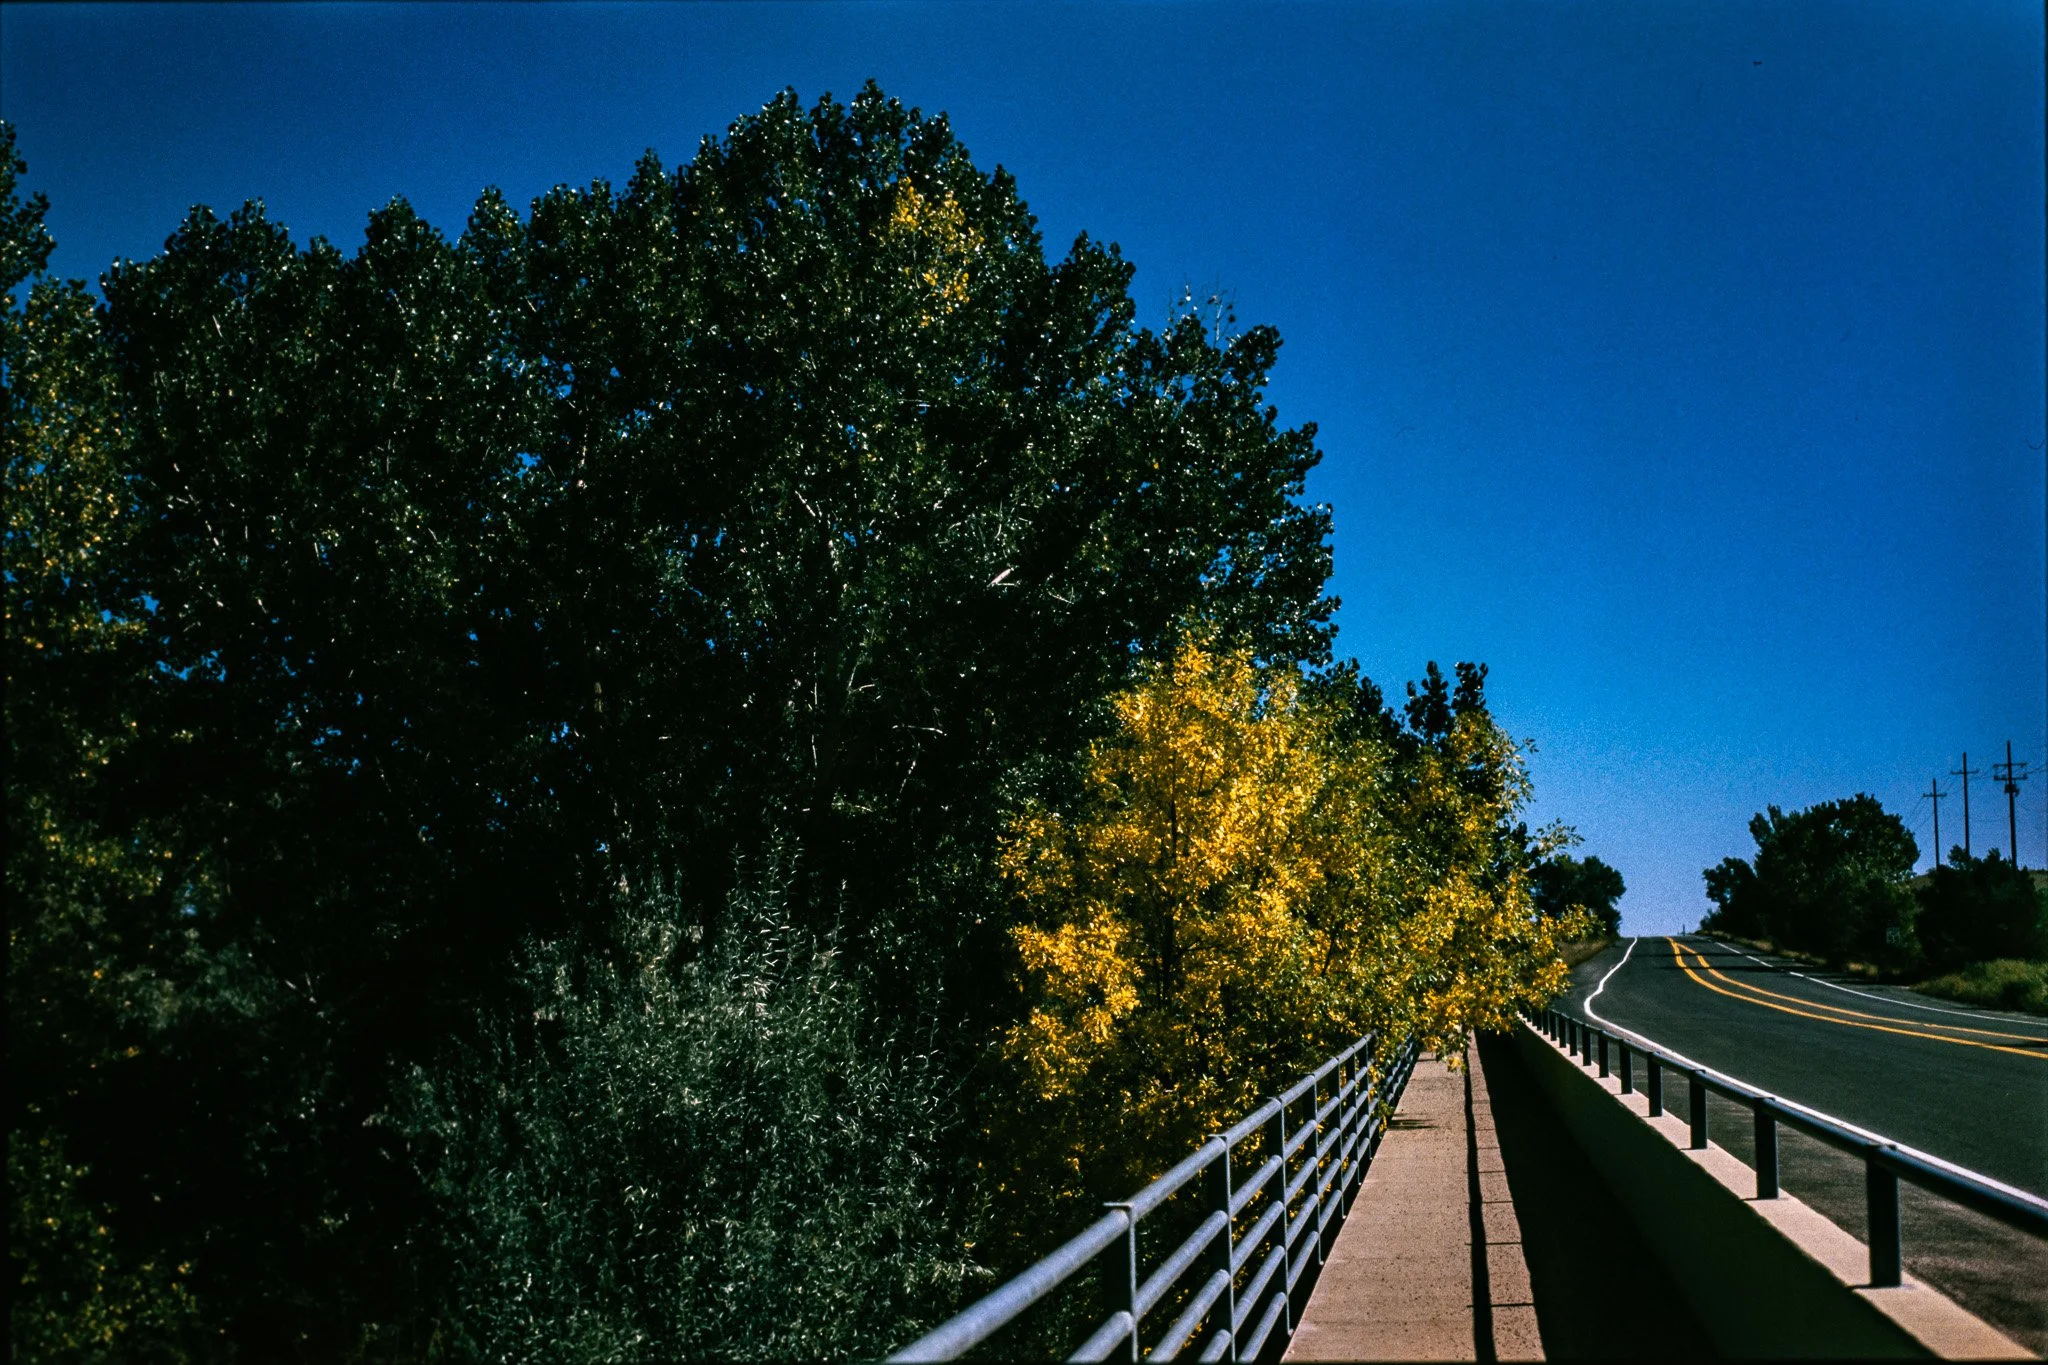
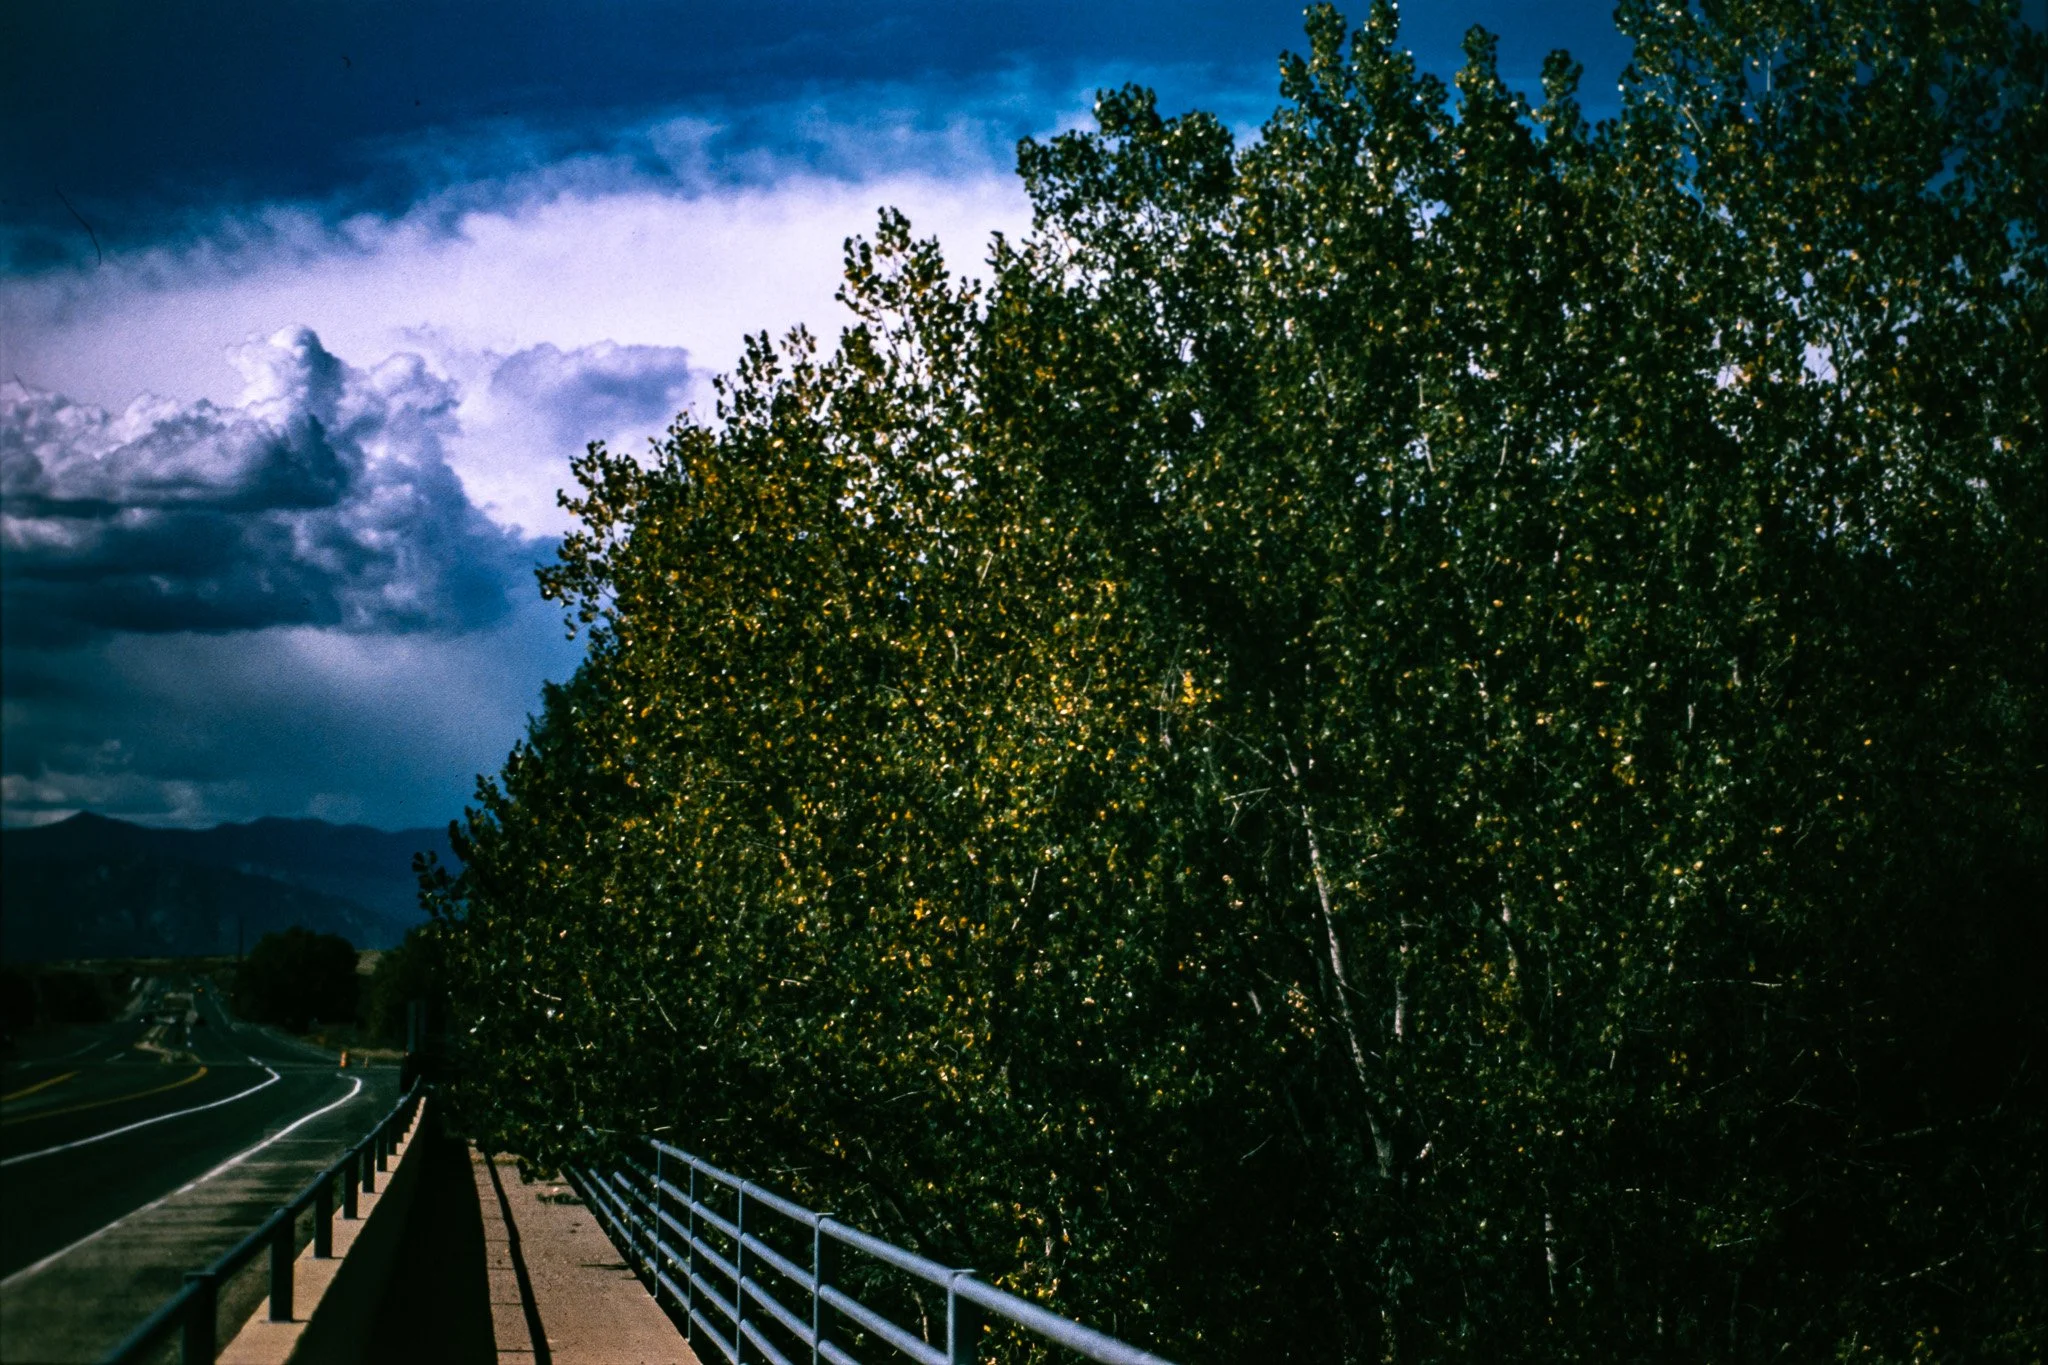
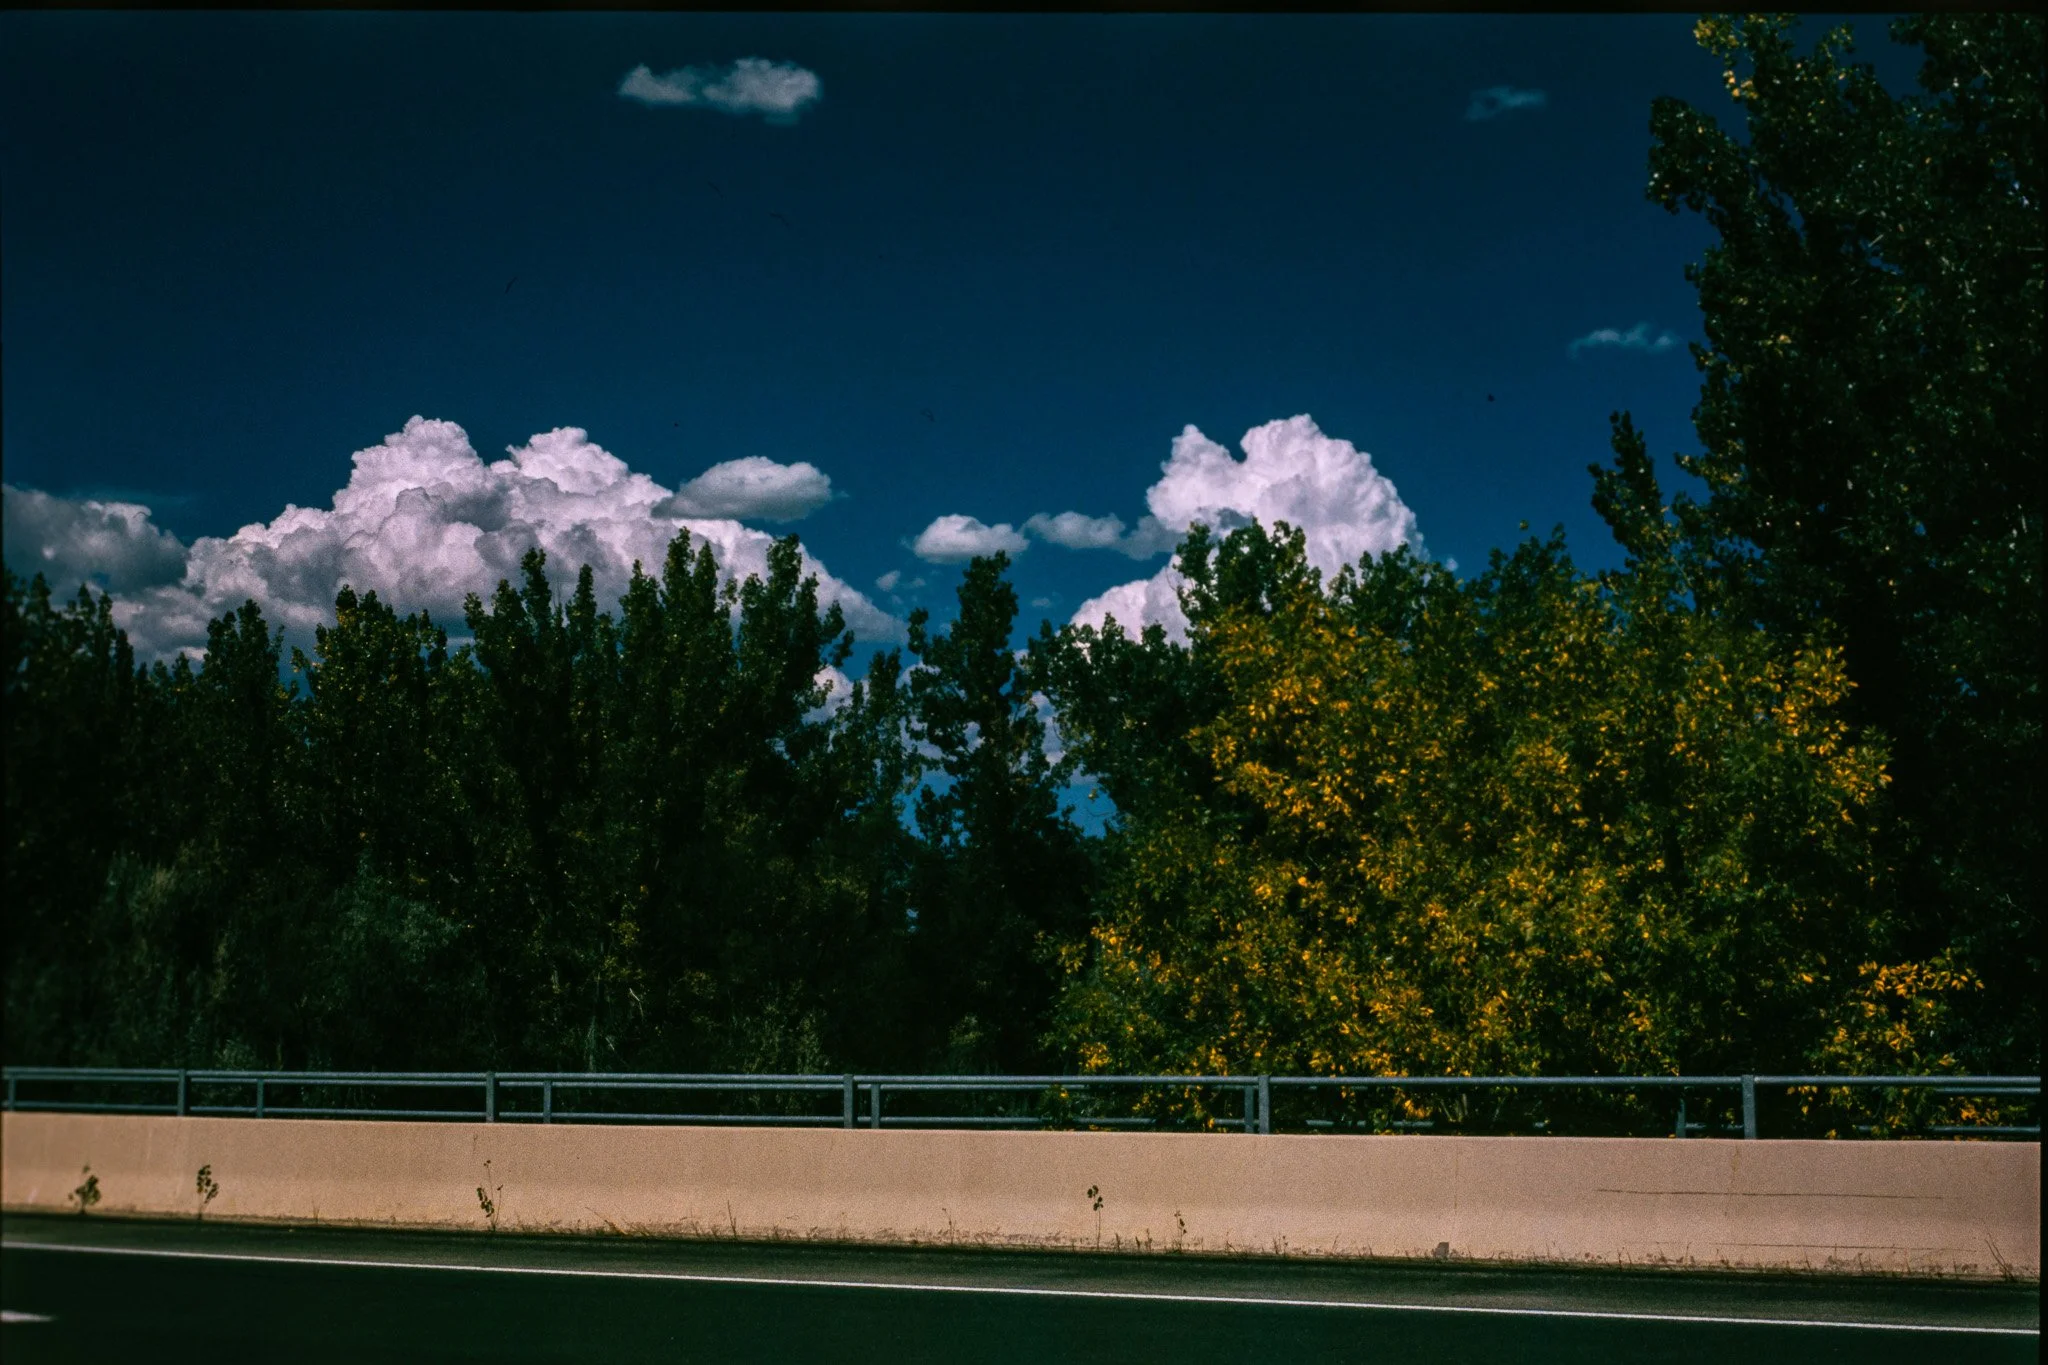
The blue skies were extraordinary.
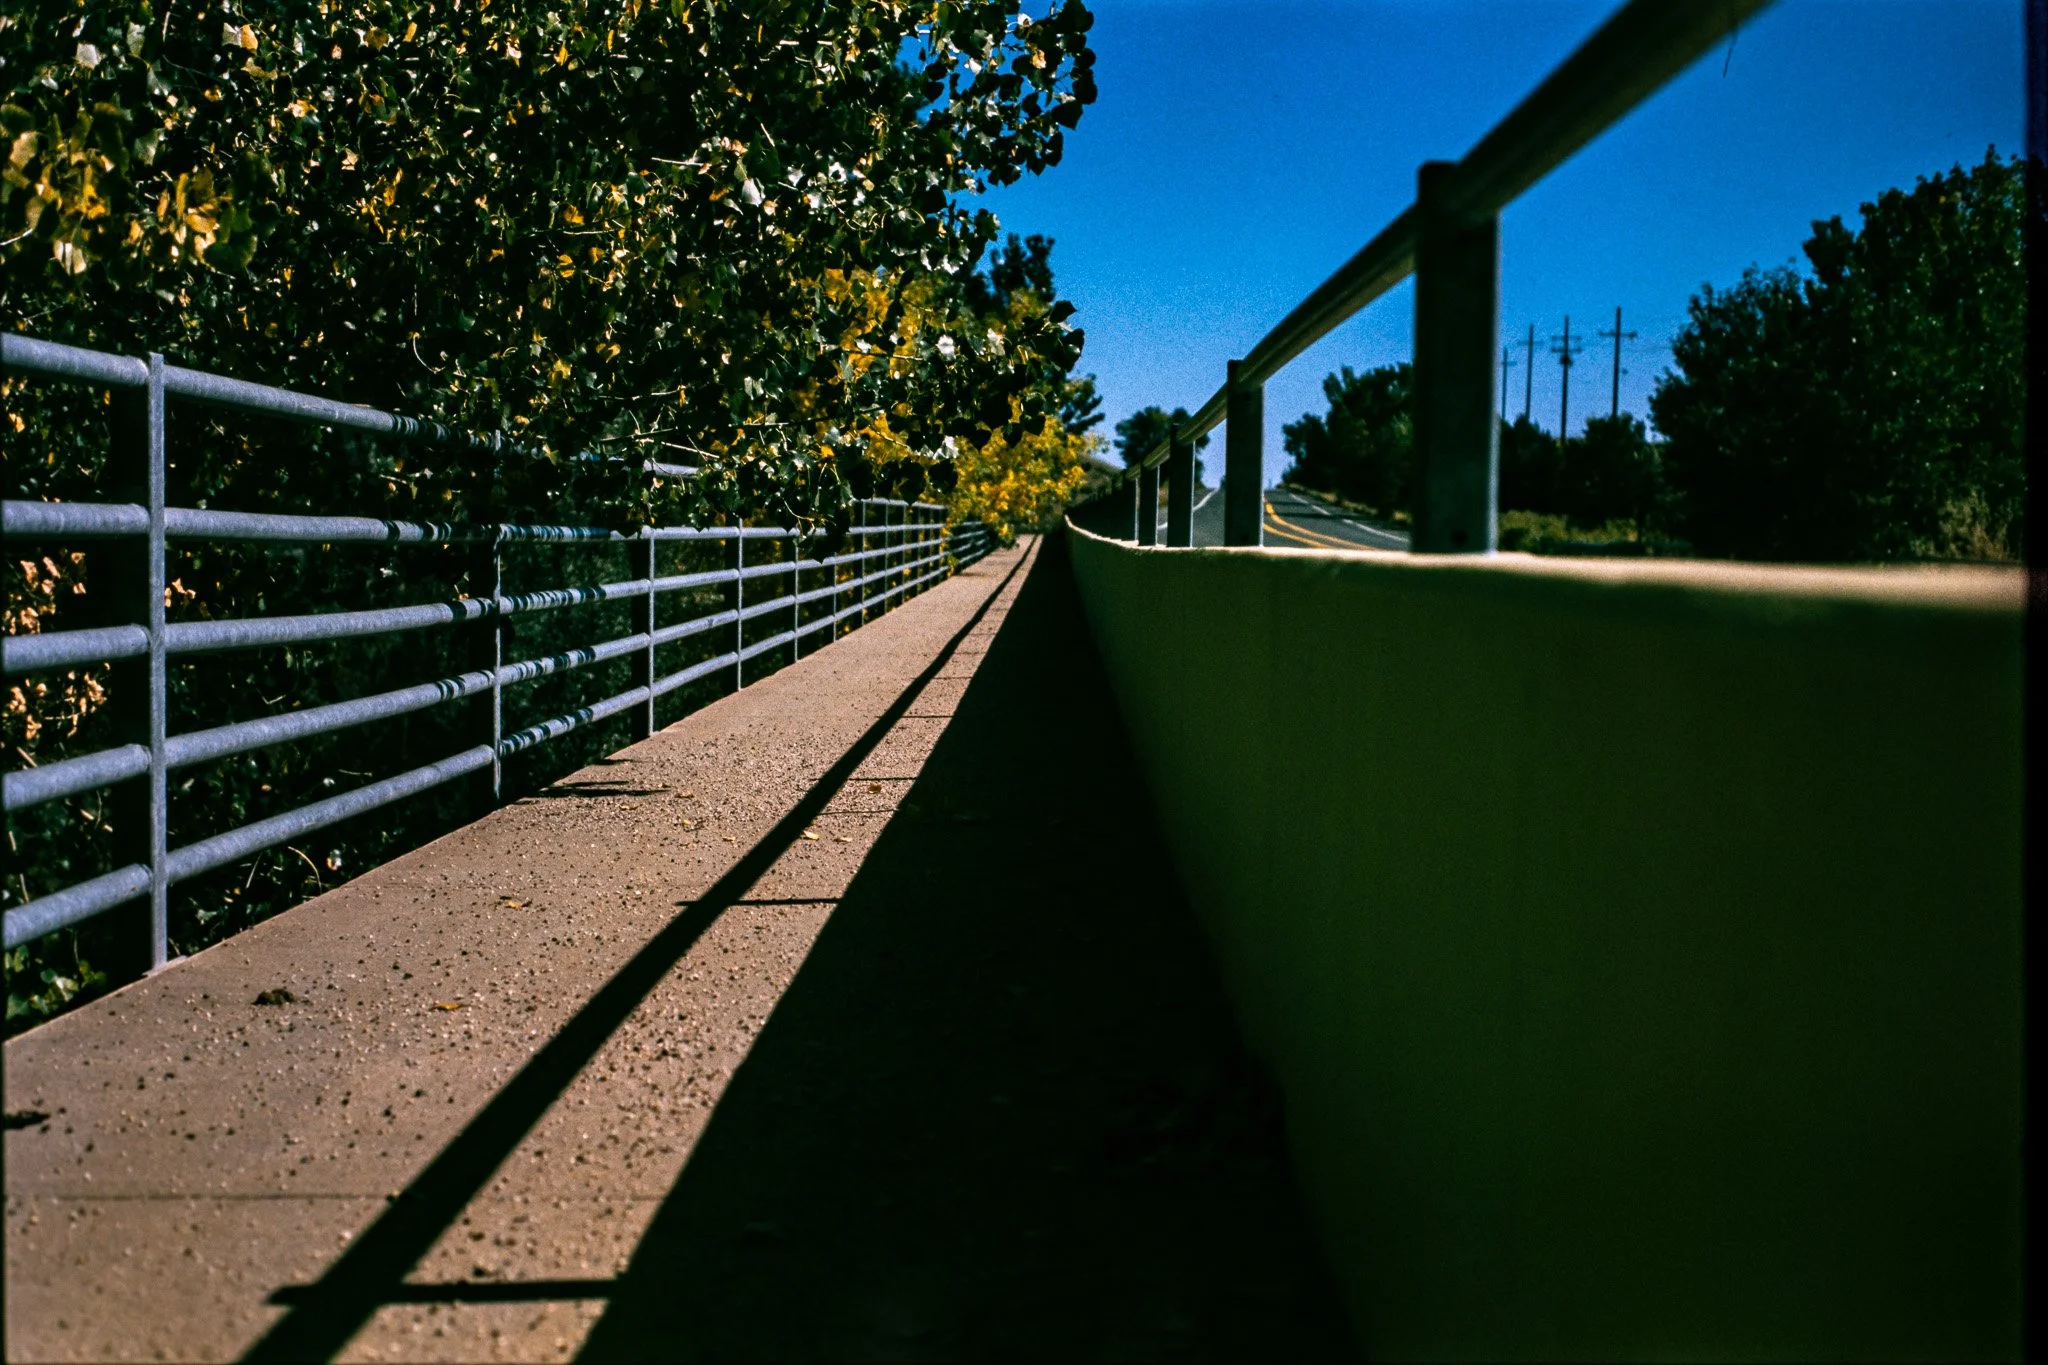
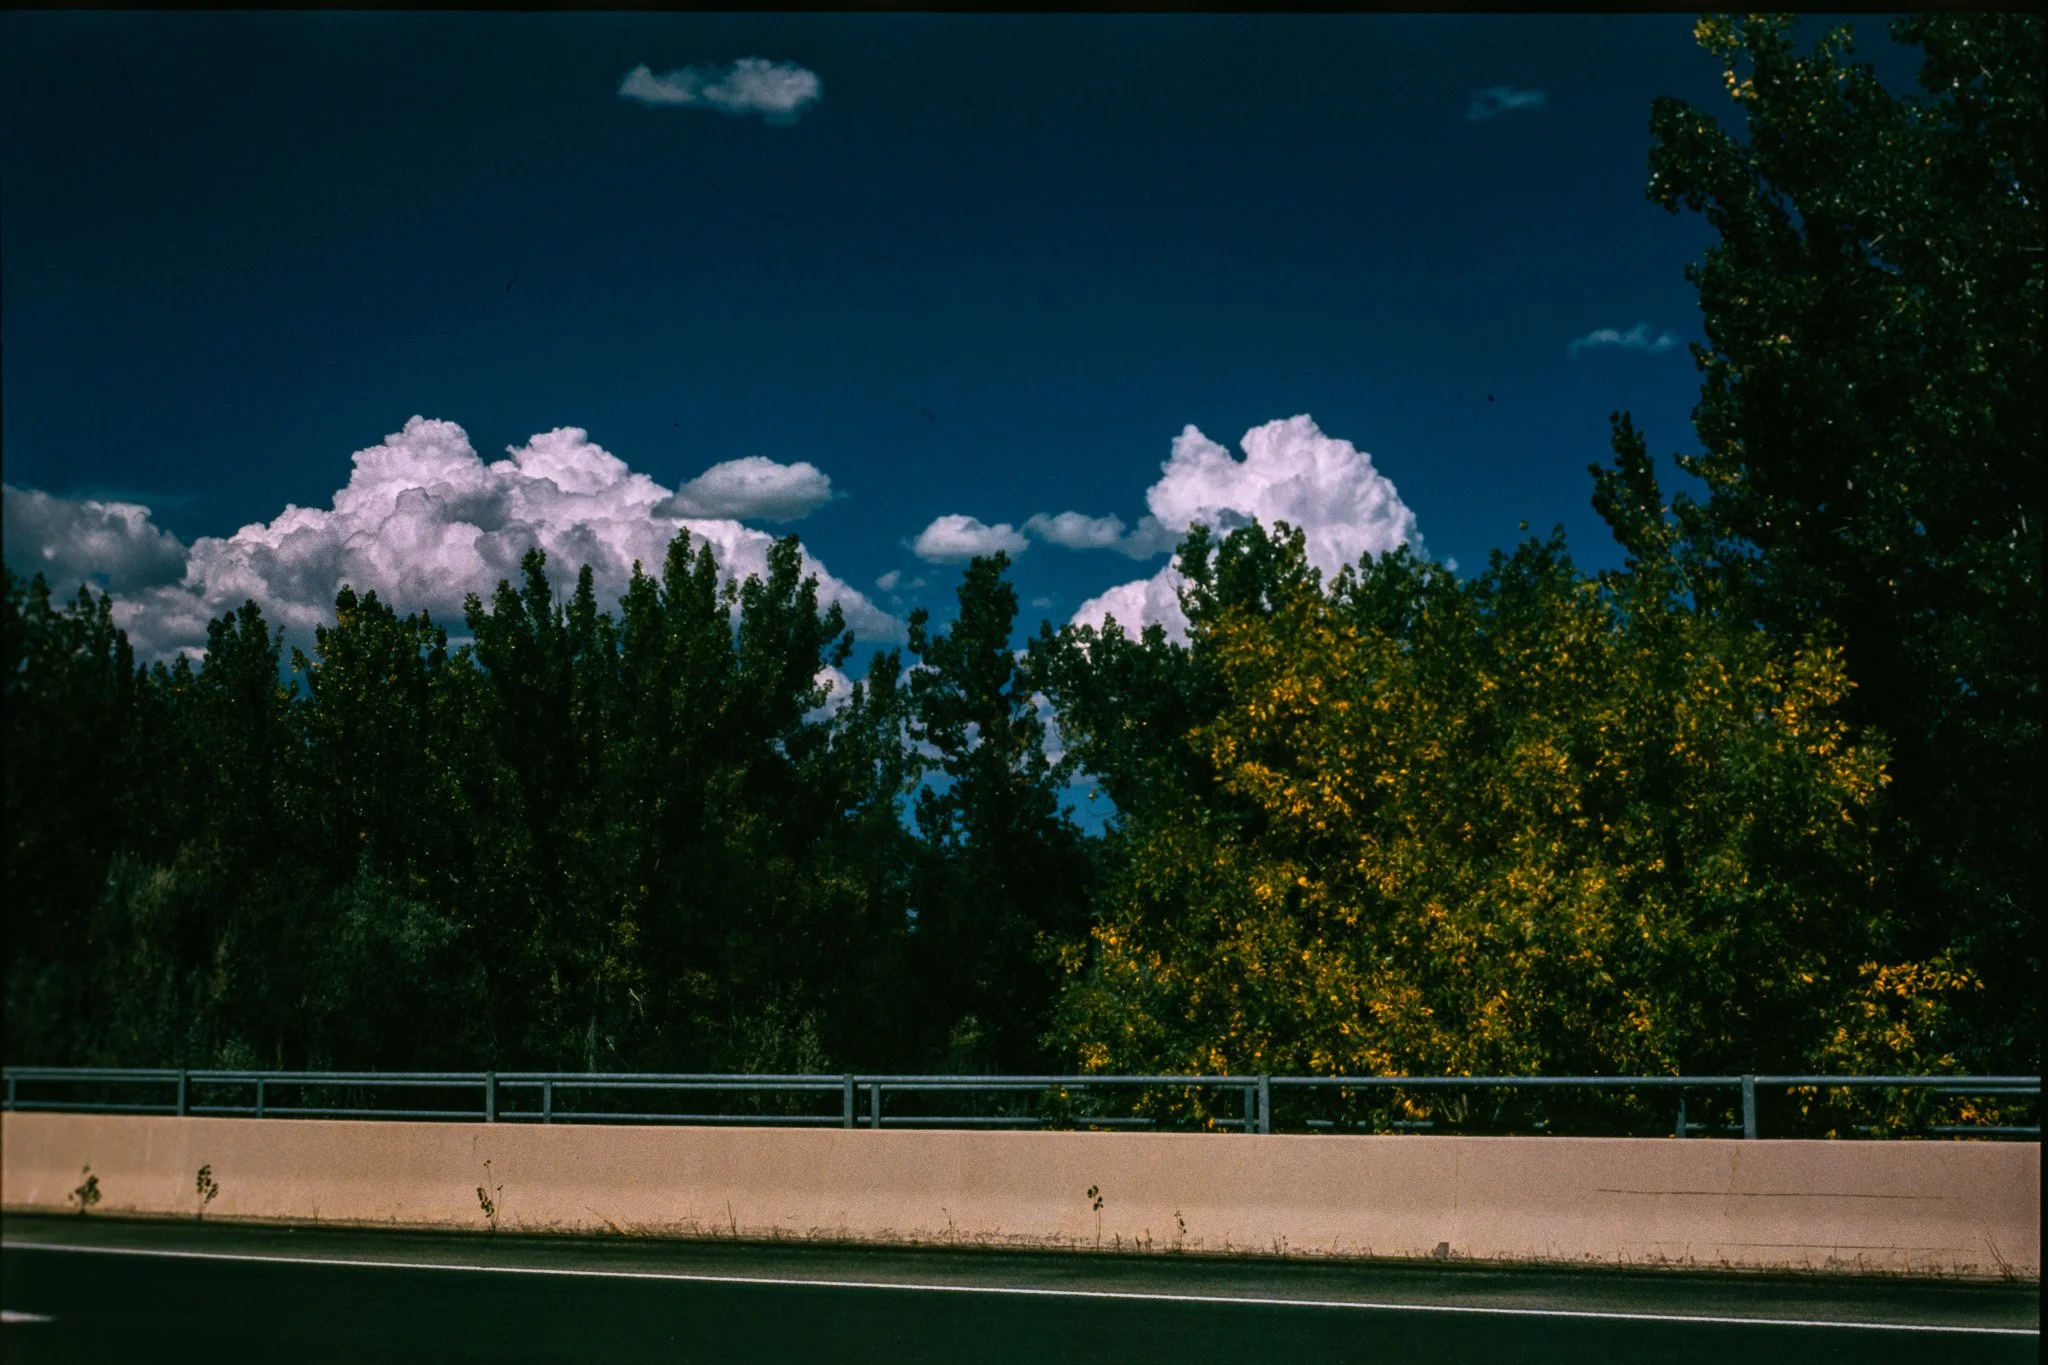
Deep, saturated blues appeared throughout the roll, sometimes approaching cobalt or navy.
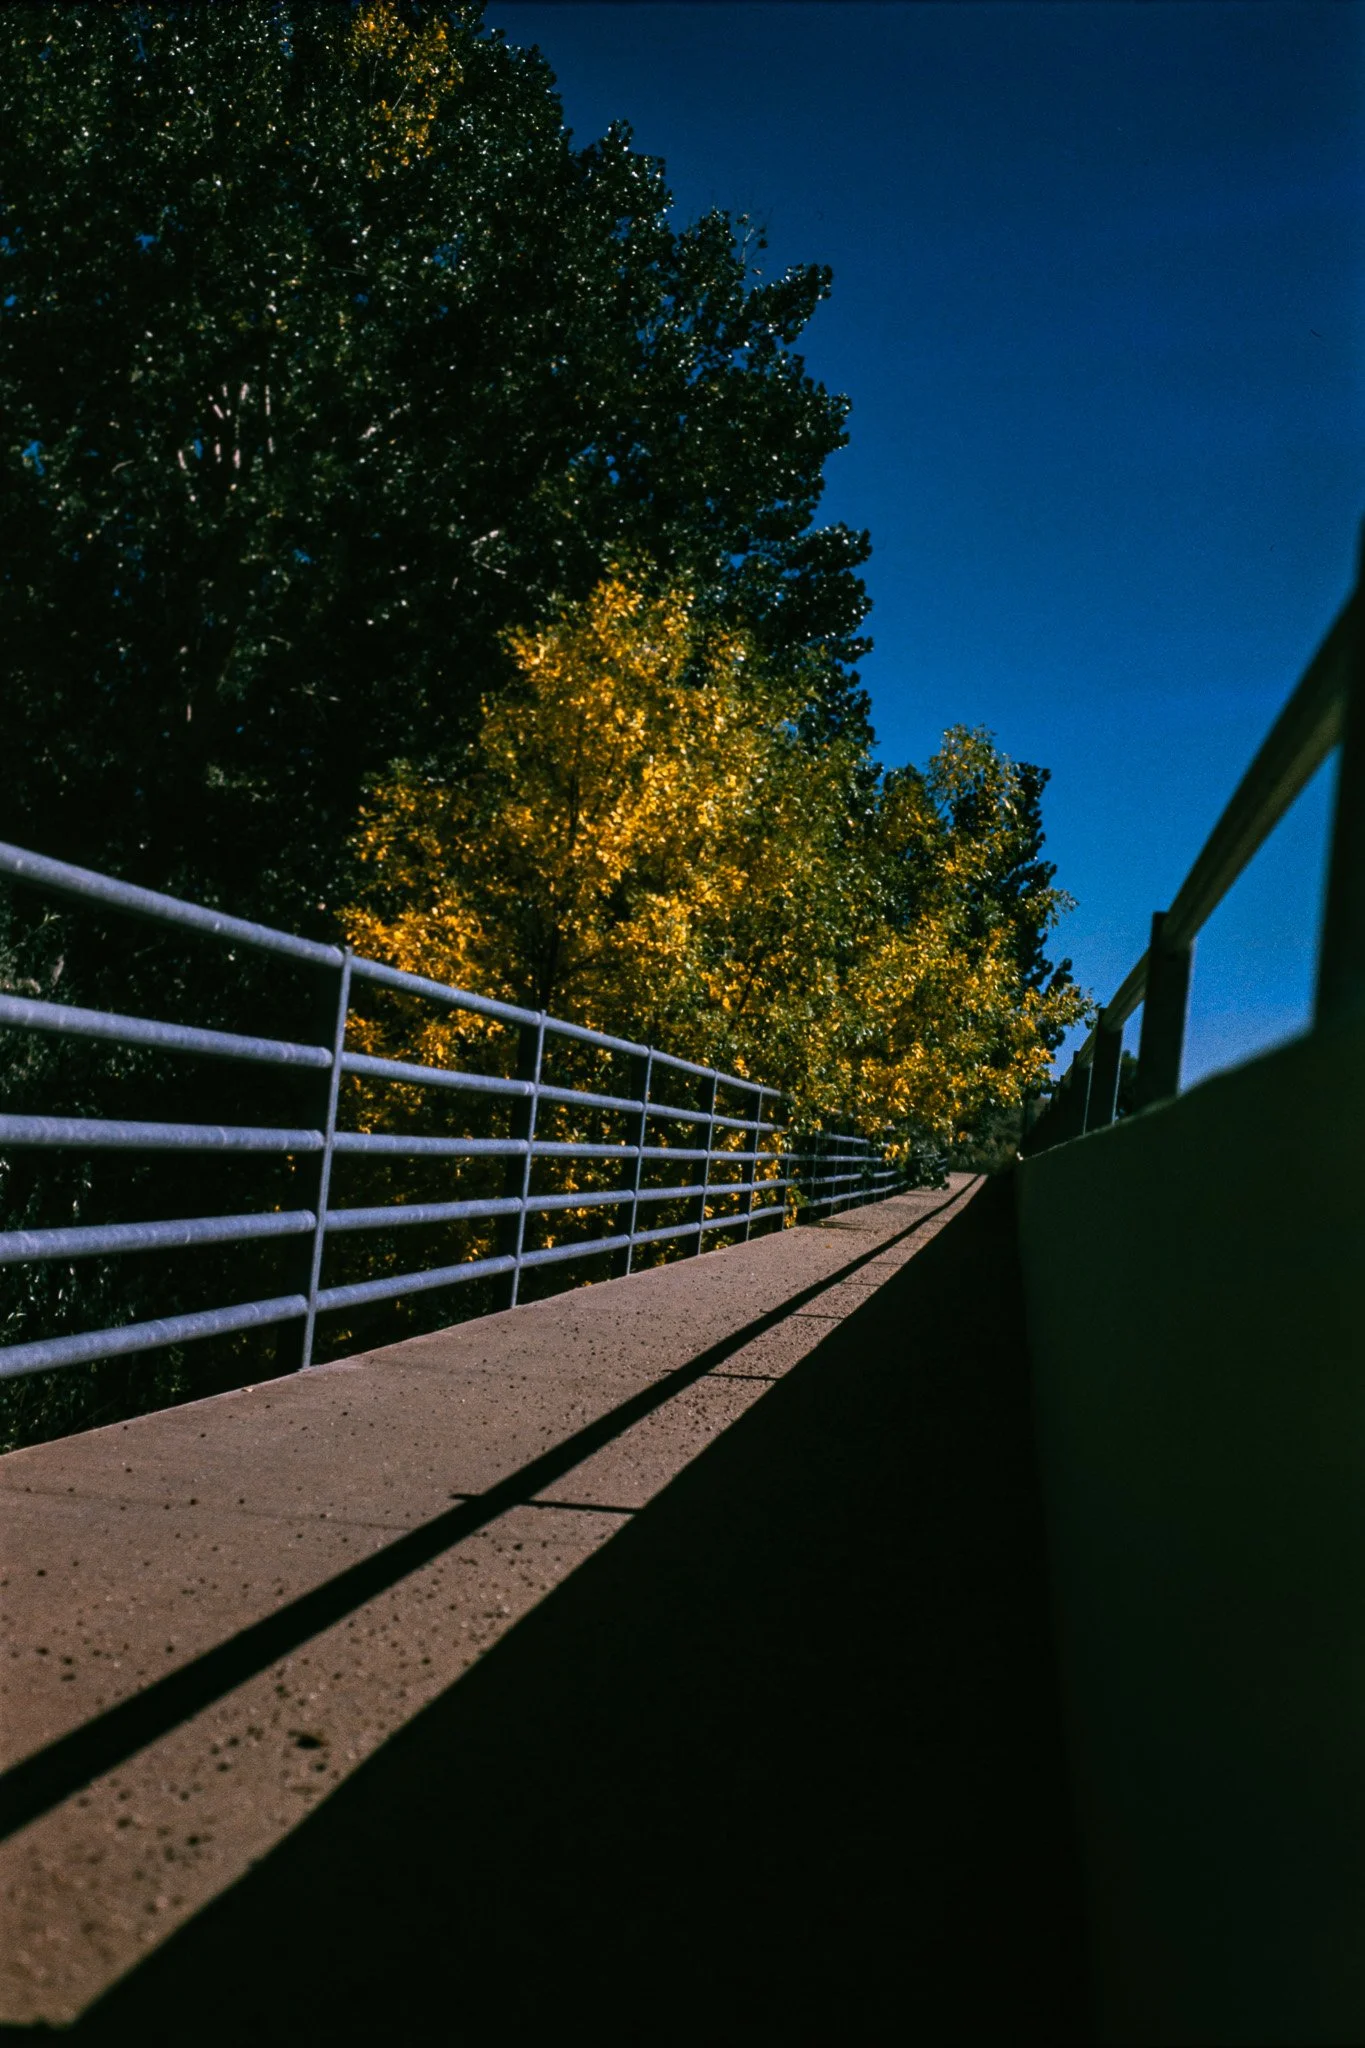
In photographs containing yellow autumn foliage, the contrast between the warm leaves and cool sky was especially striking.
Despite using a fairly strong warming filter, the blues remained vivid.
That was one of the biggest surprises of the experiment.
The Greens
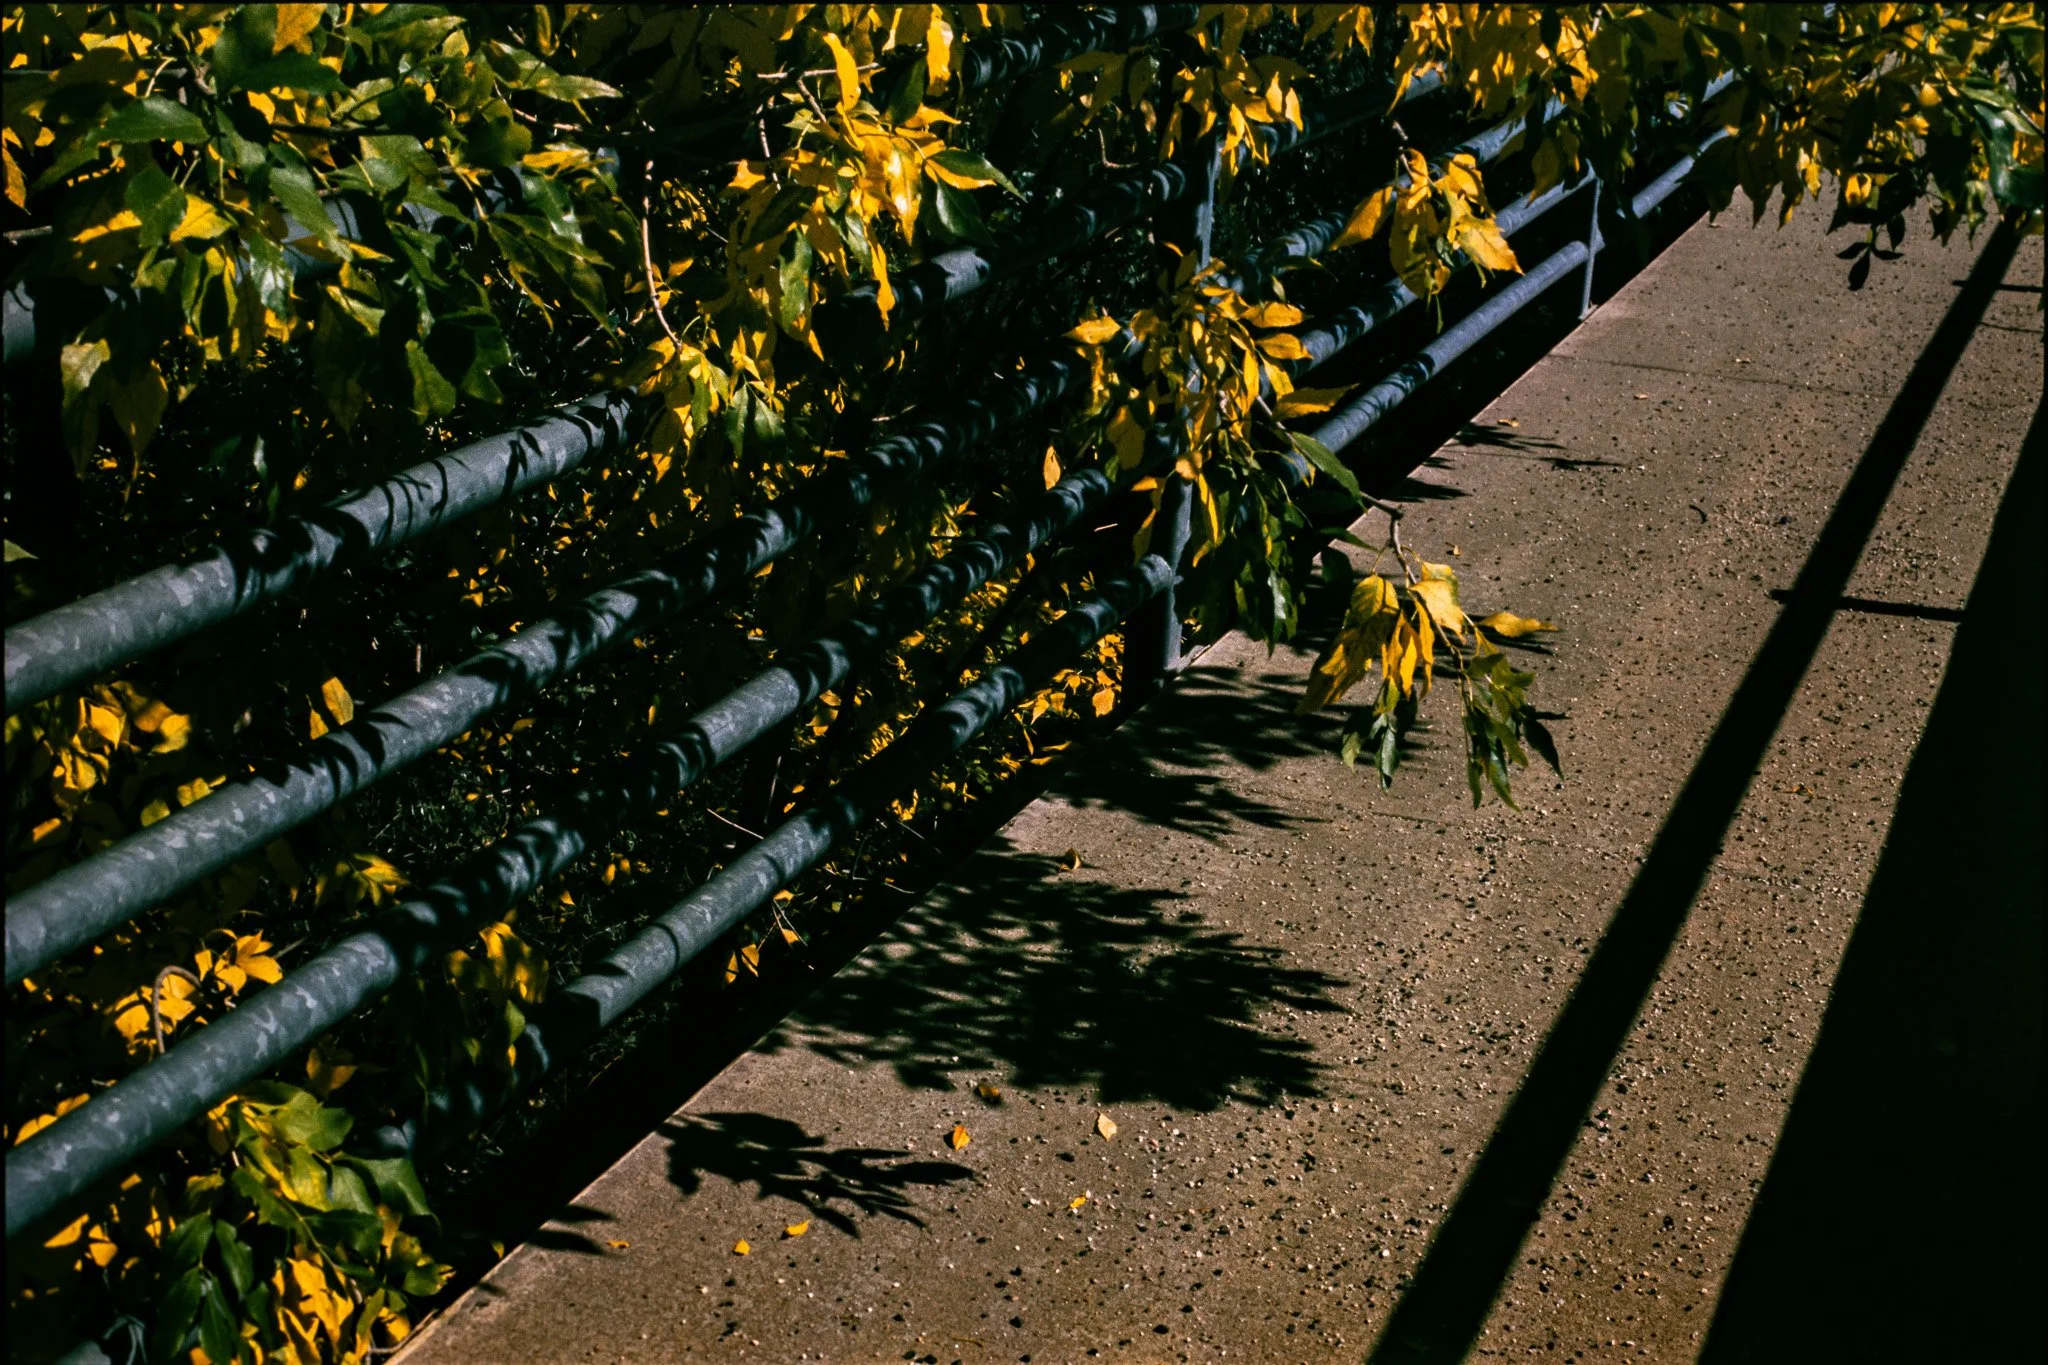
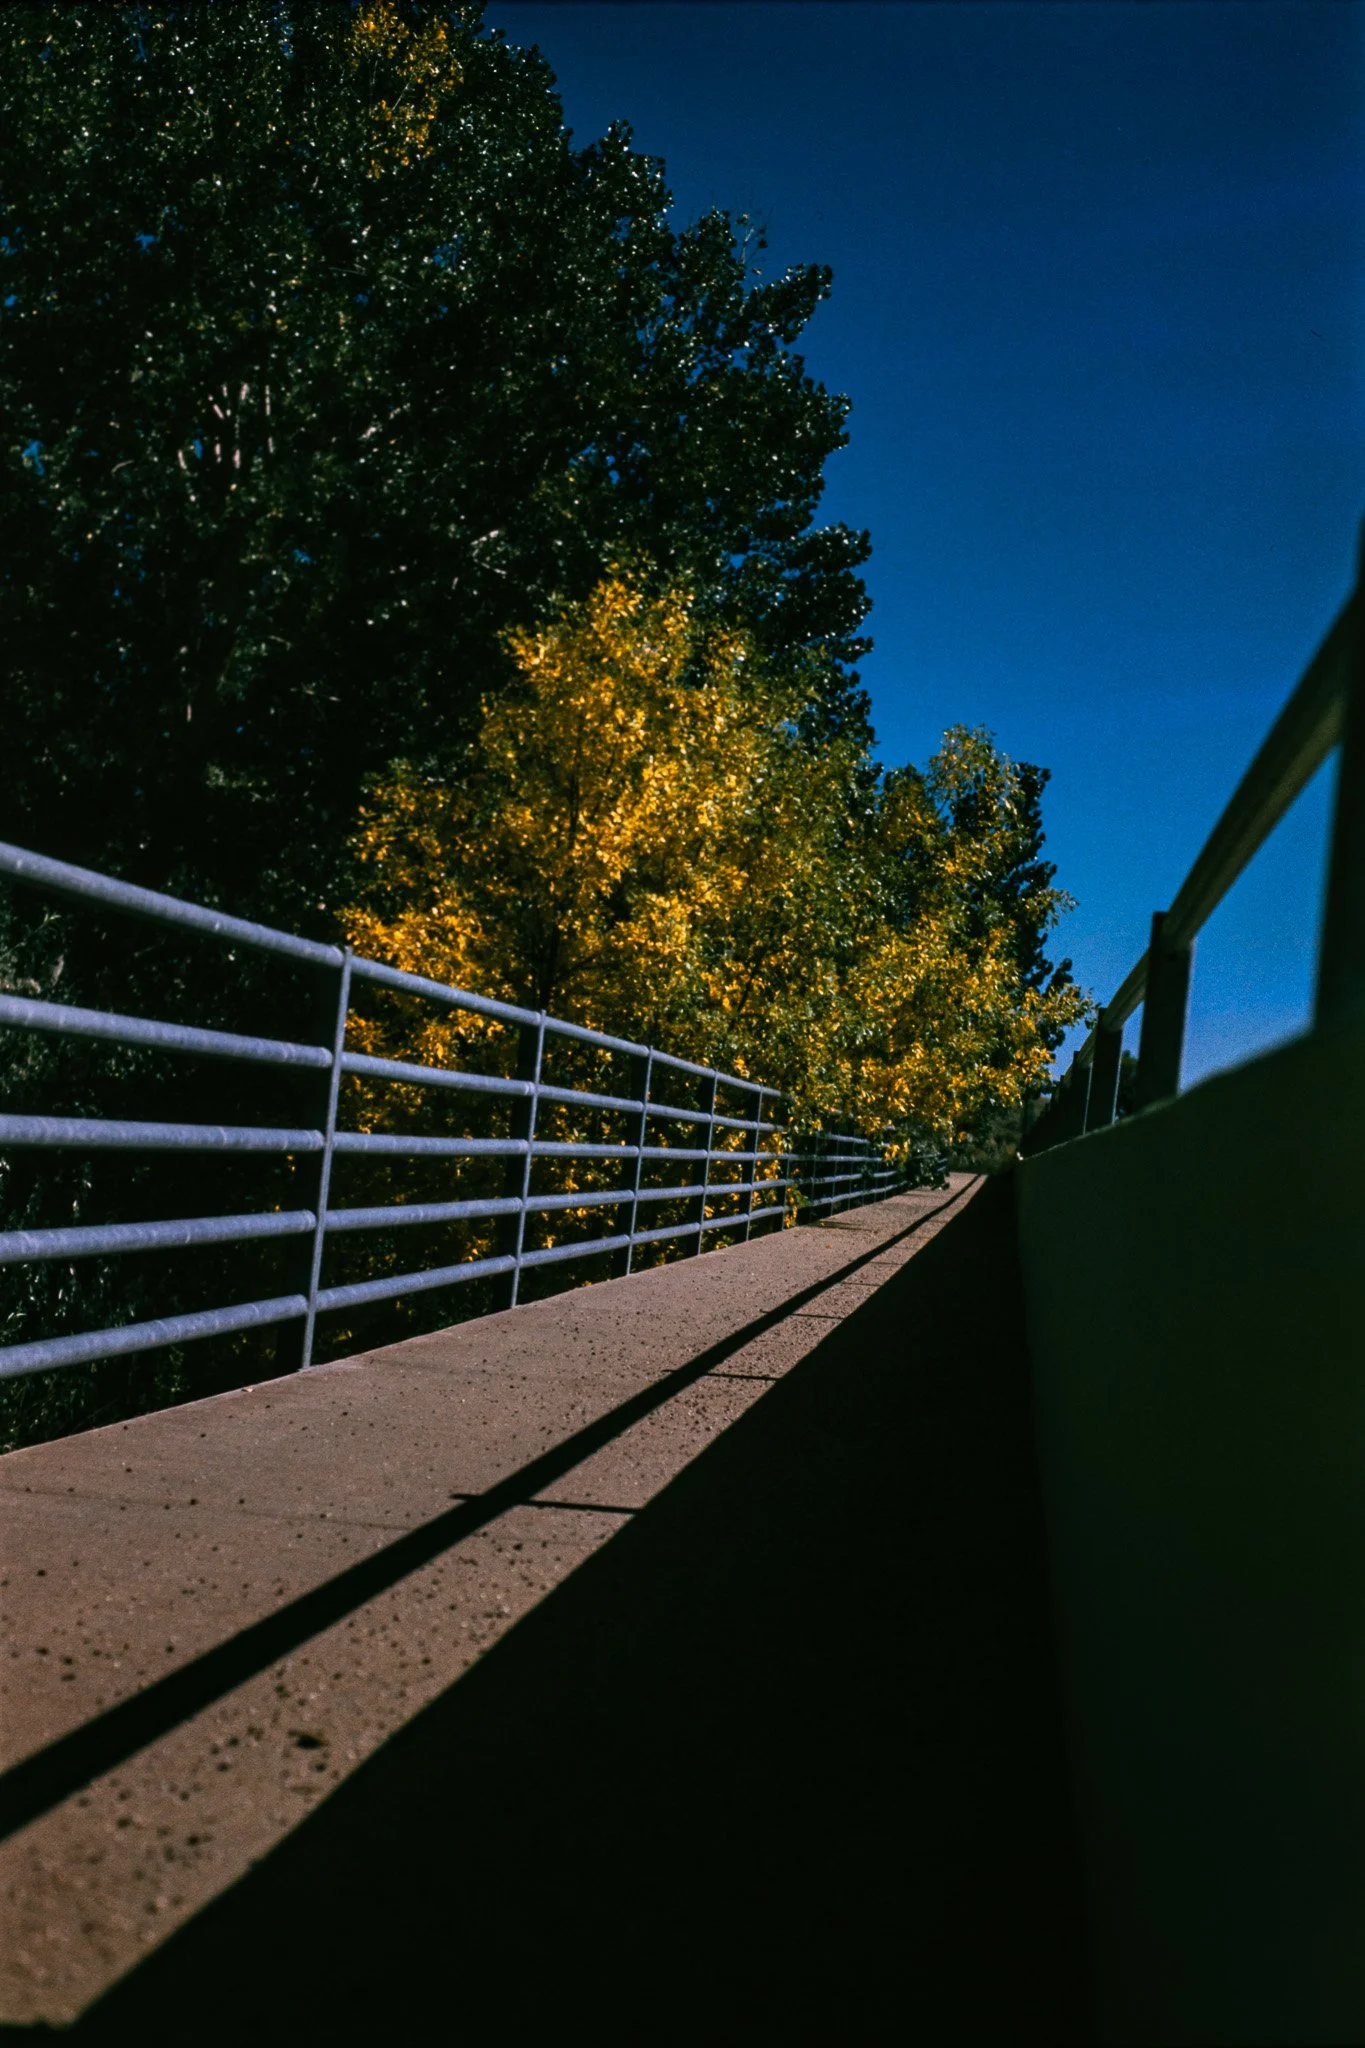
The shadows frequently exhibited a green or cyan-green cast.
This was particularly apparent in shaded brickwork, trees, and architectural details.
Interestingly, the green wasn't distributed evenly throughout the photographs.
Bright white surfaces could remain relatively neutral while adjacent shadows shifted toward green.
This suggests some degree of color crossover, where the film's color-forming layers respond differently across the tonal range.
Because AeroColor IV wasn't designed for E-6 processing, this behavior isn't entirely surprising.
What surprised me was how attractive it looked.
The Highlights
Sunlit concrete, stone, dried grass, and autumn foliage often rendered with warm golden or bronze tones.
Combined with the greenish shadows and deep blue skies, the photographs developed an unusual color separation.
The result wasn't simply a warm or cool image.
It was both.
And that's where the experiment started becoming especially interesting.
An Unexpected Cinematic Quality
While reviewing the scans, I kept thinking about the cinematography of Paris, Texas (1984), photographed by Robby Müller.
The film is known for its remarkable use of color, particularly its greenish artificial lighting, saturated blues, warm highlights, and deep shadows.
My AeroColor photographs certainly don't reproduce that look exactly.
But they share some interesting visual characteristics.
The green-black shadows, warm illuminated surfaces, and saturated skies create a sense of atmosphere that I hadn't anticipated.
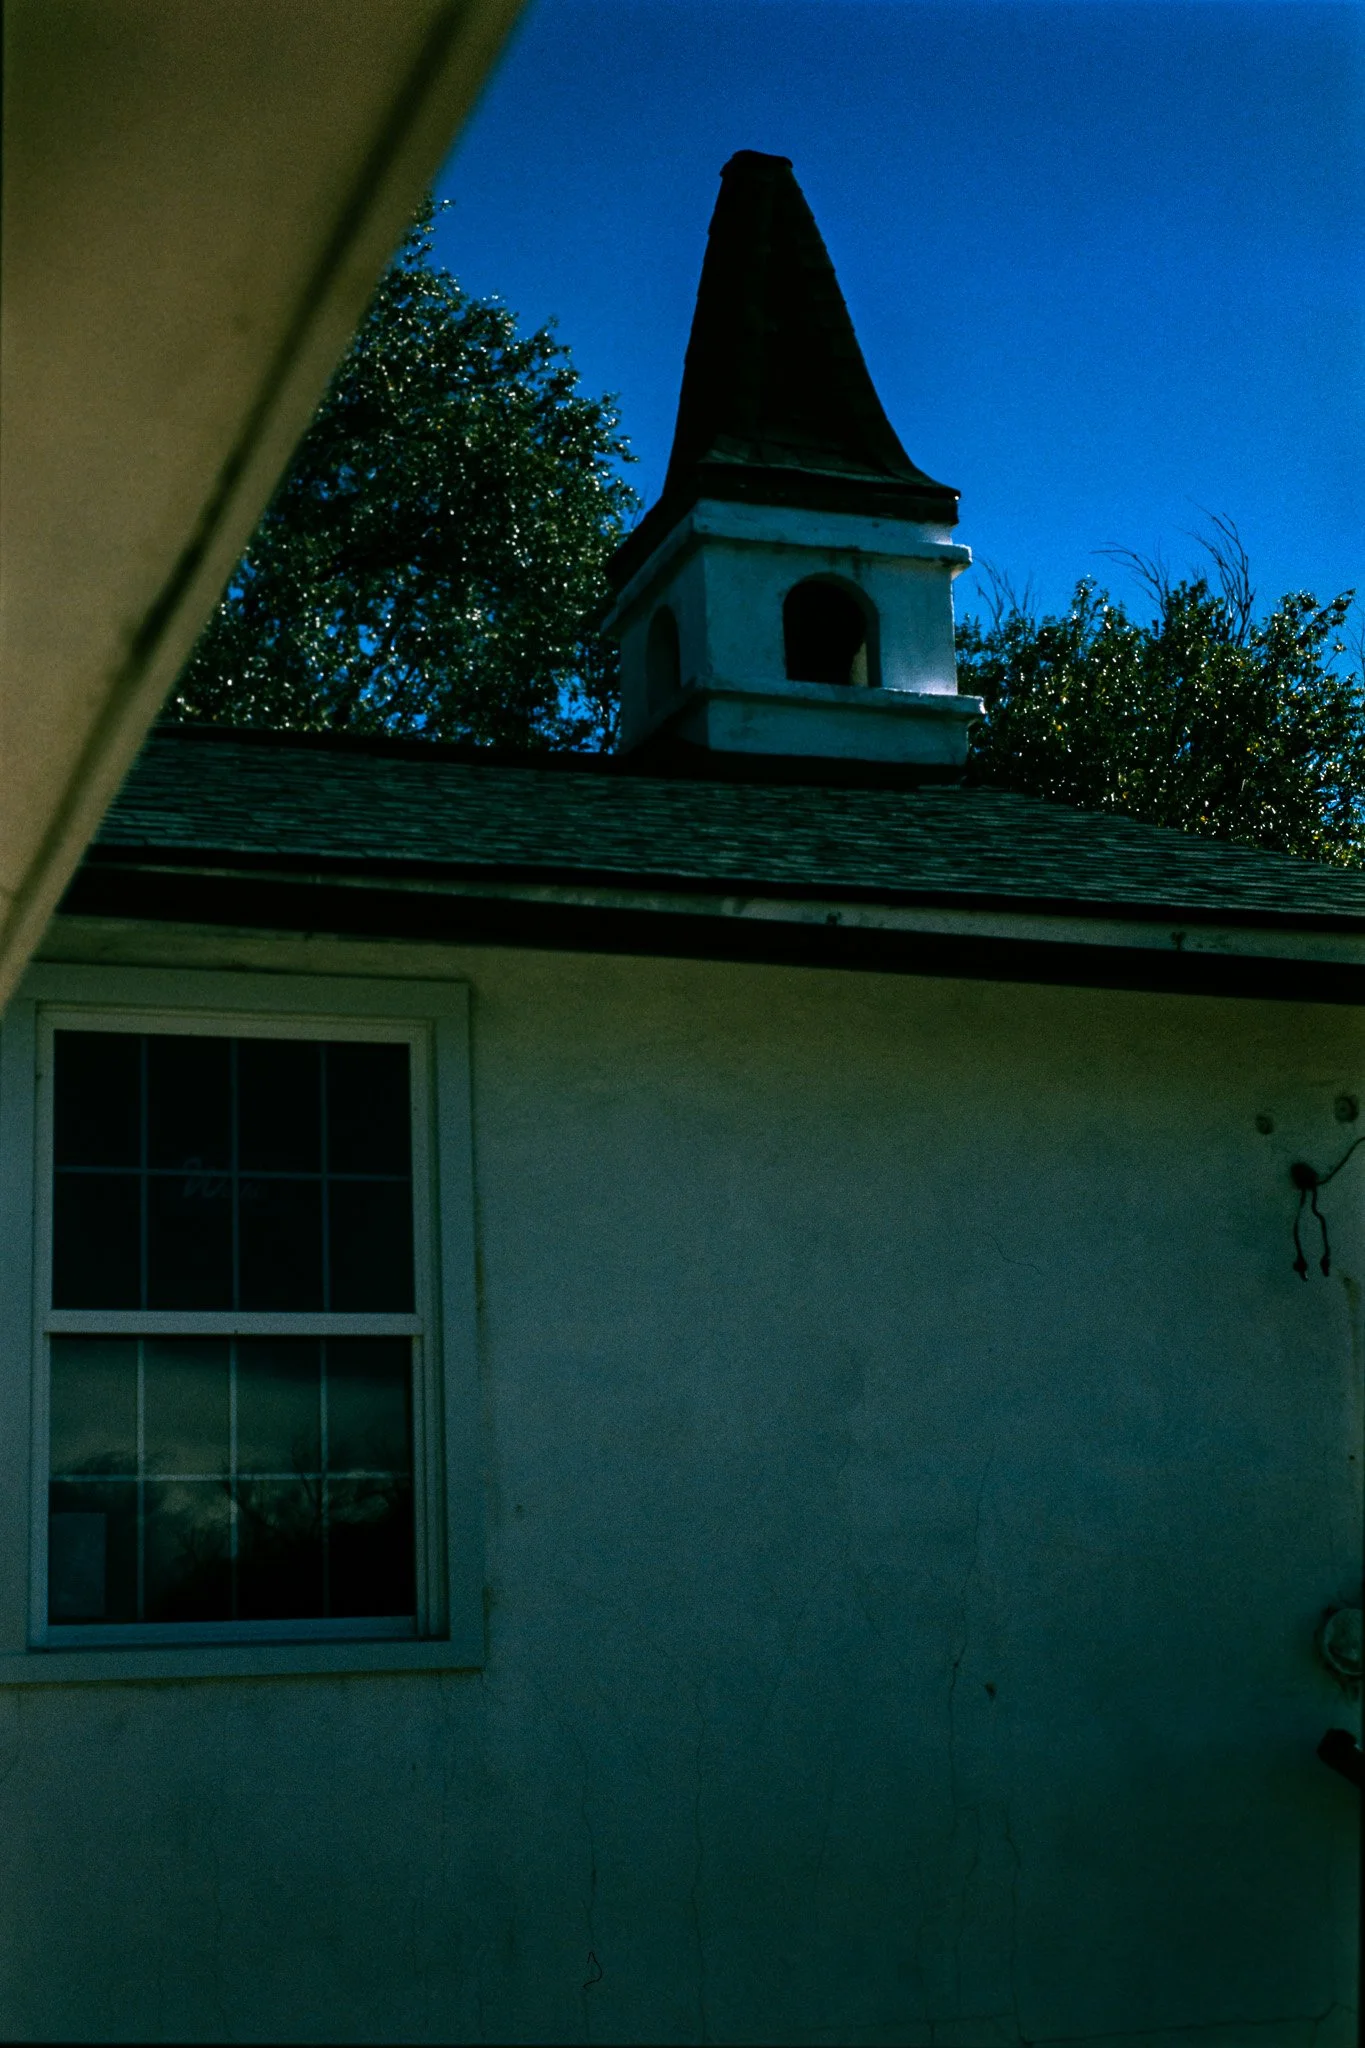
In several photographs, ordinary buildings appeared almost theatrical.
A white church illuminated by sunlight seemed to emerge from the darkness surrounding it.
Brick walls and shaded doorways took on an eerie quality.
Even simple walkways and railings became studies in color, geometry, and shadow.
What I found particularly interesting was that I hadn't created this appearance through extensive color grading.
Most of the color was already present in the scans.
I primarily adjusted exposure, clarity, and dehaze in Lightroom.
Some darker frames needed less exposure adjustment because lifting them too much emphasized the green shadows.
But overall, the photographs responded surprisingly consistently.
The Contrast: A Problem or Part of the Look?
The biggest technical limitation of this first roll was contrast.
At 400 ISO with standard E-6 development, the transparencies were extremely dense.
Many shadows contained very little recoverable information.
In some photographs, this worked beautifully.
The deep shadows isolated illuminated subjects and gave the images a dramatic appearance.
In other frames, particularly those containing dense foliage, the shadows obscured details I would have preferred to retain.
This raised an interesting question.
Should I try to eliminate the darkness?
After reviewing the entire roll, my answer is no.
I don't want to eliminate the contrast. I want to refine it.
The deep shadows are part of what makes these photographs distinctive.
But I suspect the film would benefit from approximately one to one-and-a-half stops more exposure.
That would potentially improve shadow separation without completely sacrificing the character I've discovered.
My Next Experiment: 200 ISO
For the next roll, I plan to keep almost everything identical.
Film: Kodak AeroColor IV / Reflex Lab Pro 100
ISO: 200 ISO
Filter: 85A warming filter
Development: Standard Bellini E-6
Push Processing: None
I'll also consider bracketing several scenes at ISO 160 and ISO 400.
ISO 200 provides one additional stop of exposure compared with the original roll.
ISO 160 provides approximately 1⅓ stops more exposure.
My hope is that this will improve shadow detail while retaining the deep blues, greenish shadows, and warm highlights.
There is an important technical caveat.
Although AeroColor IV is nominally ISO 100 when processed as intended, its effective reversal speed in E-6 hasn't been established by this experiment.
So ISO 200 should be understood as an experimental exposure index rather than a calibrated film speed.
I'll need additional rolls and controlled comparisons to determine where the best balance lies.
Why I'm Not Pushing the Film Yet
I briefly considered shooting another roll at ISO 400 and pushing development by approximately 1.5 stops.
That could potentially produce lighter transparencies.
However, extending the E-6 first developer can change contrast and color balance.
Because AeroColor IV wasn't designed for reversal processing, those changes could be unpredictable.
And right now, the color is exactly what I want to preserve.
Pushing also isn't equivalent to giving the film additional exposure.
It may increase the brightness of the resulting transparency, but it cannot recreate shadow information that wasn't adequately recorded.
For that reason, I want to experiment with exposure before changing development.
Could a Low-Contrast Filter Help?
Another idea I'm considering is stacking a traditional low-contrast filter with the 85A.
The first roll demonstrated that AeroColor IV can produce very strong contrast in E-6.
A low-contrast filter could potentially soften that relationship by introducing controlled flare into darker portions of the image.
I'm particularly interested in trying a mild Tiffen Low Contrast filter.
The goal wouldn't be to make the photographs flat.
Instead, I'd like to soften some of the harshest transitions between direct sunlight and deep shadow.
This approach wouldn't increase the film's inherent dynamic range, but it could change how the scene's brightness range is recorded.
It may also introduce additional glow and slightly reduce saturation.
Whether those changes complement the AeroColor palette remains to be seen.
I'd want to photograph identical scenes with and without the filter before drawing conclusions.
Taking the Experiment to Medium Format
I also have several rolls of Reflex Lab Pro 100 in 120 format.
Since Reflex Lab Pro 100 uses Kodak AeroColor IV, I'm interested in repeating this experiment with my Hasselblad or Mamiya 645.
The larger format shouldn't fundamentally change the emulsion's color response.
However, it offers a larger image area, potentially smoother grain at equivalent output sizes, and more detail for scanning.
There is one important practical difference.
When using the Hasselblad with an external meter, I'll need to compensate manually for the light absorbed by the 85A filter.
With the Nikon F4, the TTL meter handled most of that automatically.
For future tests, I'll verify the actual filter factor before exposing an entire roll.
What About Night Photography?
This may be the experiment I'm most excited about.
After seeing the greenish shadows and warm highlights, I immediately started imagining what AeroColor IV might do under artificial lighting.
Fluorescent-lit buildings, gas stations, parking garages, and illuminated storefronts could produce some fascinating results.
The combination of greenish artificial lighting, warm tungsten sources, and deep blue twilight could be especially interesting.
Again, Paris, Texas comes to mind.
Of course, nighttime photography introduces additional complications.
At ISO 200, especially with an 85A filter, exposures could become quite long.
Reciprocity failure is another unknown, particularly when processing AeroColor IV in E-6.
But those uncertainties are part of what makes the experiment appealing.
I'm not necessarily looking for perfect color accuracy.
I'm interested in discovering what the film can do.
What I Learned From This Roll
After scanning and reviewing the photographs, several lessons stand out.
1. Kodak AeroColor IV can produce compelling color transparencies in E-6.
The results are unconventional, but that doesn't make them unsuccessful. The film produced a distinctive palette that I genuinely enjoy.
2. The 85A warming filter is worth keeping.
The combination produced rich blues, warm highlights, and surprisingly neutral bright surfaces. I'm not ready to change that part of the process.
3. ISO 400 creates a dramatic, high-contrast appearance.
Although the transparencies were extremely dense, proper scanning revealed more information than I initially expected.
4. Another stop of exposure may be the sweet spot.
My next experiment at ISO 200 should help determine whether I can improve shadow separation while preserving the overall look.
5. Scanning technique makes a tremendous difference.
The film looked almost unusably dark under ordinary household lighting. Controlled scanning with the Leica SL2 revealed substantially more detail.
6. Not every technical imperfection needs correcting.
The green shadows, strong contrast, and unusual color relationships are part of what makes these photographs interesting.
Sometimes the characteristics you initially consider problems become the very things you want to preserve.
Final Thoughts
I started this experiment wondering whether Kodak AeroColor IV could provide an interesting alternative to expensive color reversal film.
I expected unusual colors.
I expected some technical compromises.
And when I first removed the film from the developing tank, I wondered whether I'd underexposed the entire roll beyond usefulness.
What I didn't expect was to discover a color palette that I genuinely wanted to explore further.
The deep blues, golden highlights, greenish shadows, and dramatic contrast created photographs that felt different from anything I'd been shooting recently.
And perhaps the most satisfying part was how little deliberate color manipulation was required.
The film, filter, exposure, and chemistry did most of the work. I'm not ready to call AeroColor IV a replacement for Ektachrome or Provia.
That wasn't really the point. What I found was something different. Something worth experimenting with.
And after seeing the results from this first roll, I have a feeling I'll be shooting considerably more AeroColor IV in E-6.
Sometimes the best film experiments aren't the ones that produce technically perfect results. They're the ones that show you something you didn't know you were looking for.
This experiment was conducted using Kodak AeroColor IV sold as Panther Air 100, photographed with a Nikon F4E and an 85A warming filter, and processed using standard Bellini E-6 chemistry. All photographs were scanned using a Leica SL2 and Sigma 105mm Macro.
These observations are based on a single experimental roll. They should not be interpreted as calibrated film-speed measurements or guaranteed processing results.